Game Panel Sub-Users
You can find information on how to setup and use Billing Contacts and Billing Sub-Users on our ![]() Billing Contacts & Sub-Users Page article!
Billing Contacts & Sub-Users Page article!
A Game Panel Sub-User is granted access to each server individually and can manage the server settings, access the console, manage files, start/stop the server, or connect via SFTP depending on the permissions you grant them. There's a fine grained permissions system that can limit the extent to which each of those actions can be performed. Even allowing you to limit a Game Panel Sub-User to being able to view/download files but not be able to upload or edit them through either SFTP or the Website.
Adding a new Game Panel Sub-User
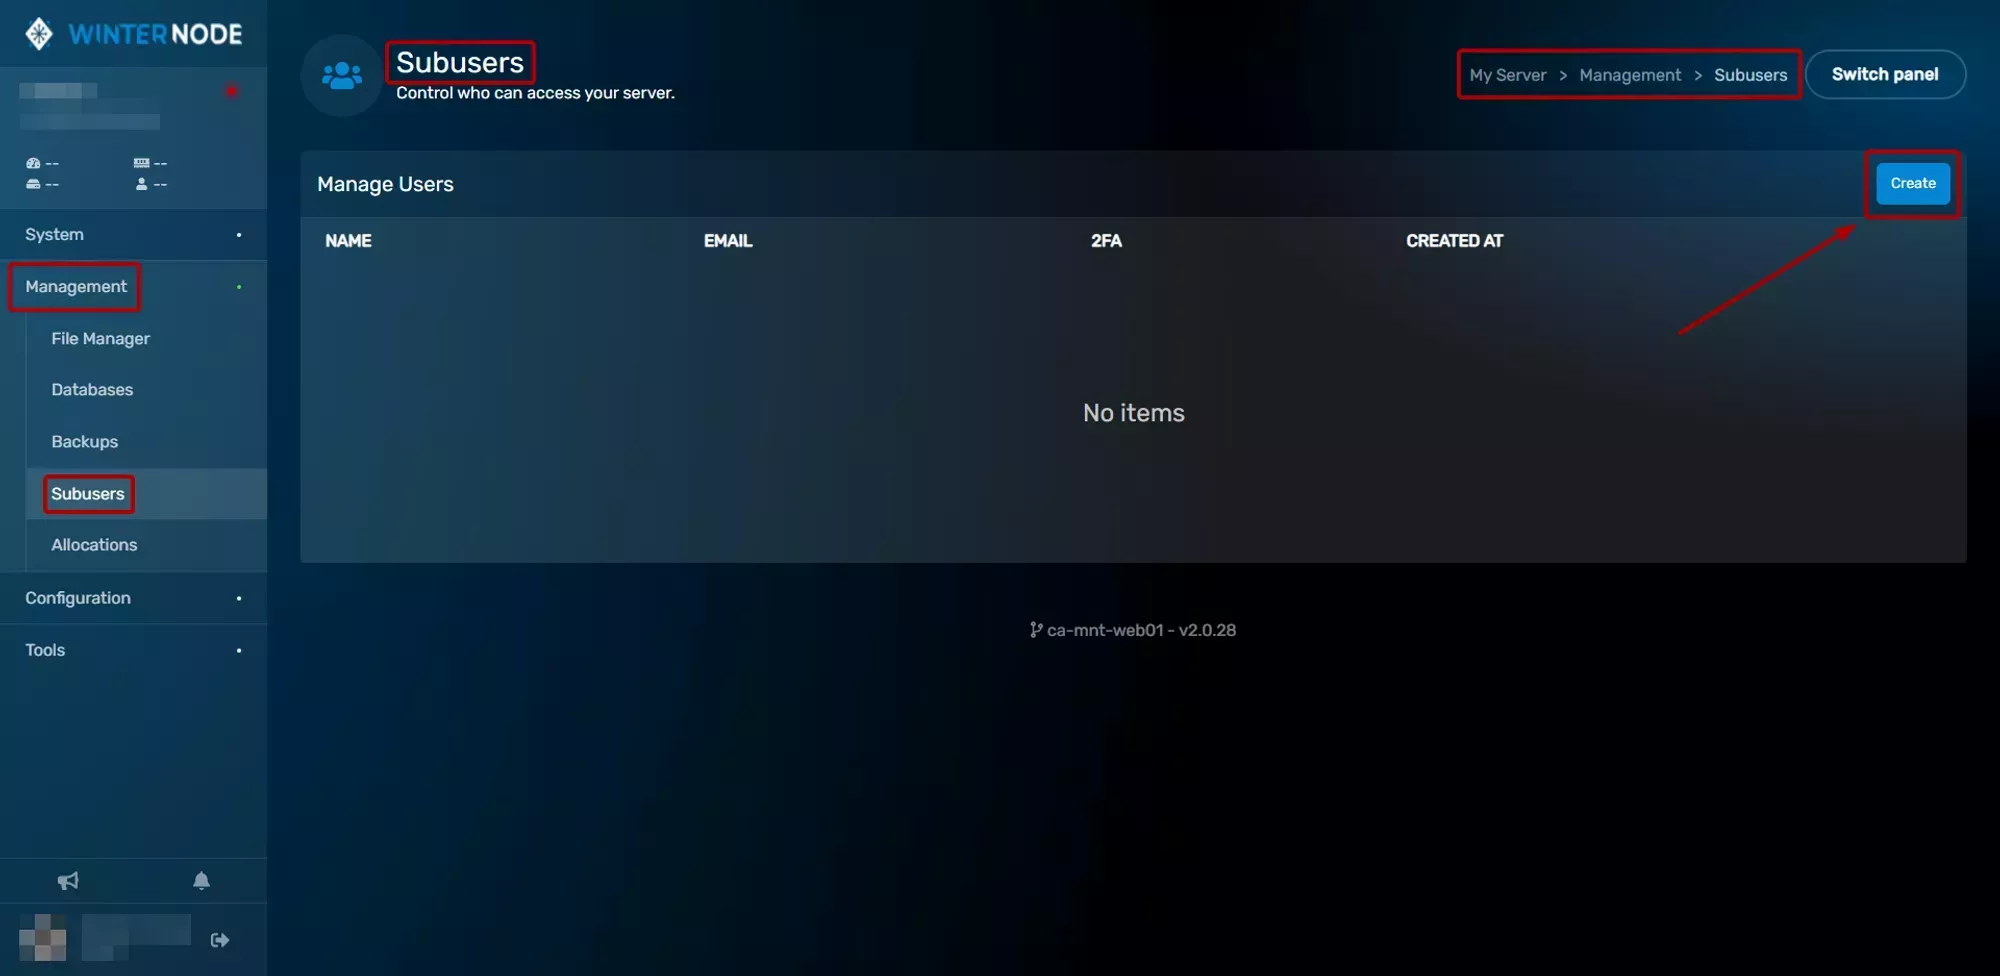
You can add a new Game Panel Sub-User to each server individually and as such each server has it's own Subusers tab under it's Management tab as shown in Image 1.
 Loading...
In the Sub-Users tab you can add and manage Game Panel Sub-Users for that server. In this case, we'll be adding a new Game Panel Sub-User to the server so you'll start by clicking the Create New button on the top right of the tab and you'll see a new page that matches the one shown in Image 2.
 Loading...
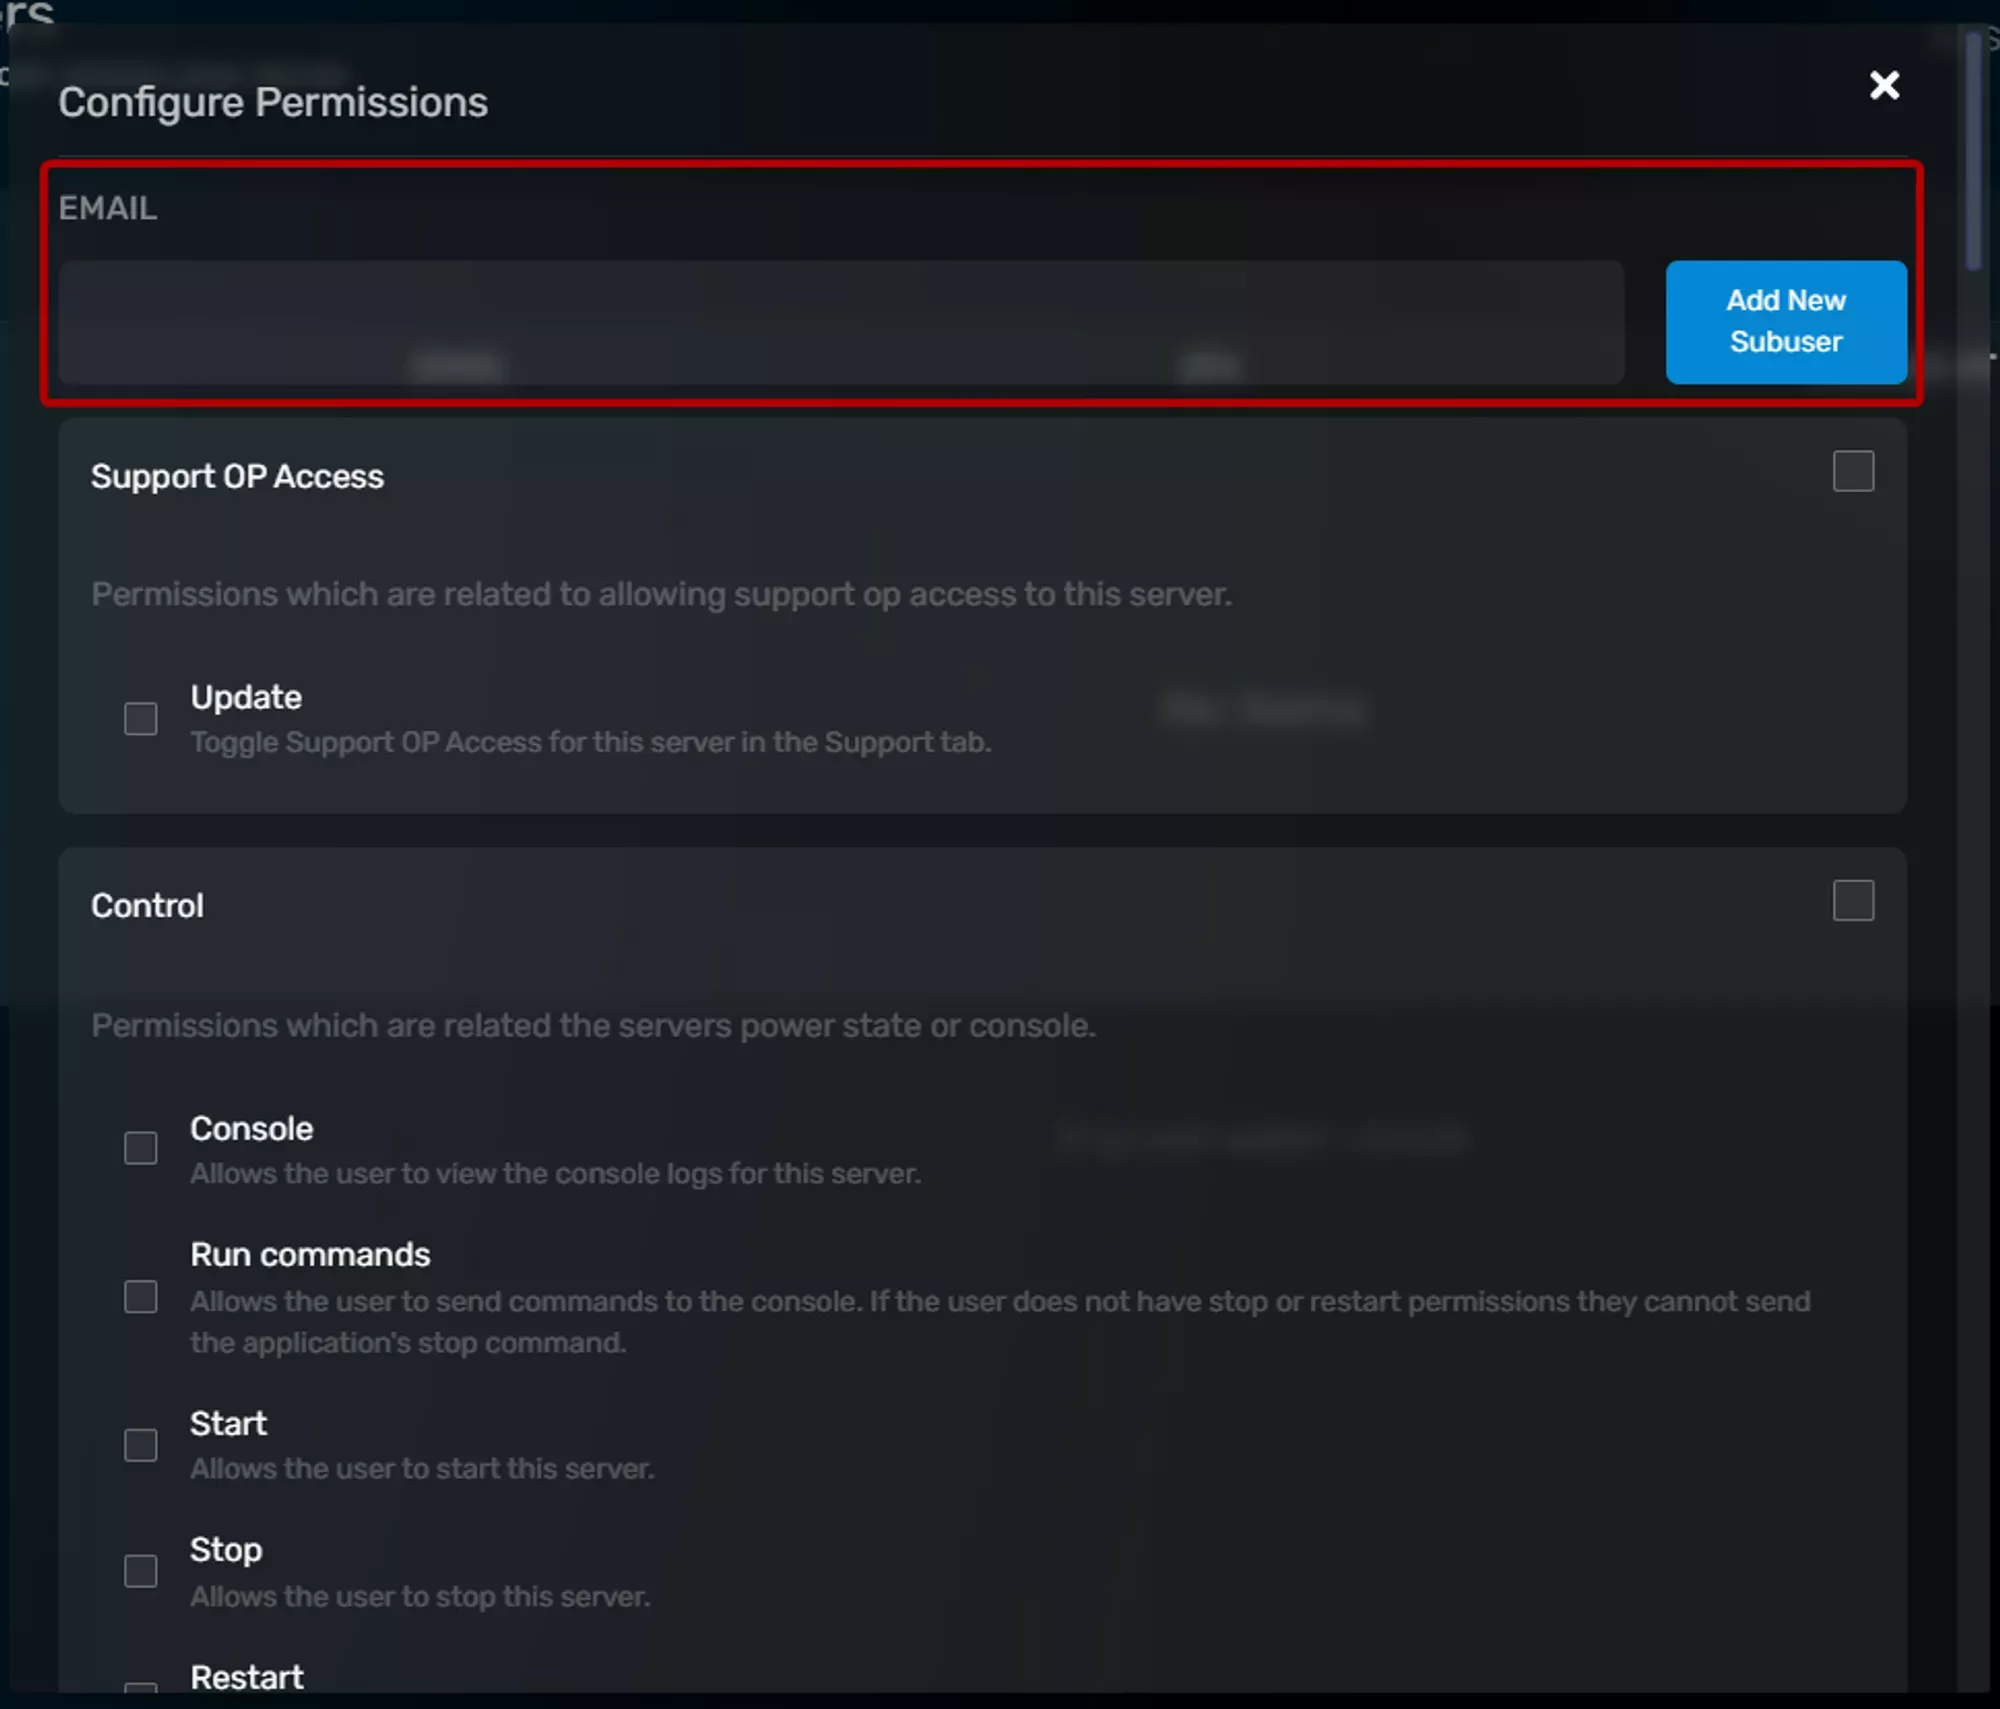
You need to enter the email address of the person you want to invite as a Game Panel Sub-User for your server into the Email Address field. They'll receive an email with a link asking them to setup an account if they don't already have one and informing them that they've been invited to access your server. We have more information on what that looks like for them in the Next Section called Game Panel Sub-User Verification.
The area below that is the permissions that the Game Panel Sub-User will have on your server. They're separated into dropdowns and each permission has a short description for what it allows the Sub User to do. You can then grant access to it by ticking the checkbox next to it if it's something you want them to do, or leave it empty if you don't. There's also a section dedicated to the specifics of each permission in the ![]() Securing a Game Panel Sub-Users account section.
Securing a Game Panel Sub-Users account section.
Game Panel Sub-User Verification
After entering the users email address and clicking the Add New Subuser button the user will be sent an email and they will be added to the list of Sub-Users for that server.
 Loading...
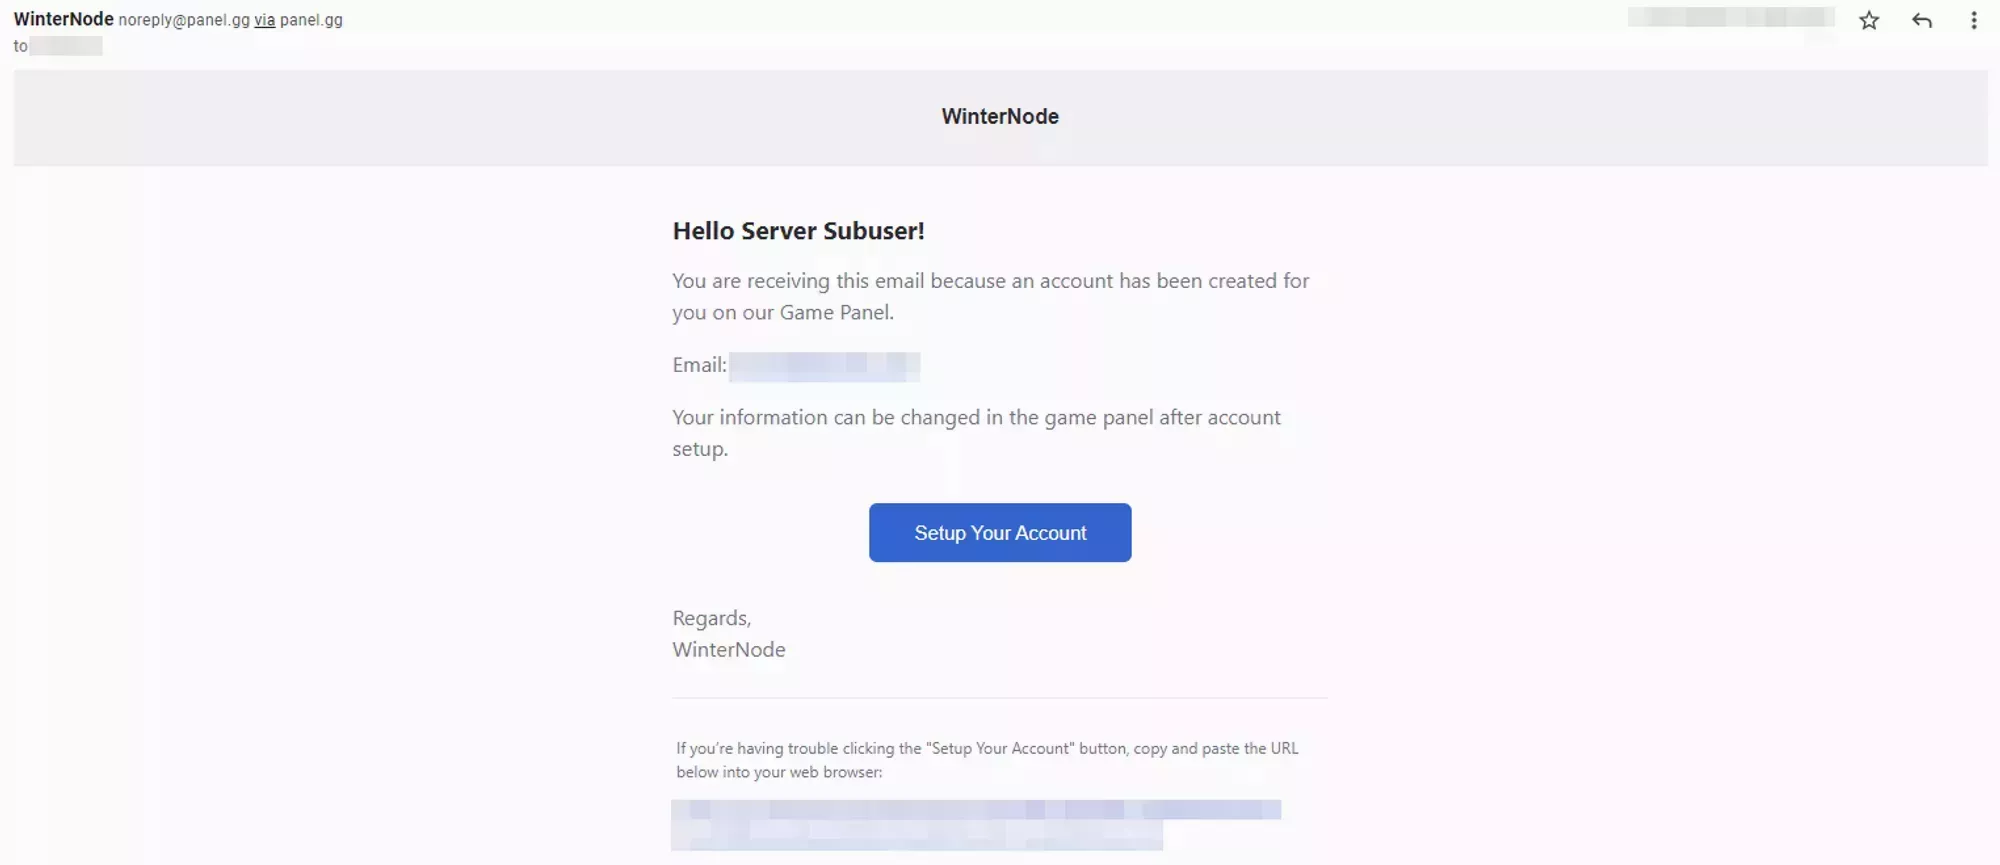
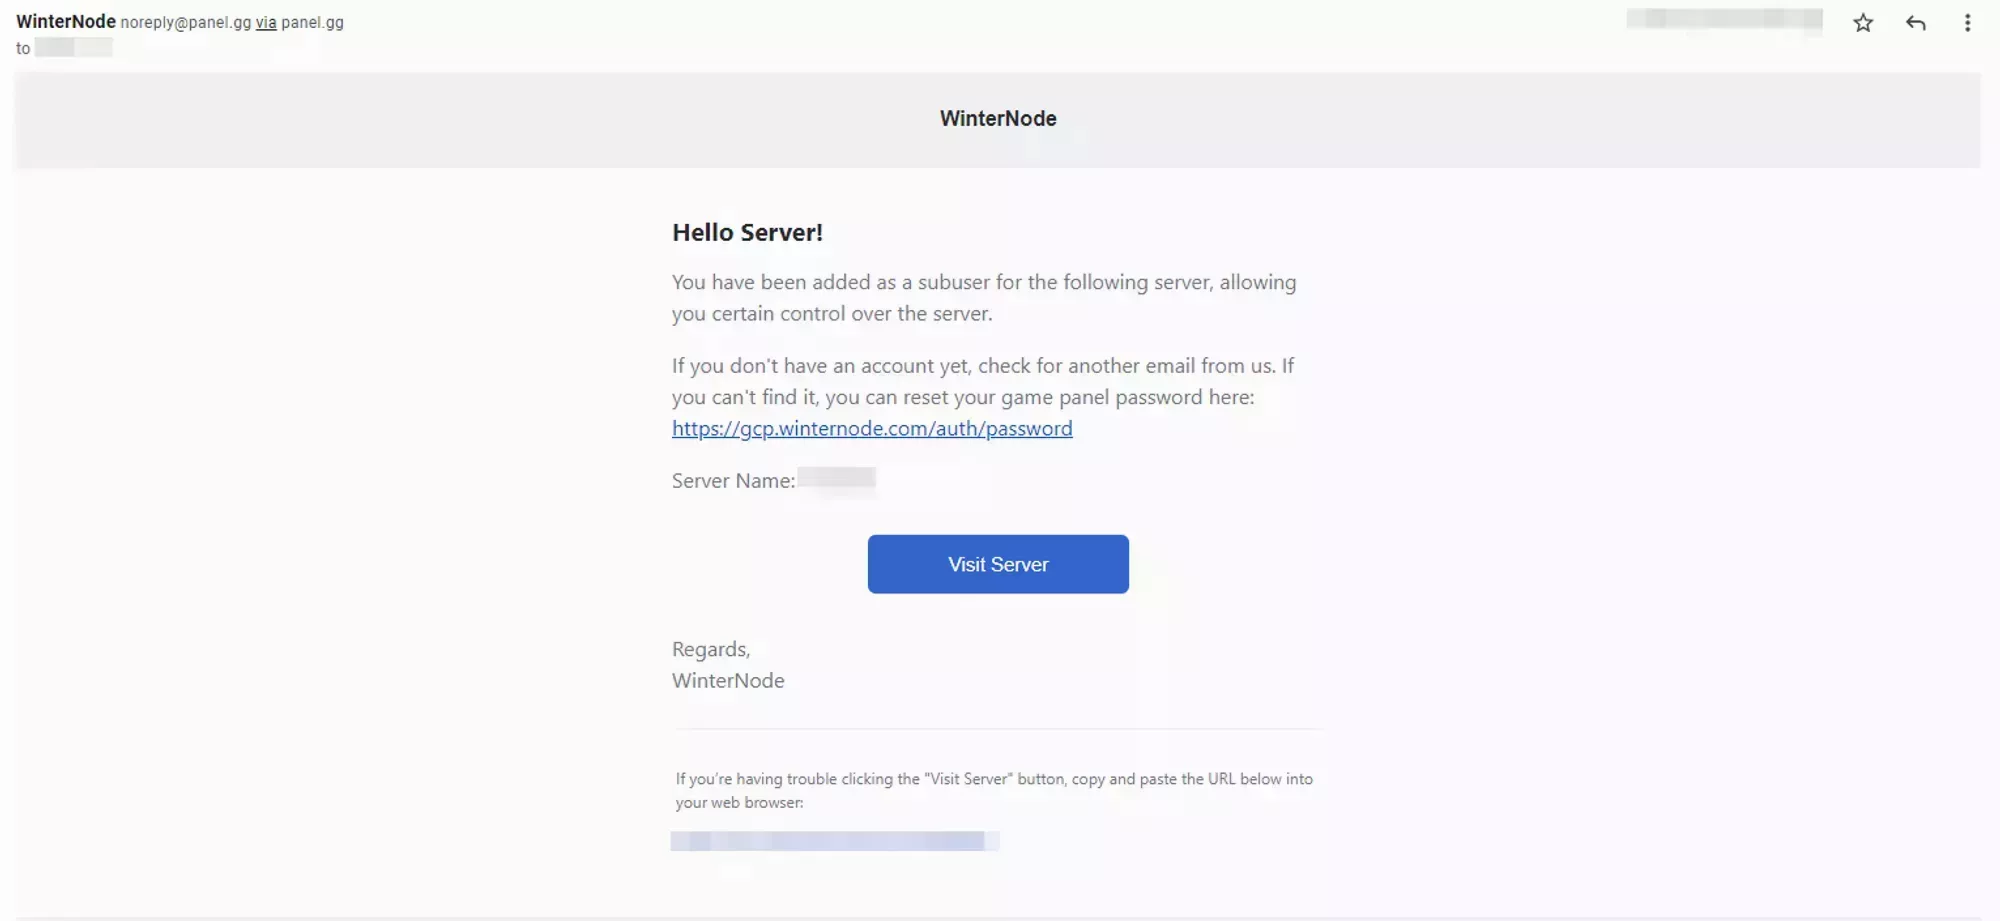
The user you invited will then receive emails similar to the ones shown below notifying them that they've been added to a new server and another instructing them on how to create an account if they haven't already.
 Loading...
 Loading...
If they already have an account then they’ll be able to log in and see the new server added to the My Servers tab on the Game Panel just as they’d see any other server.
If they don’t have an account then they’ll need to create one using the link or button provided in the email sent to them. Once they’ve created an account they’ll have access to the server you’ve invited them to. They will only need to create one account to access any number of servers they’ve been invited to using that email address.
Removing an existing Game Panel Sub-User
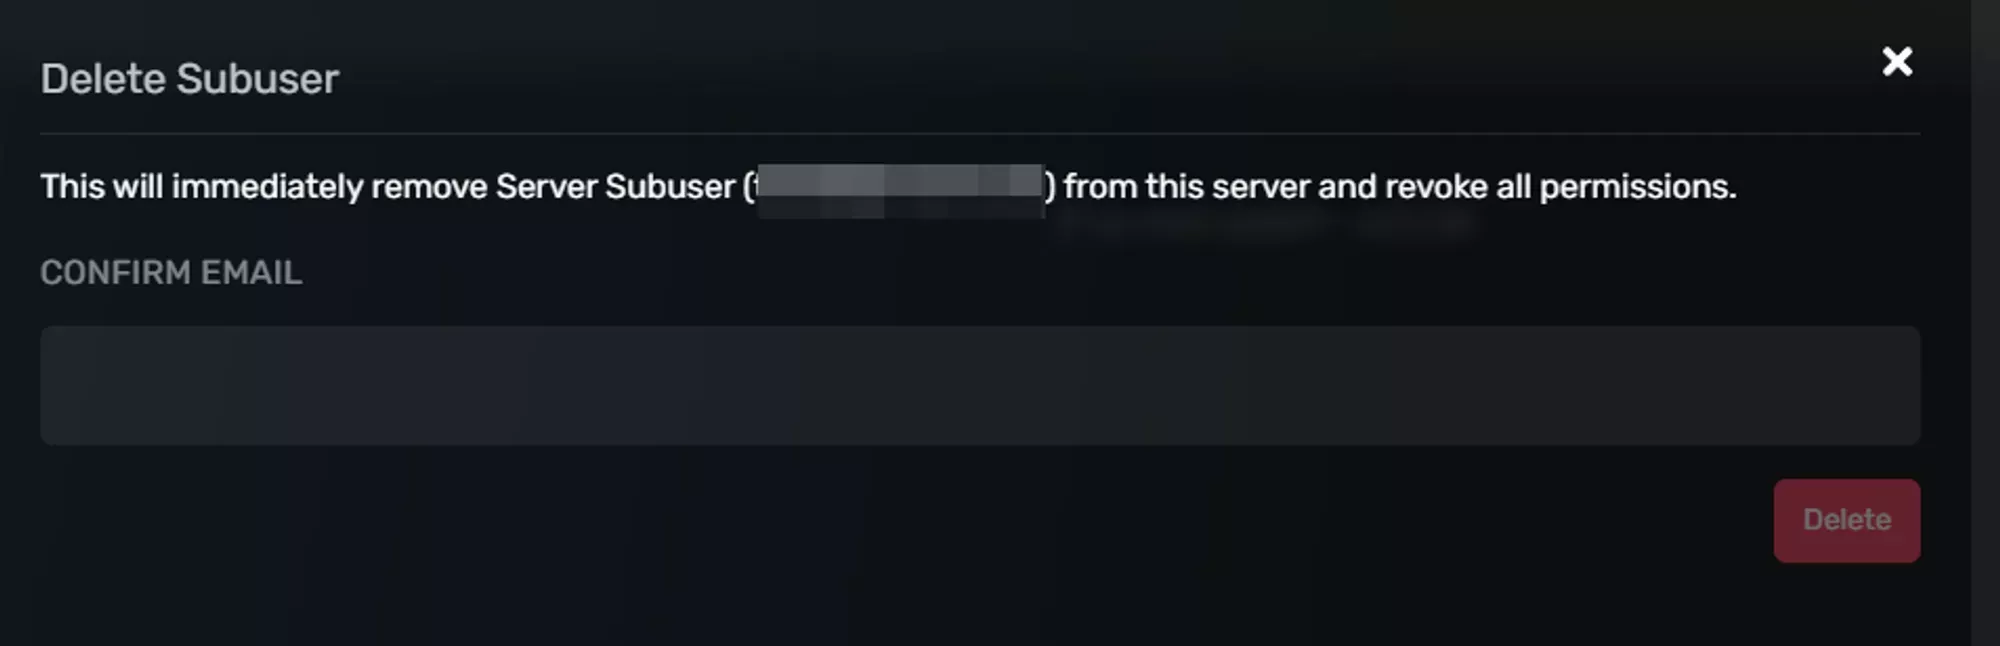
If at any point you need to remove an existing Game Panel Sub-User from your server, you can do so by navigating to the Subusers tab under Managment on the server in question and clicking the Delete icon next to their name.
 Loading...
You ‘ll get a dialog box asking you to enter the users email to confirm that you want to delete them as a Sub-User. If you confirm that you do, their access to your server will immediately be revoked.
 Loading...
Securing a Game Panel Sub-Users account
2 Factor Authentication
2-Factor authentication is an extra step added to logging into to an account that helps prevent unauthorized access. When you, or the Game Panel Sub-User in question, logs into the account you’ll be prompted to provide a code from an Authenticator application that’s crypto-graphically generated from a private token only shared between WinterNode and the Authenticator application. As long as you don’t share those tokens or that code and a third party doesn’t have physical access to the device that you’re using for your Authenticator application, this is a nearly foolproof method of Authenticating. For redundancies sake, you can even save the original code in a password manager or other safe location in case you loose your device or have multiple devices setup with an Authenticator application ready to go.
You can check if a Game Panel Sub-User has enabled 2-FA by looking at the Management -> Manage Users tab and checking the 2FA column. A closed green lock means they have enabled it and an open red lock means they have not.
 Loading...
 Loading...
It’s highly recommended to use 2FA as a security measure. It is the most secure way to prevent your accounts, and by extension your servers, from getting hacked.
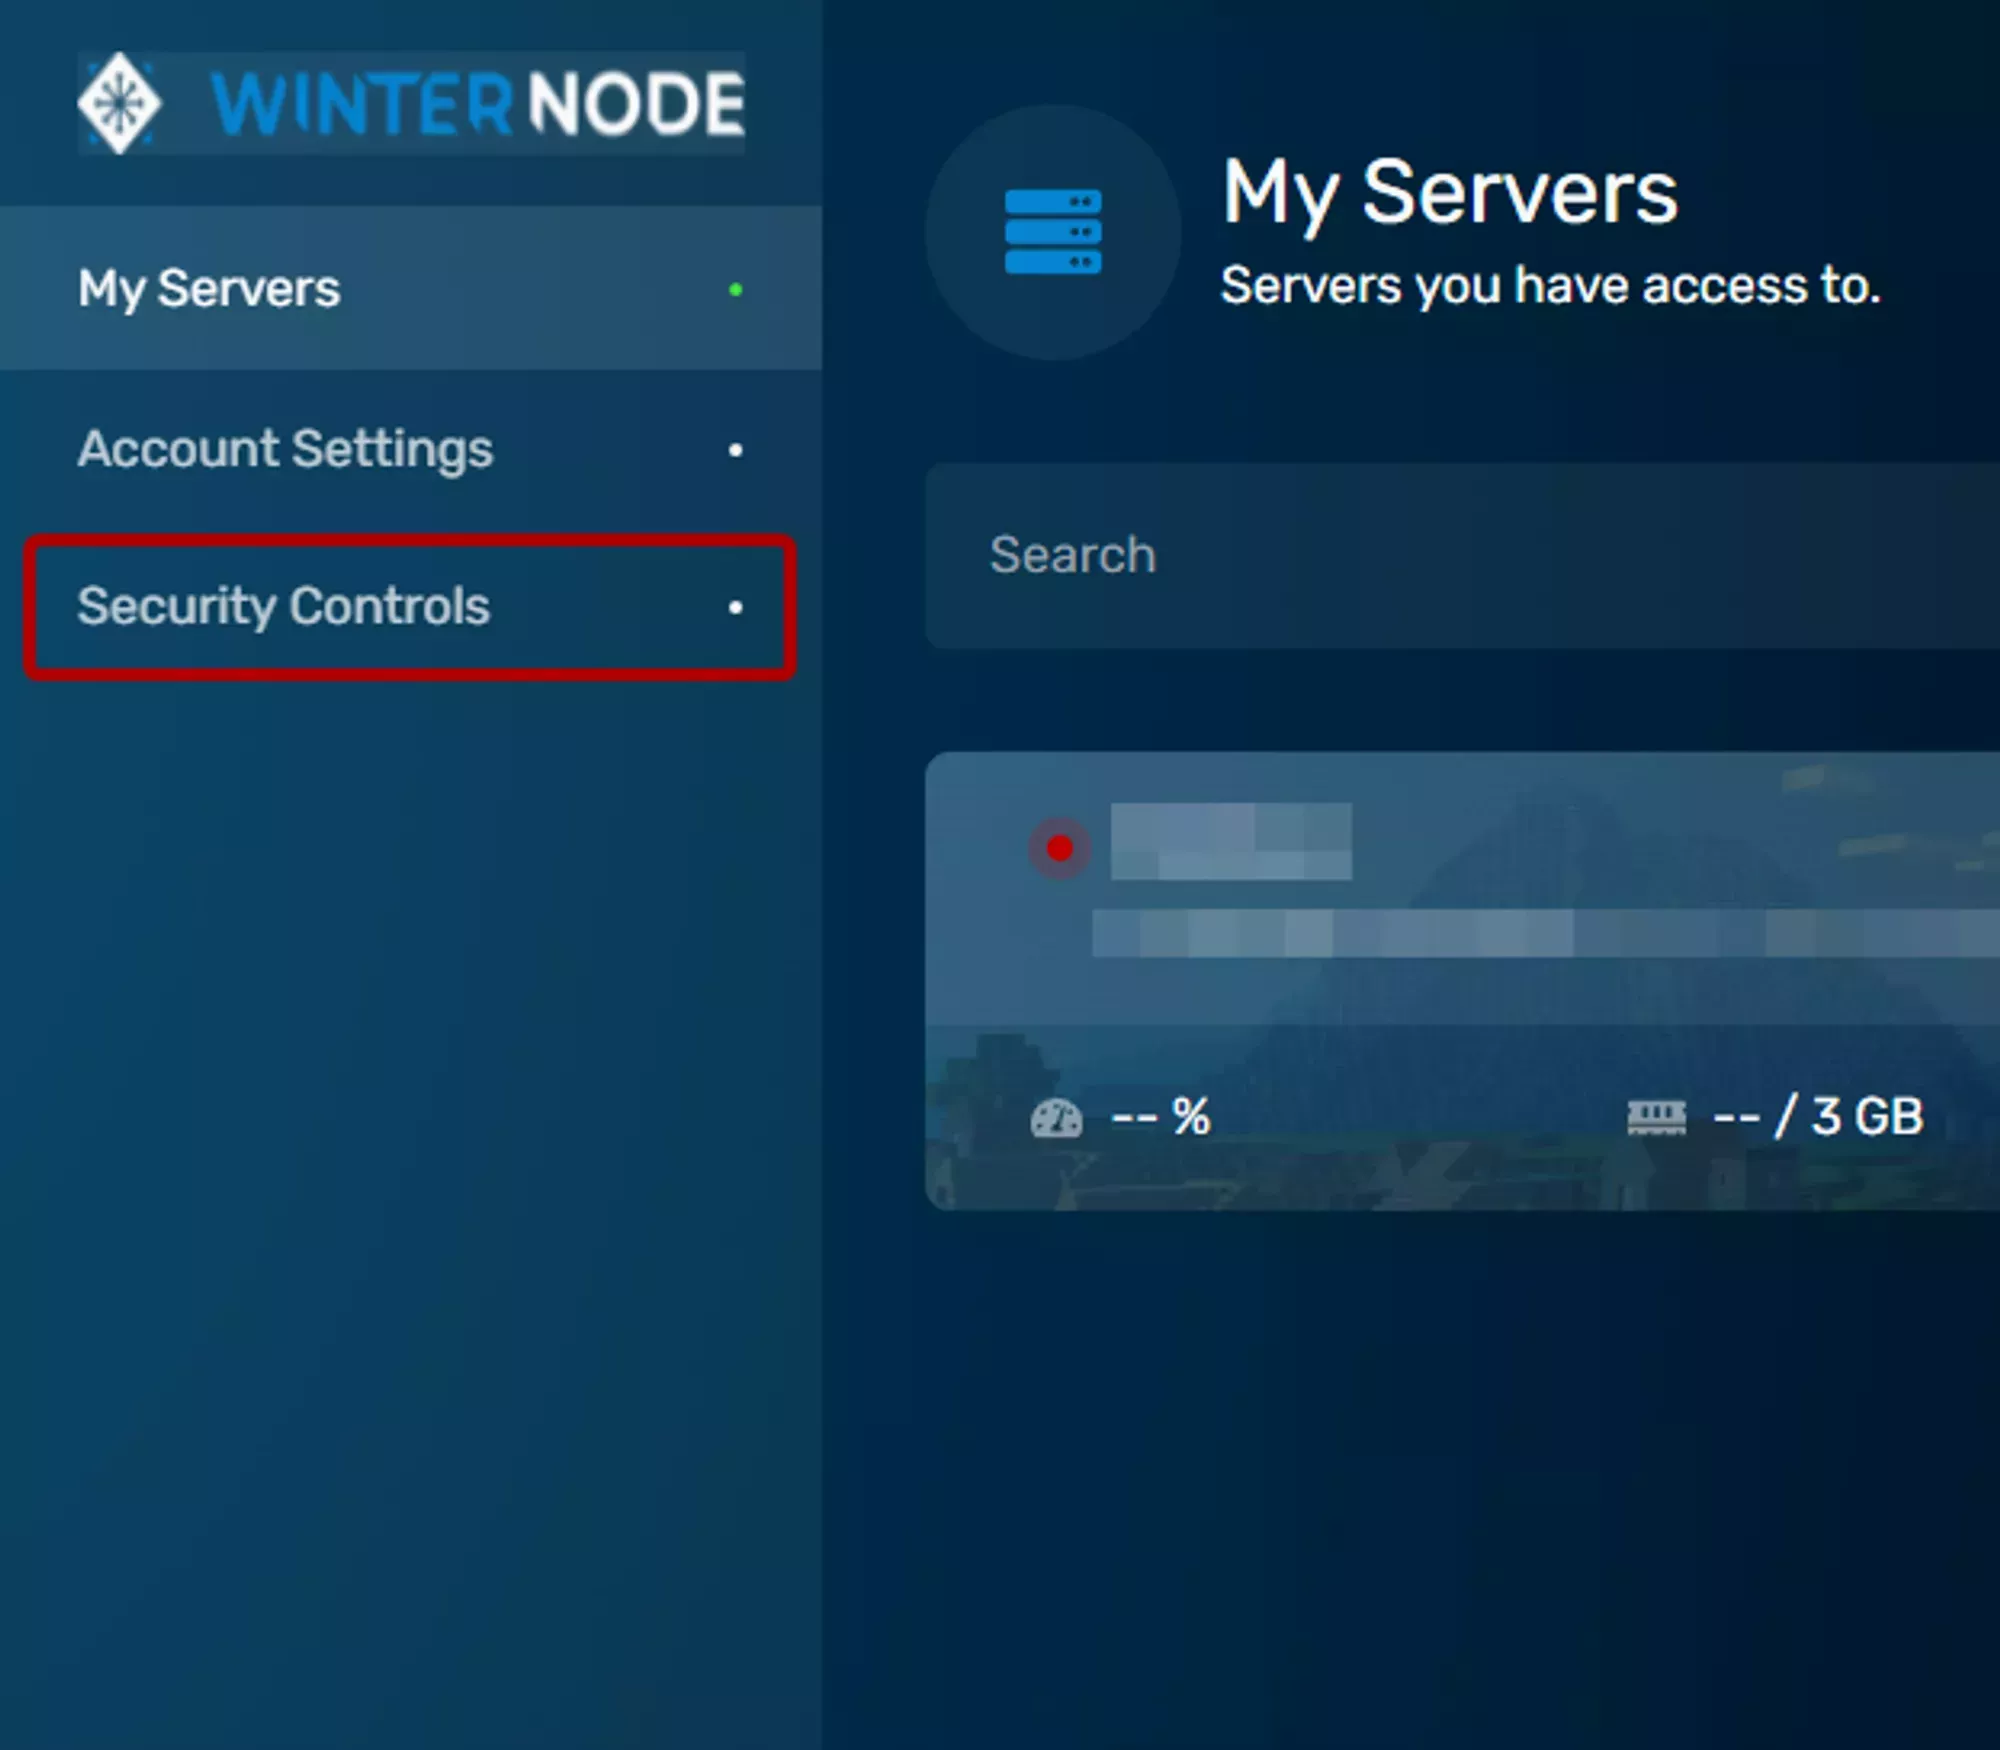
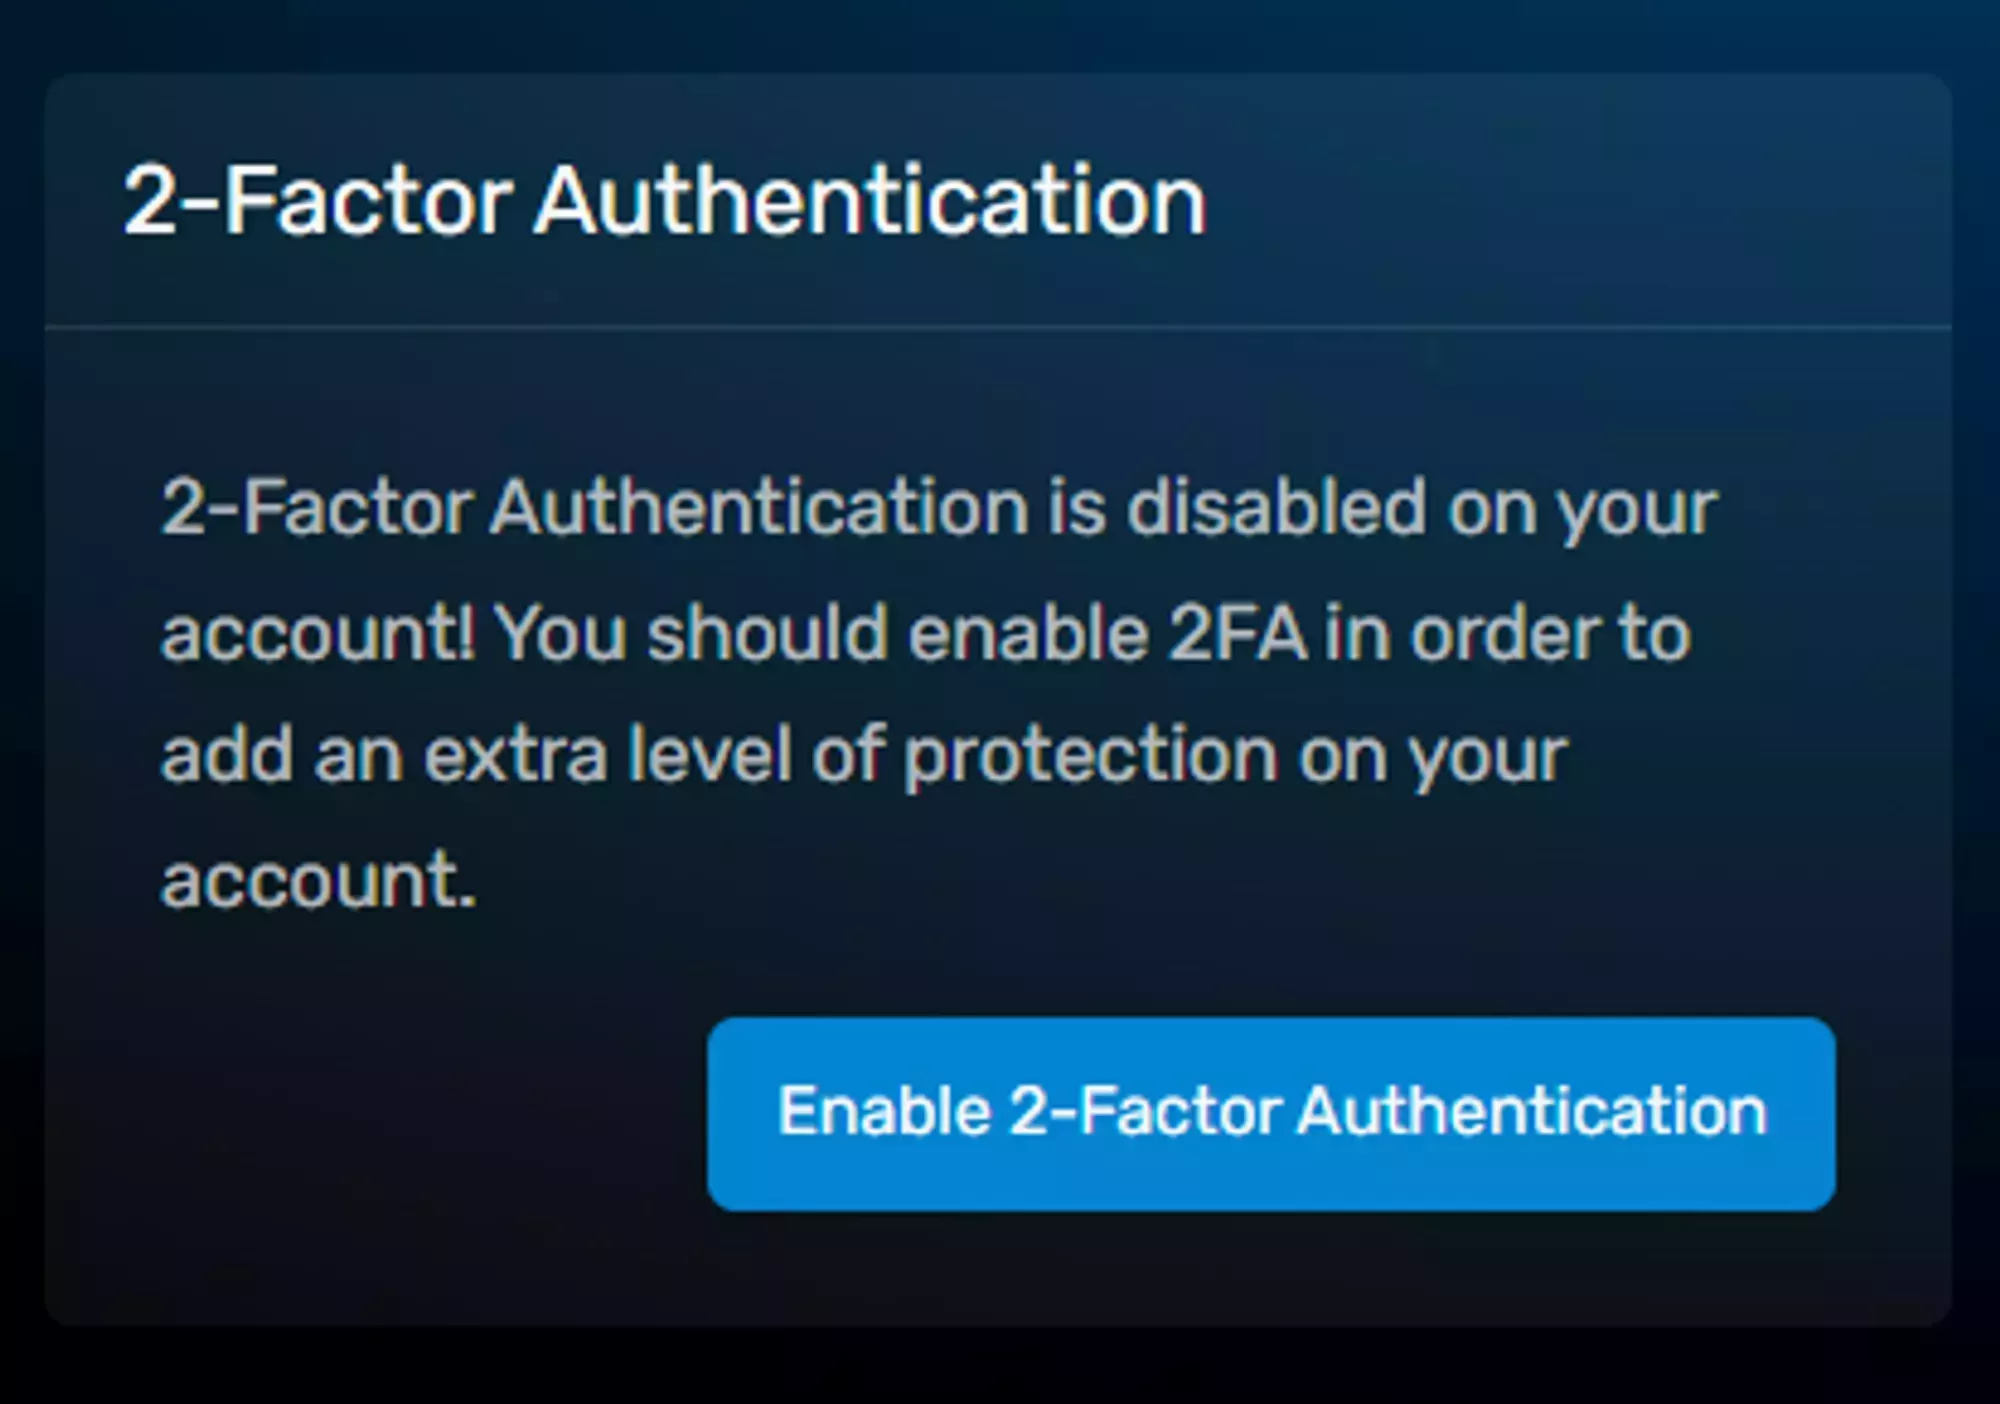
You can find the 2FA setting under the security controls tab on your home page in the Game Panel. Once there you’ll find a box labeled 2-Factor Authentication with a button inside labeled Enable 2-Factor Authentication. Click that button to get your Authentication code and QR code.
 Loading...
 Loading...
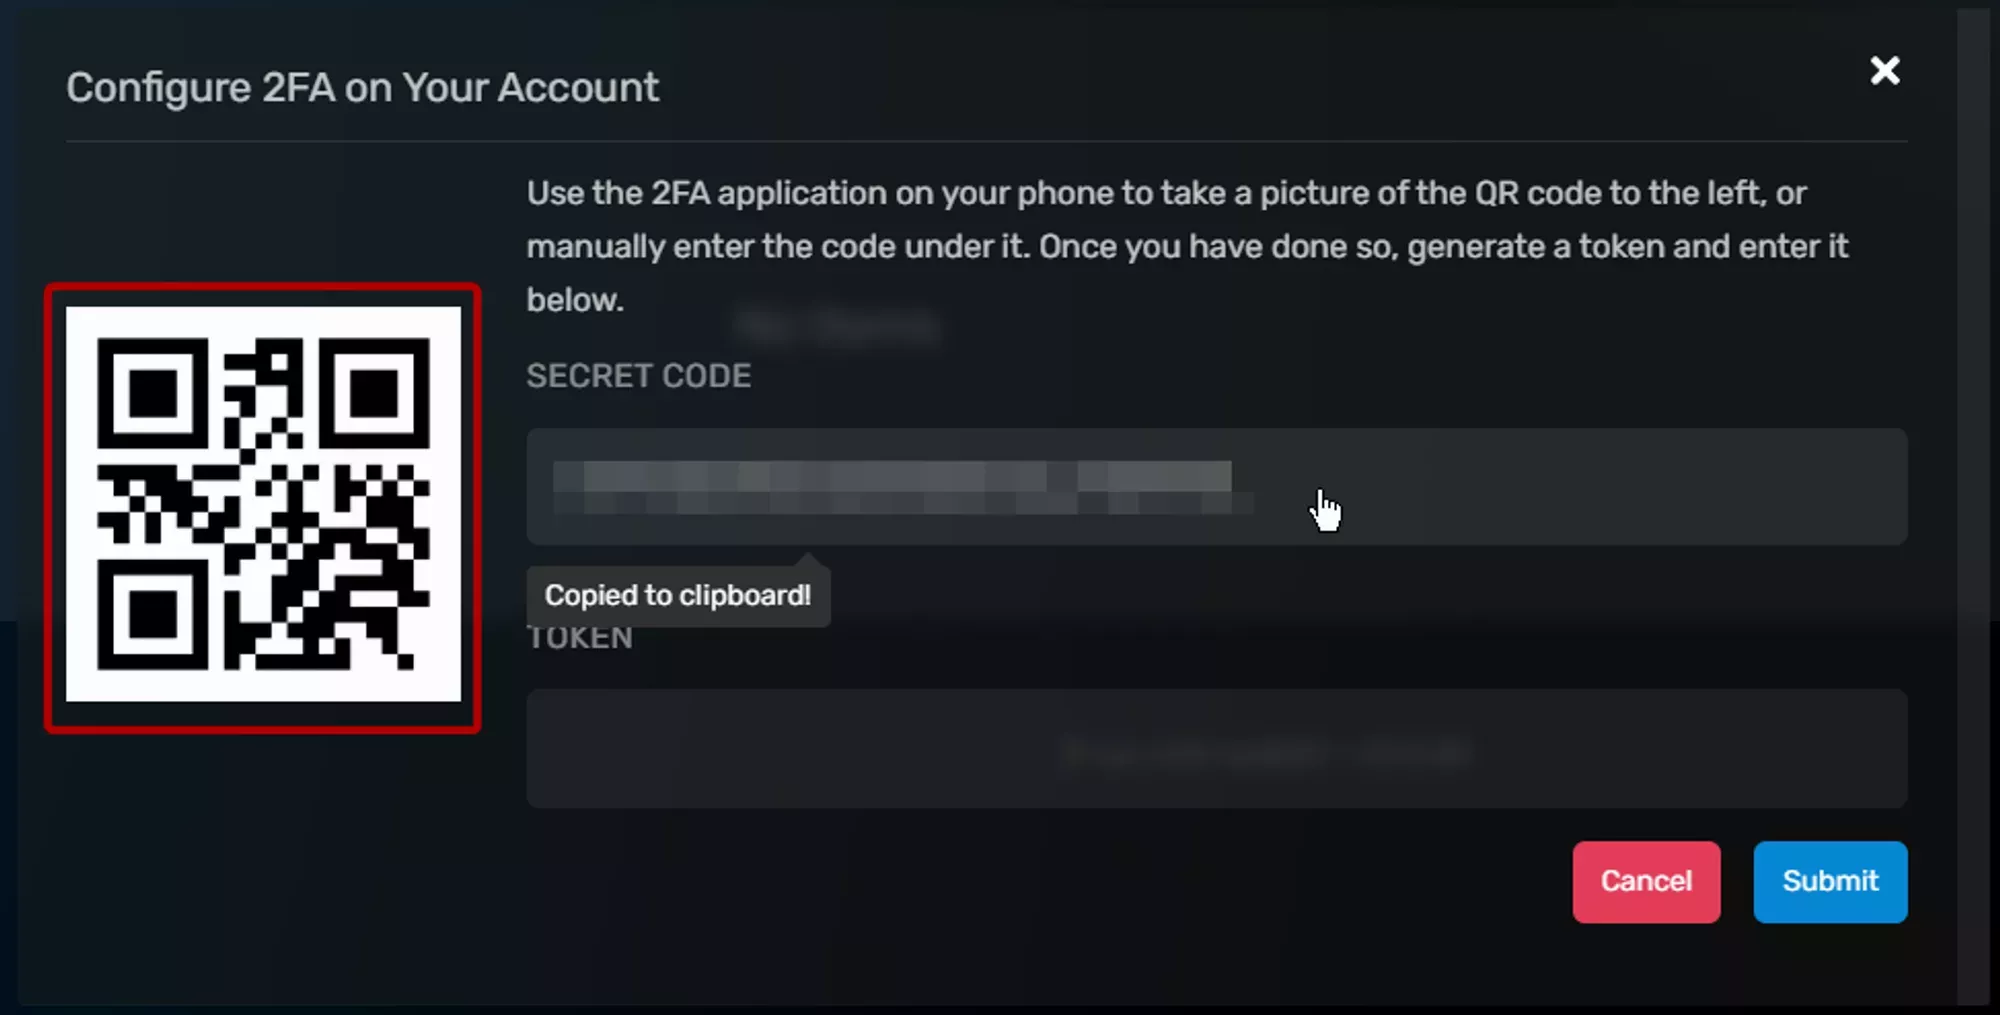
After clicking the 2-Factor Authentication button, you’ll be shown a window similar to the one below containing a QR code and a long alphanumeric code next to it. You can scan the QR code using an app like Google Authenticator or Authy or you can enter the code manually into either of the two apps. You can also click the alphanumeric code to copy it into your clipboard.
 Loading...
Make sure to save the alphanumeric code or QR code somewhere in a secure format. Good ways are in a private password manager or encrypted flash drive!
 Loading...
There are a lot of Authenticator apps with many different features, so you might want to try a few out or look at what’s provided by your phone already. If you save the code above then you’ll have no problem switching Authenticator apps!
Setting Permissions
Before you create a Game Panel Sub-User, you have the ability to restrict their access to your server by specifying the permissions they have. You can also change those permission after you create a Game Panel Sub-User by navigating to the Configure Permissions button on the right side of the user entry as shown in Image 1.
 Loading...
We’ll be going over the permissions and what they do below. Keep in mind that a few of these permissions affect features that aren’t supported by WinterNode at this time and we’ll mention that in each synopsis.
The italic text shown within the quote is the synopsis provided by the Panel and the text shown below it contains any clarifications that might be needed for that specific permission, such as the location of the feature itself or any limitations it has.
Loading...
We’ll be going over the permissions and what they do below. Keep in mind that a few of these permissions affect features that aren’t supported by WinterNode at this time and we’ll mention that in each synopsis.
The italic text shown within the quote is the synopsis provided by the Panel and the text shown below it contains any clarifications that might be needed for that specific permission, such as the location of the feature itself or any limitations it has.
Support OP Access
Permissions which are related to allowing support op access to this server.
Update
Toggle Support OP Access for this server in the Support tab.
Ability to grant WinterNode staff access to your server for assistance. The toggle is located under the Configuration -> advanced tab.
Control
Ability to grant WinterNode staff access to your server for assistance. The toggle is located under the
Configuration -> advancedtab.
Console
Allows the user to view the console logs for this server.
Ability to view the live console logs under the System -> Console tab. This is unrelated to any Console logs saved to a file or in the audit logs.
Run Commands
Allows the user to send commands to the console. If the user does not have stop or restart permissions they cannot send the application's stop command
Ability to run commands on the System -> Console tab. The stop command is defined in the game egg, IE for Minecraft it’s simply stop and without the stop permission the user will not be able to run it.
Start
Allows the user to start this server.
Ability to start the server by clicking the start button on the System -> Console tab.
Stop
Allows the user to stop this server.
Ability to use the Stop command and press the Stop button on the System -> Console tab.
Restart
Allows the user to restart this server.
Ability to to use the restart button on the System -> Console tab.
Subuser
Permissions which allow users to manage other subusers assigned to the server.
Read
Allows the user to list & inspect Sub-Users assigned to this server.
Ability to list other Sub-Users, their associated emails, and the permissions assigned to them, under the Management -> Subusers tab.
Update
Allows the user to edit permissions assigned to other subusers.
Ability to edit the permissions assigned to other Sub-Users by clicking on the Configure Permissions button on the Management -> Subusers tab.
Create
Allows the user to create additional subusers on this server.
Ability to create new Sub-Users on the Management -> Subusers tab.
Delete
Allows the user to delete other subusers on this server.
Ability to delete other Sub-Users by clicking the trash can icon next to them in the list on the Management -> Subusers tab.
Allocations
Permissions which allow the user to manage all assigned IP:Port's to this server.
Read
Allows the user to view all allocations assigned to this server. Users with any access to the server can always view the default allocation via the Details page.
Ability to view the port and IP allocations for the server on the Management -> Allocations tab. If you or the Sub-User need additional ports allocated see our page on ![]() Requesting Additional Ports.
Requesting Additional Ports.
Update
Allows the user to change the primary allocation.
Ability to change the primary port allocation which is used to display the connection address on your server list page and in the configuration for some server types. This can be accessed on the Management -> Allocations tab.
Startup Parameters
Permissions which allow users to manage the server's configuration.
Read
Allows the user to view the startup command and associated variables for this server.
Ability to view the Startup Command and Variables on the Configuration -> Startup Parameters tab.
Update
Allows the user to modify startup variables for this server.
Ability to edit the startup variables for the server under the Configuration -> Startup Parameters tab. If you need your Startup Command changed, please open a ticket with WinterNode staff and we’ll be happy to help!
Database
Permissions which allow users to manage MySQL databases for the server.
Read
Allows the user to view all databases associated with this server including the usernames and passwords for the databases.
Ability to view all data about and within databases associated with this server. Database details can be found under the Management -> Databases tab and the contents of Databases can be viewed with a software like HeidiSQL.
Reset Password
Allows the user to reset the passwords for databases.
Ability to reset the password for any database associated with this server under the Management -> Databases tab.
Create
Allows the user to create additional databases for this server.
Ability to create a new database in the Management -> Databases tab as long as the server has an open database allocation.
Delete
Allows the user to delete the databases from this server.
Ability to delete any existing database under the Management -> Databases tab.
File Manager
Permissions which allow users to manage the files stored on a server through the File Manager or the SFTP Server.
SFTP
Allows the user to connect to the SFTP server.
Ability to connect the server via SFTP using the credentials under the System -> SFTP Details tab.
The SFTP connection respects the other permissions within this group.
List
Allows the user to list all files & folders on this server but not view file contents.
Ability to list, but not view, folders and files under the Management -> File Management tab.
Read
Allows the user to view the contents of existing files.
Ability to view, but not edit or save, the contents of existing files by selecting them under the Management -> File Management tab.
Write
Allows the user to update the contents of existing files for this server.
Ability to update the contents of existing files on the server by uploading them directly, saving them using a file editor over SFTP, or the web editor on the Management -> File Manager tab.
Delete
Allows the user to delete files from this server in the file manager or SFTP.
Ability to delete existing files/folders on the server, either individually or in bulk, as seen on our ![]() Game Control Panel - The Basics page under the
Game Control Panel - The Basics page under the Management -> File Management tab.
Archive
Allows the user to compress files & folders in the file manager.
Ability to compress existing files/folders on the server, either individually or in bulk, as seen on our ![]() Game Control Panel - The Basics page under the
Game Control Panel - The Basics page under the Management -> File Management tab.
Git
Allows the user to use git actions (ie Cloning, Pulling).
Ability to use the git actions by using the ellipsis menu on the top right side of the Management -> File Management tab.
Schedule
Permissions which allow the user to create automatic tasks that run periodically on the server.
Read
Allows the user to list schedules & view a schedule's details including all of the assigned tasks.
Ability to view all schedules and associated tasks under the Configuration -> Startup Parameters tab.
Update
Allows the user to edit a schedule including all of the schedule's tasks. This will allow the user to remove individual tasks, but not delete the schedule itself.
Ability to edit a schedule as mentioned above under the Configuration -> Startup Parameters tab.
Create
Allows the user to create a new schedule.
Ability to create new schedules under the Configuration -> Startup Parameters tab.
Delete
Allows the user to delete schedules from this server.
Ability to delete any existing schedule associated with this server under the Configuration -> Startup Parameters tab.
Details
Permissions which allow the user to change the name that identifies the server in the panel.
Read
Allows the user to view this server details.
Ability to view the Server Details tab located at System -> Server Details.
Update
Allows the user to change this server name. This only allows the user to change the name the server is named in the panel, not in-game.
Ability to edit the Server Name parameter on the System -> Server Details tab.
Audit Log
Permissions which allow the user to inspect all actions going on for this server.
Read
Allows the user to view this server action logs. Note: This may contain information which could be locked behind other permissions.
Ability to view everything on the System -> Audit Logs tab.
Mod Manager
Permissions which allow the user to view & install one-click mods for this server.
This is an Unsupported Feature! To install individual mods please try the Plugin Manager or check out our page on ![]() Forge - Manual Modpack Installation
Forge - Manual Modpack Installation
Read
Allows the user to view available one-click mods to install on this server.
Ability to view mods available for installation on the Tools -> Mod Manager tab.
This is an Unsupported Feature! To install individual mods please try the Plugin Manager or check out our page on ![]() Forge - Manual Modpack Installation
Forge - Manual Modpack Installation
Update
Allows the user to install one-click mods on this server.
Ability to install mods listed on the Tools -> Mod Manager tab.
This is an Unsupported Feature! To install individual mods please try the Plugin Manager or check out our page on ![]() Forge - Manual Modpack Installation
Forge - Manual Modpack Installation
Modpack Manager
Permissions which allow the user to install Minecraft Modpacks on this server.
Read
Allows the user to view which modpacks are available for installation on this server.
Ability to view available ModPacks on the Tools -> ModPack Manager tab.
Install
Allows the user to install a modpack on this server.
Ability to install ModPacks listed on the Tools -> Mod Manager tab.
Plugin Manager
Permissions which allow the user to install Minecraft Plugins on this server.
Read
Allows the user to view which plugins are available for installation on this server.
Ability to view available Plugins on the Tools -> Plugin Manager tab.
Update
Allows the user to install a plugin on this server.
Ability to install Plugins listed on the Tools -> Plugin Manager tab.
Health Monitor
Permissions which allow the user to use the manage the Health Monitor for this server.
Read
Allows the user to view the status of server's Health Monitor.
Ability to view the current state of the server’s health monitor setting under the Configuration -> Advanced tab.
Update
Allows the user to toggle the server's Health Monitor status.
Ability to toggle the current state of the server’s health monitor setting under the Configuration -> Advanced tab.
Reinstall
Permissions which allow the user to trigger a re-installation for this server.
Update
Allows the user to reinstall this server.
Ability to install, or reinstall, the server on the Configuration -> Advanced tab.