VPS Panel - The Basics
The VPS Panel is where you’ll manage the Off-VPS tasks such as rebooting or managing the Firewall. It’s located in the client area and is found on the service details page for your VPS Service. We’ll go over what actions you can preform with the VPS panel and details about how specific actions work.
Locating
There is a separate VPS panel for each VPS Service you have and you can find the panel by viewing the details for that VPS on the Client Panel. You’ll find a Step by Step on how to locate the VPS Panel below.
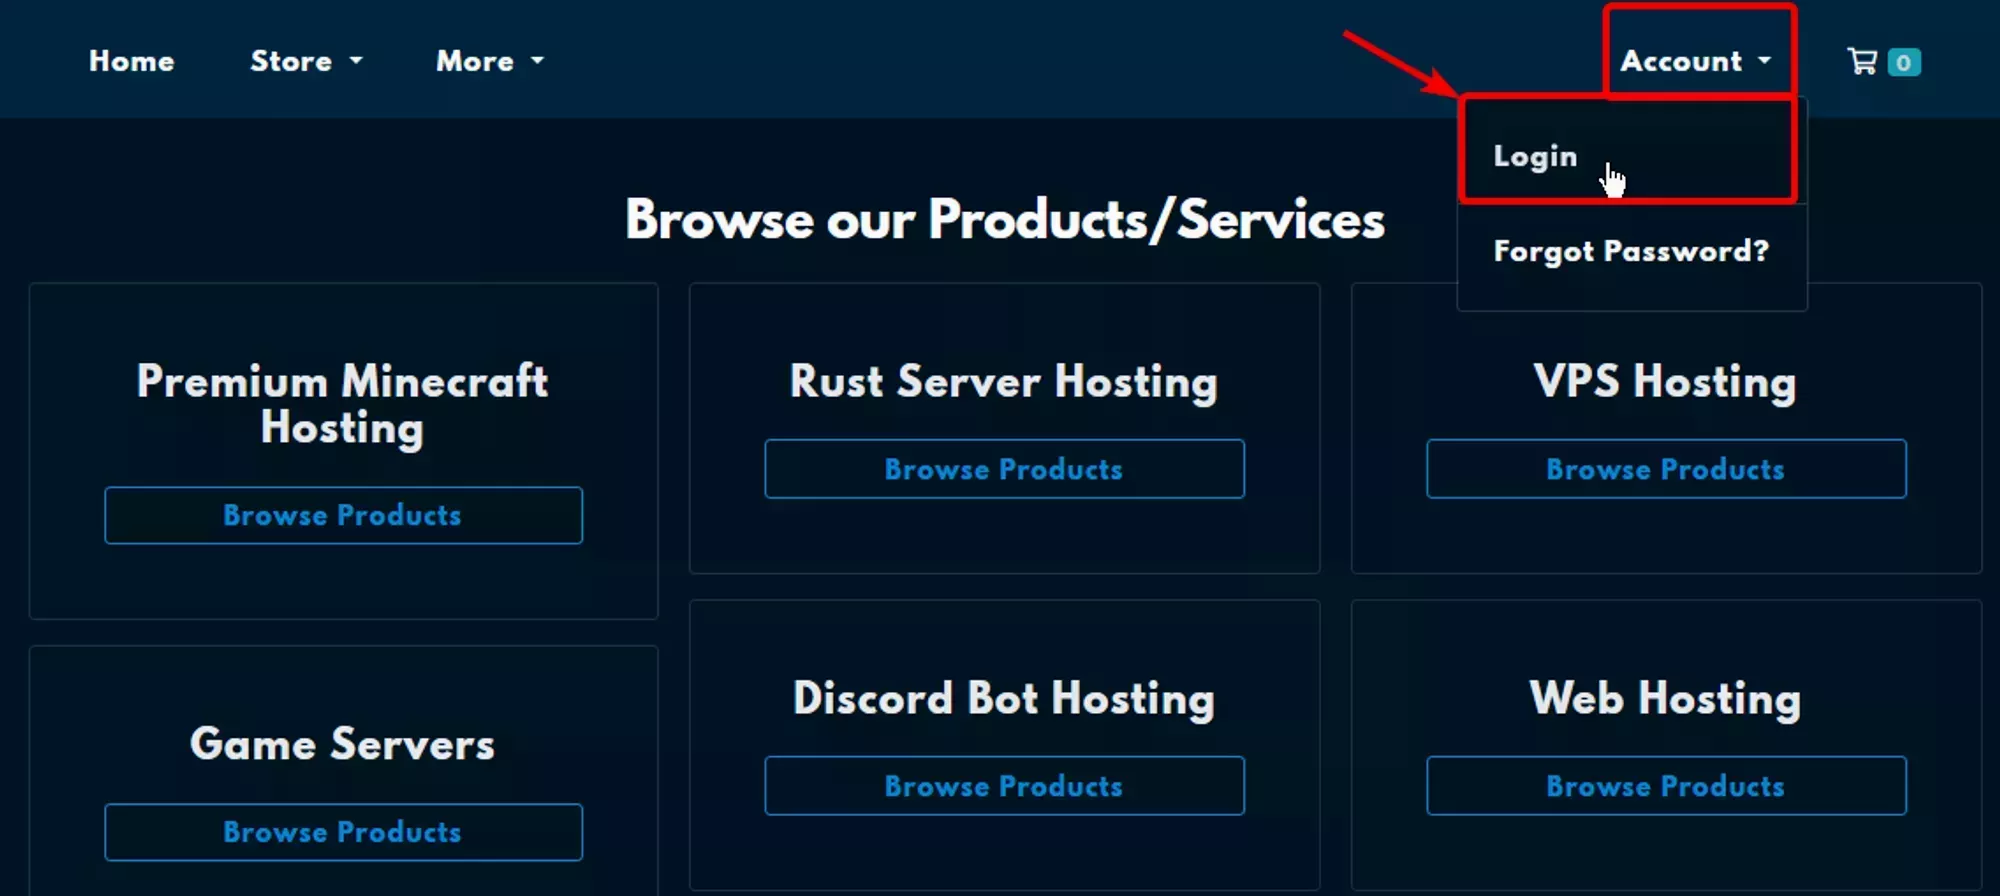
You need to navigate to and login by selecting Account → Login from the Navigation Bar, as shown in the image on the right. After logging in you’ll use the Services → My Services drop down in the Navigation Bar to go to the list of Services. An example of where you’ll find that is shown below
 Loading...
 Loading...
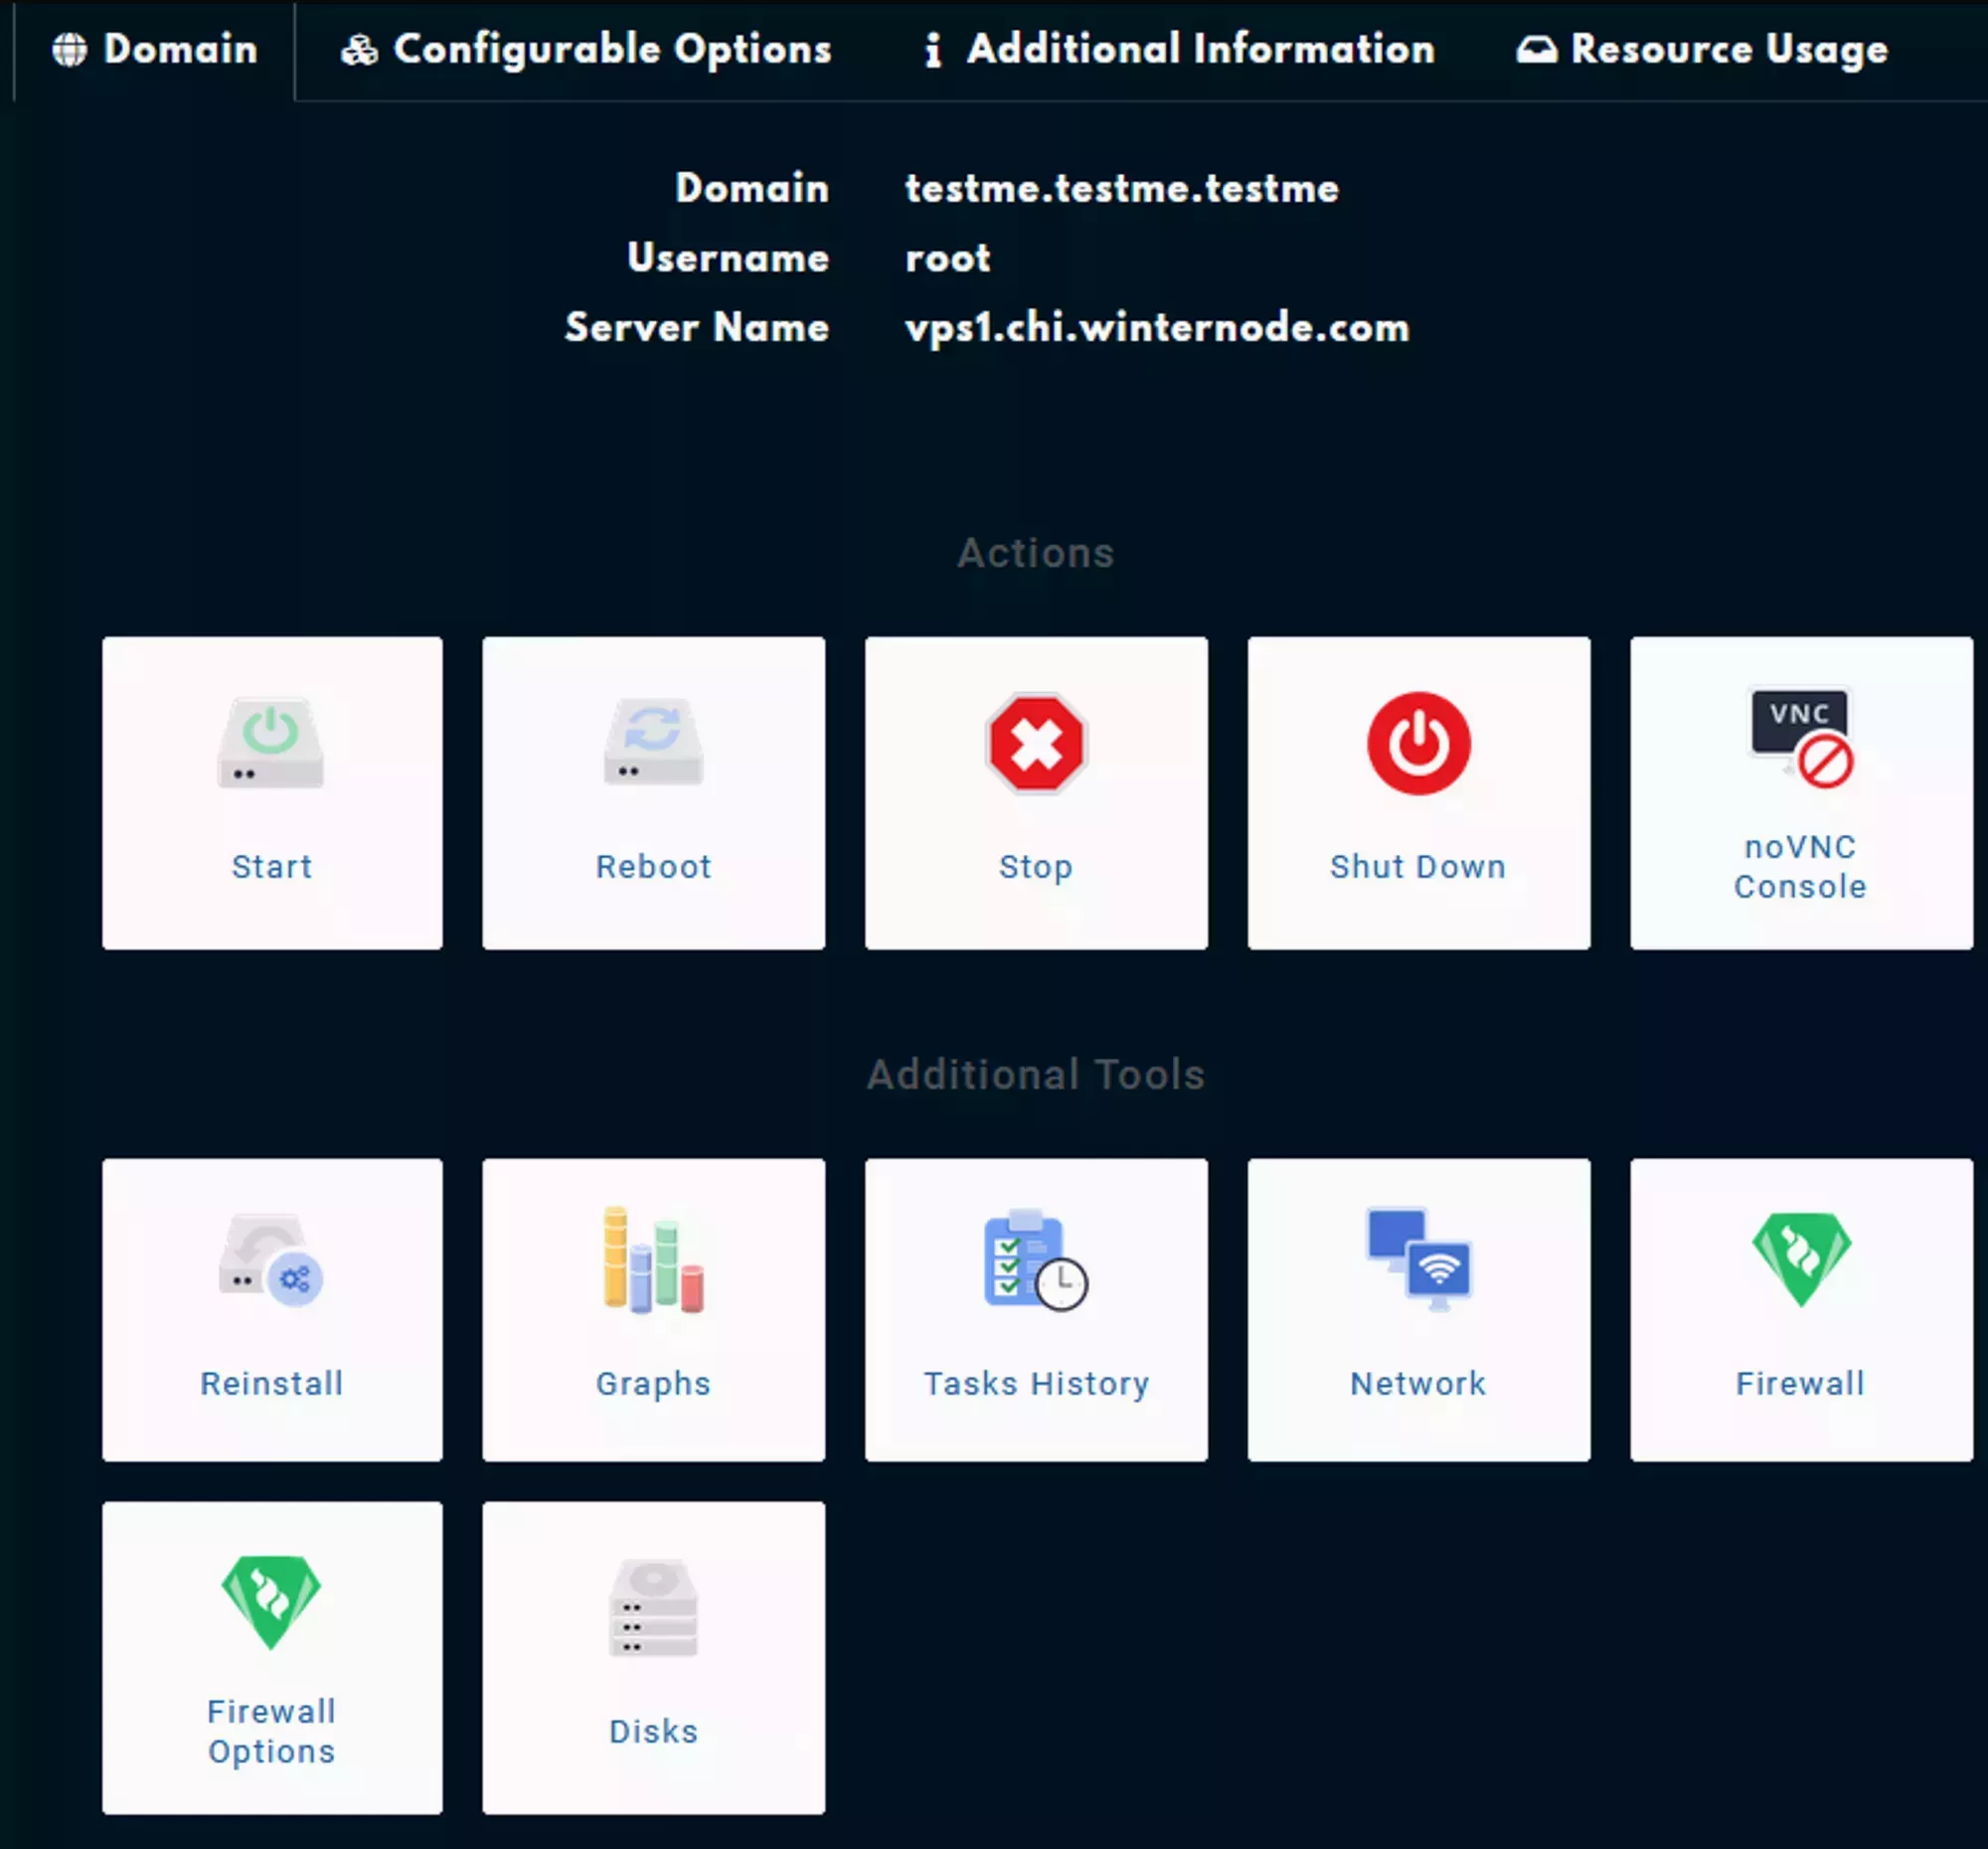
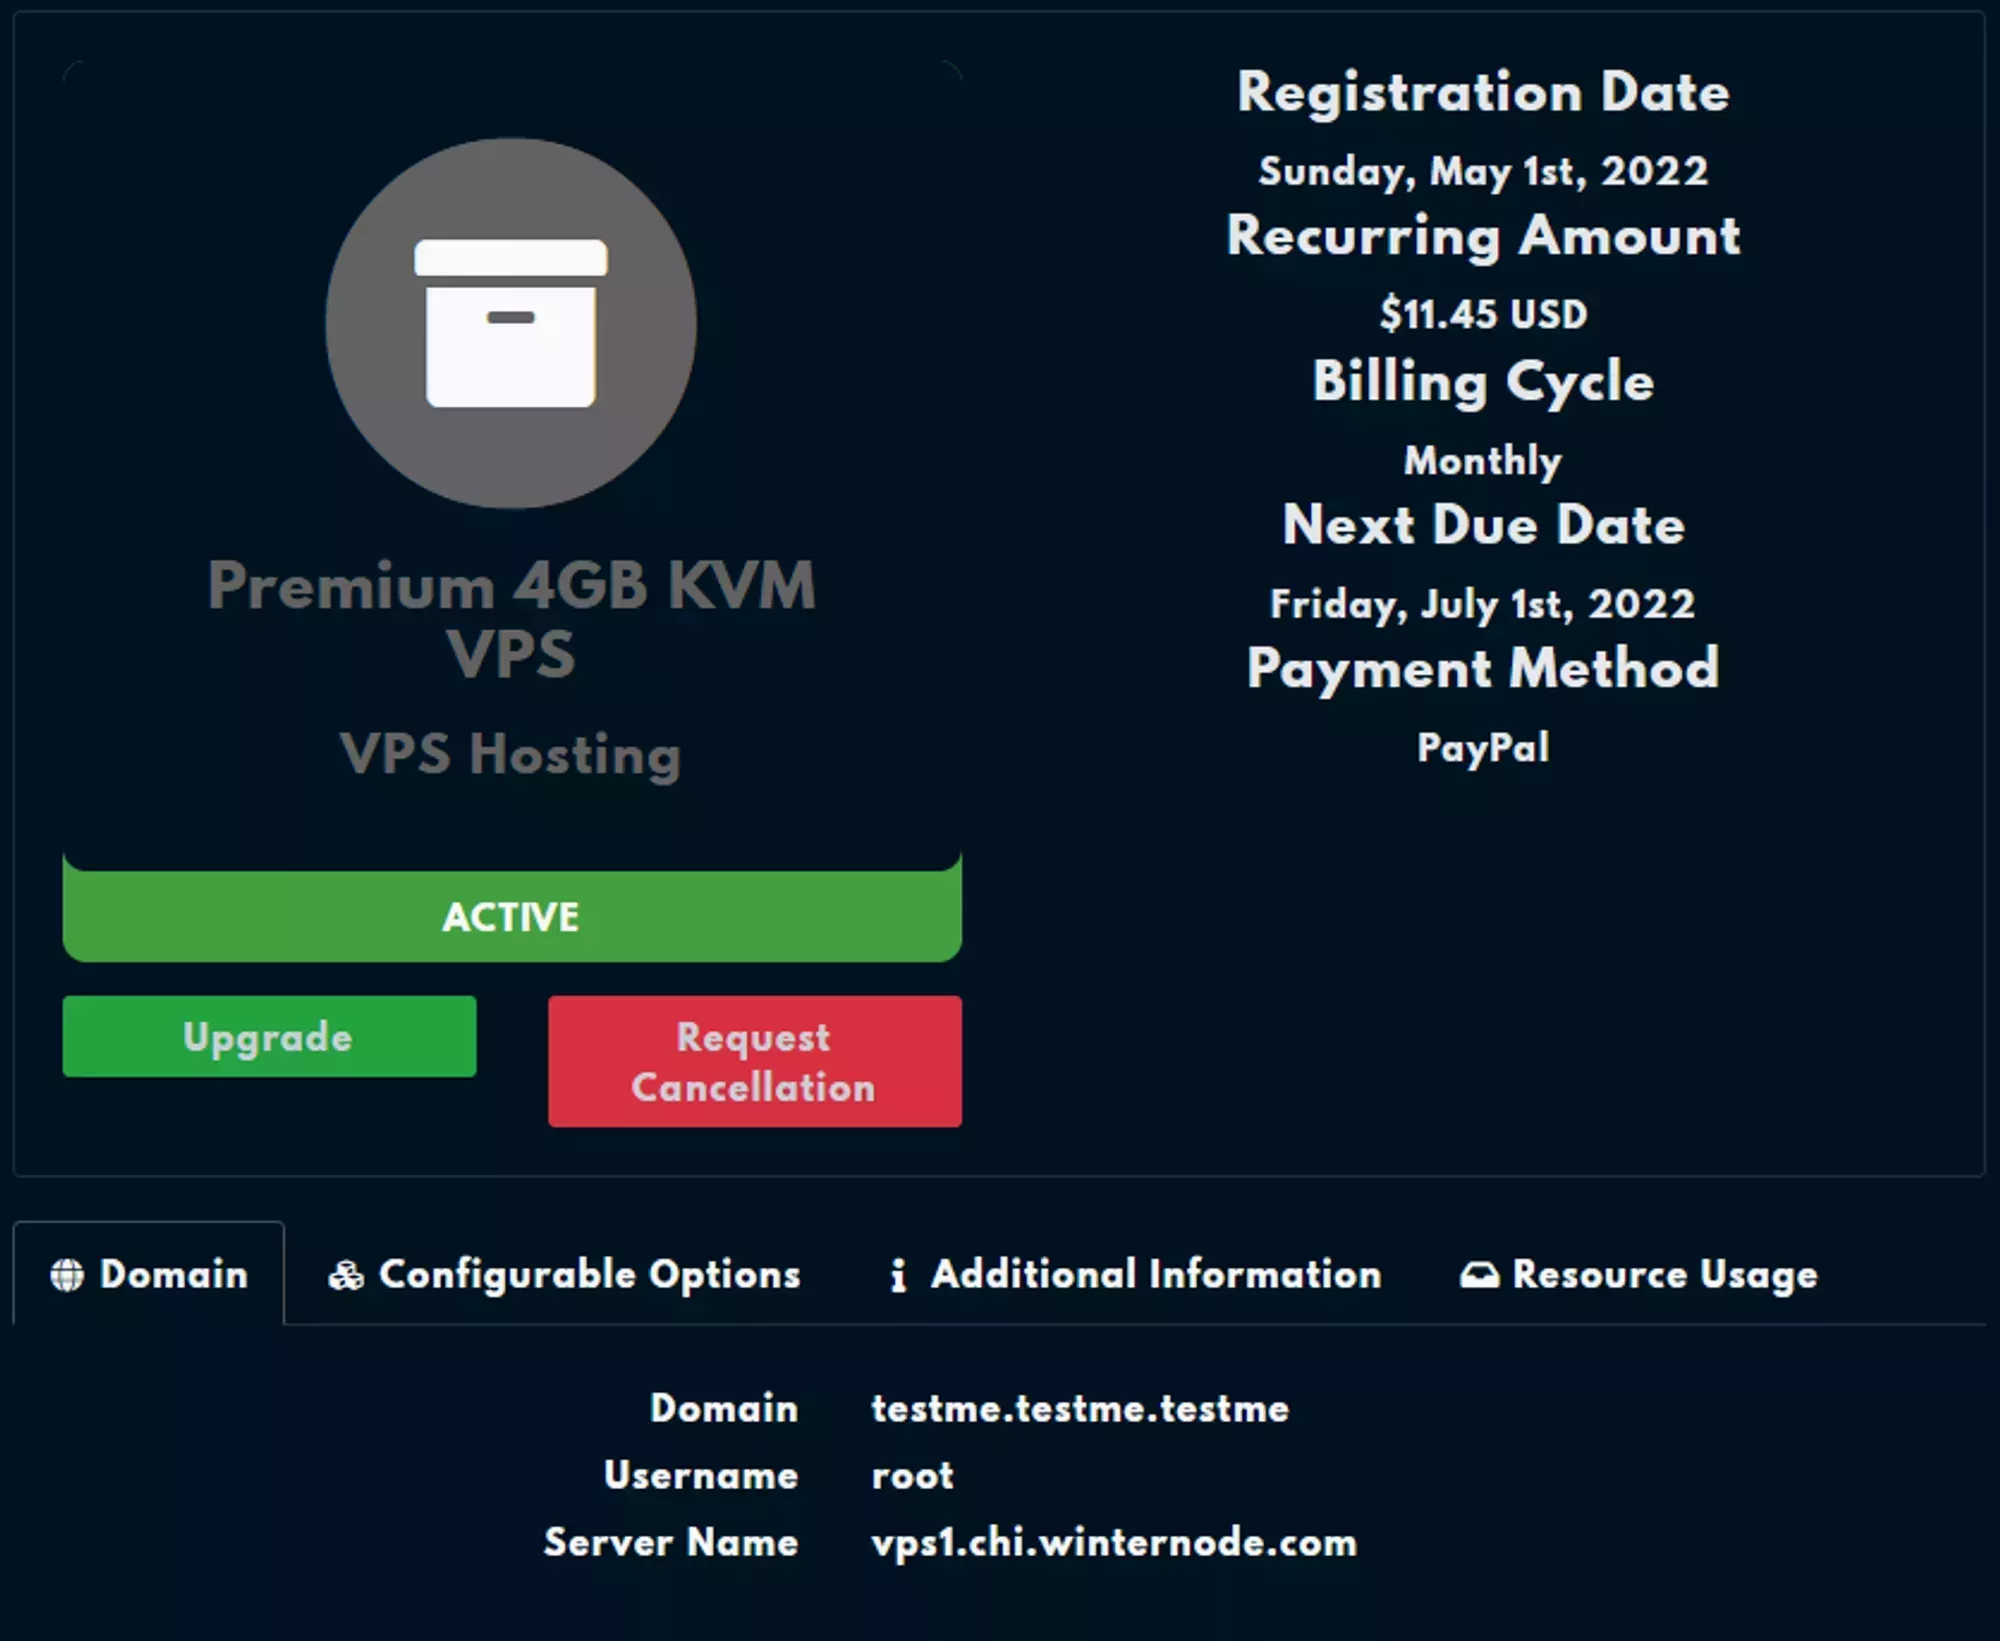
After navigating to your services page, find your VPS Service and select it. You should see a page that looks similar to the one shown on the right. If you scroll down and look under the Domain tab, you’ll find the VPS Panel for the VPS Service. It should look very similar to the one shown below and will control only this VPS.
 Loading...
 Loading...
 Loading...
Information Pane
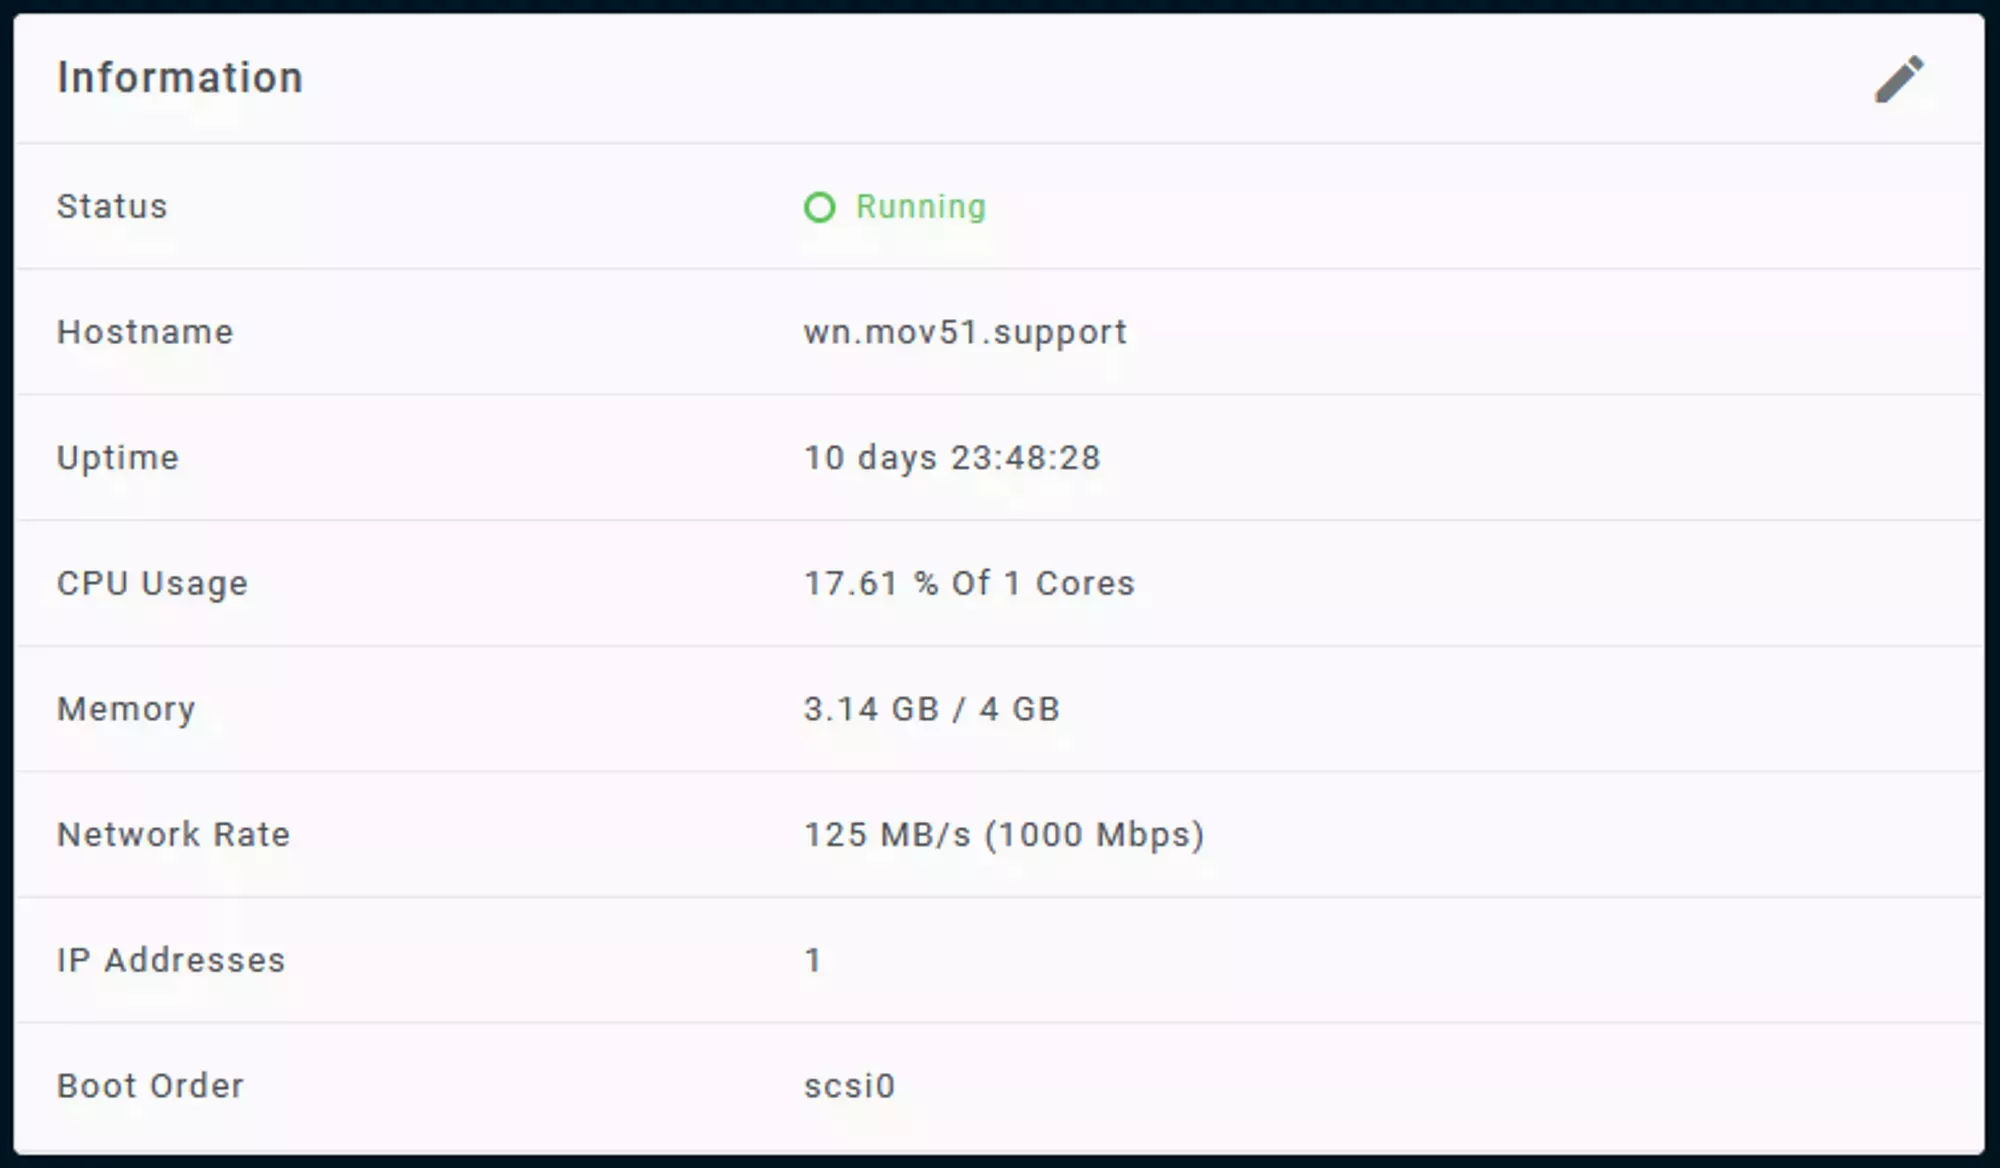
The Information Pane is a pane located below the Additional Tools Pane and contains basic information about your VPS such as it’s status, uptime, and current resource usage. It also allows you to edit some of the more obscure options for your server including the host name and boot order.
You can open the edit window by clicking on the pencil icon located on the top right.
 Loading...
Power Management
You can use the VPS Panel to control the Power State of your VPS. This allows you to Start, Shut Down, Reboot, or Stop your VPS without relying on the VPS’s system, meaning that it doesn’t have to be online or responsive.
 Loading...
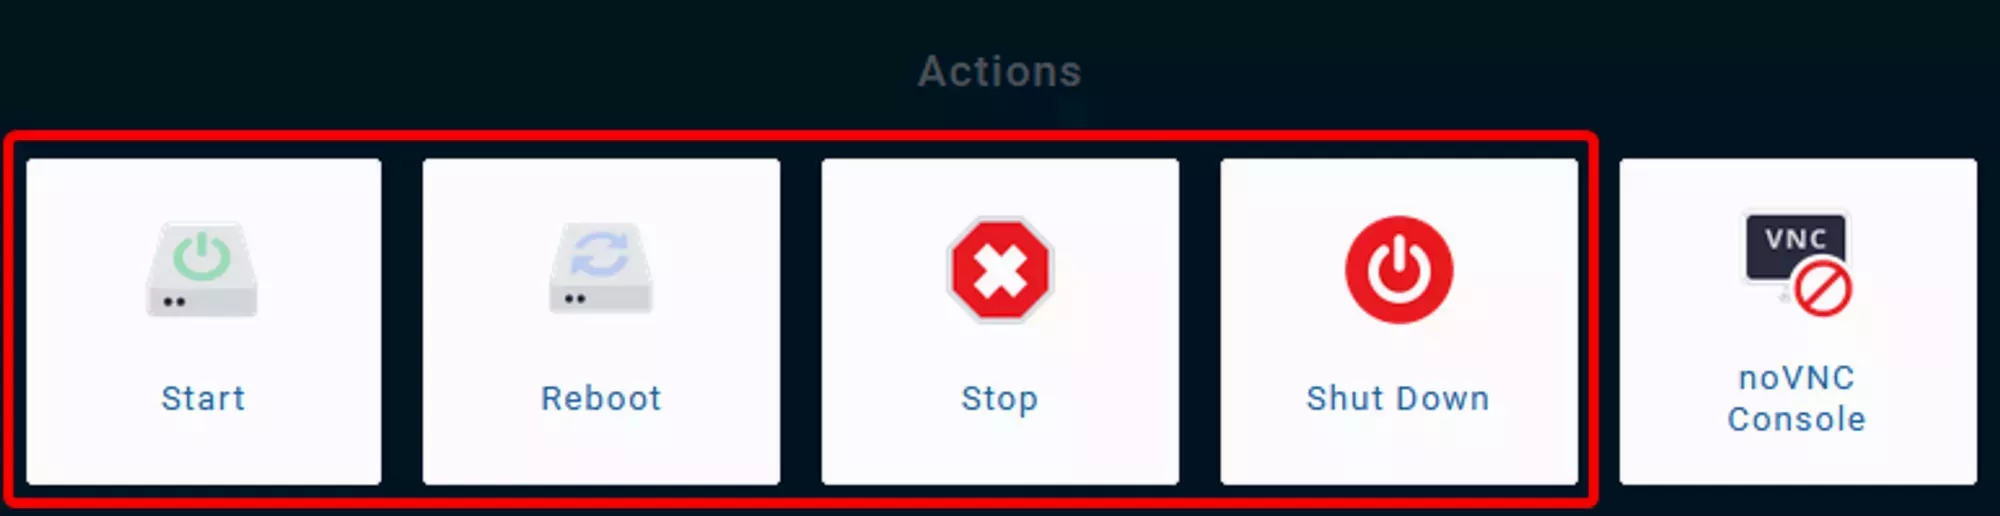
You’ll find the Power Management buttons in the Actions section of the VPS Panel. Each button does what it says with little to no hassle, with Start and Shut Down being the standard On and Off buttons, Reboot Gracefully Shutting Down the Server and Starting it back up, and Stop acting as an immediate kill switch.
Loading...
You’ll find the Power Management buttons in the Actions section of the VPS Panel. Each button does what it says with little to no hassle, with Start and Shut Down being the standard On and Off buttons, Reboot Gracefully Shutting Down the Server and Starting it back up, and Stop acting as an immediate kill switch.
Firewall
One of the most important features you manage through the VPS Panel is the Firewall. It’s where you’ll manage connection filters for your VPS before they reach their destination.
This is different from the Firewall on your VPS in that any connections that are dropped or rejected are intercepted regardless of the state of your VPS, which greatly increases the security of your VPS if it gets hacked or has malicious software installed. You’re able to modify the connections that can leave or enter your VPS without relying on the VPS’s systems and can regain control. This Firewall can not be modified from within your VPS and as a result acts as another layer of security should your VPS be compromised.
 Loading...
 Loading...
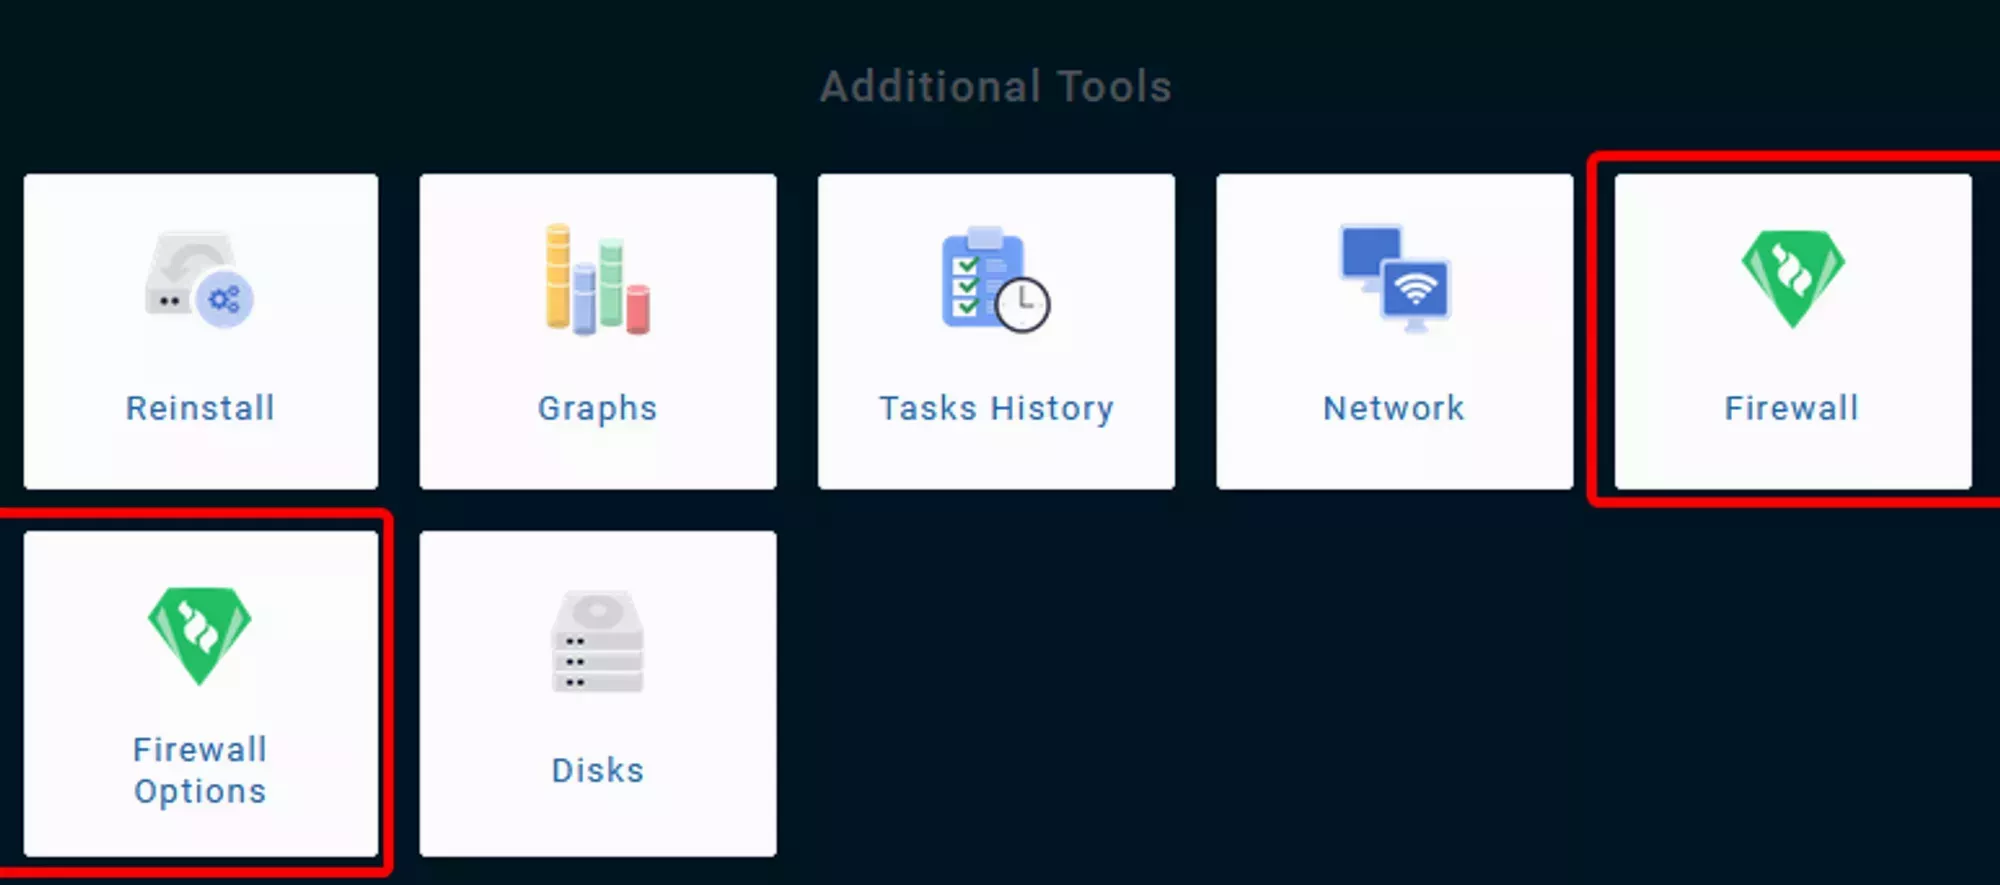
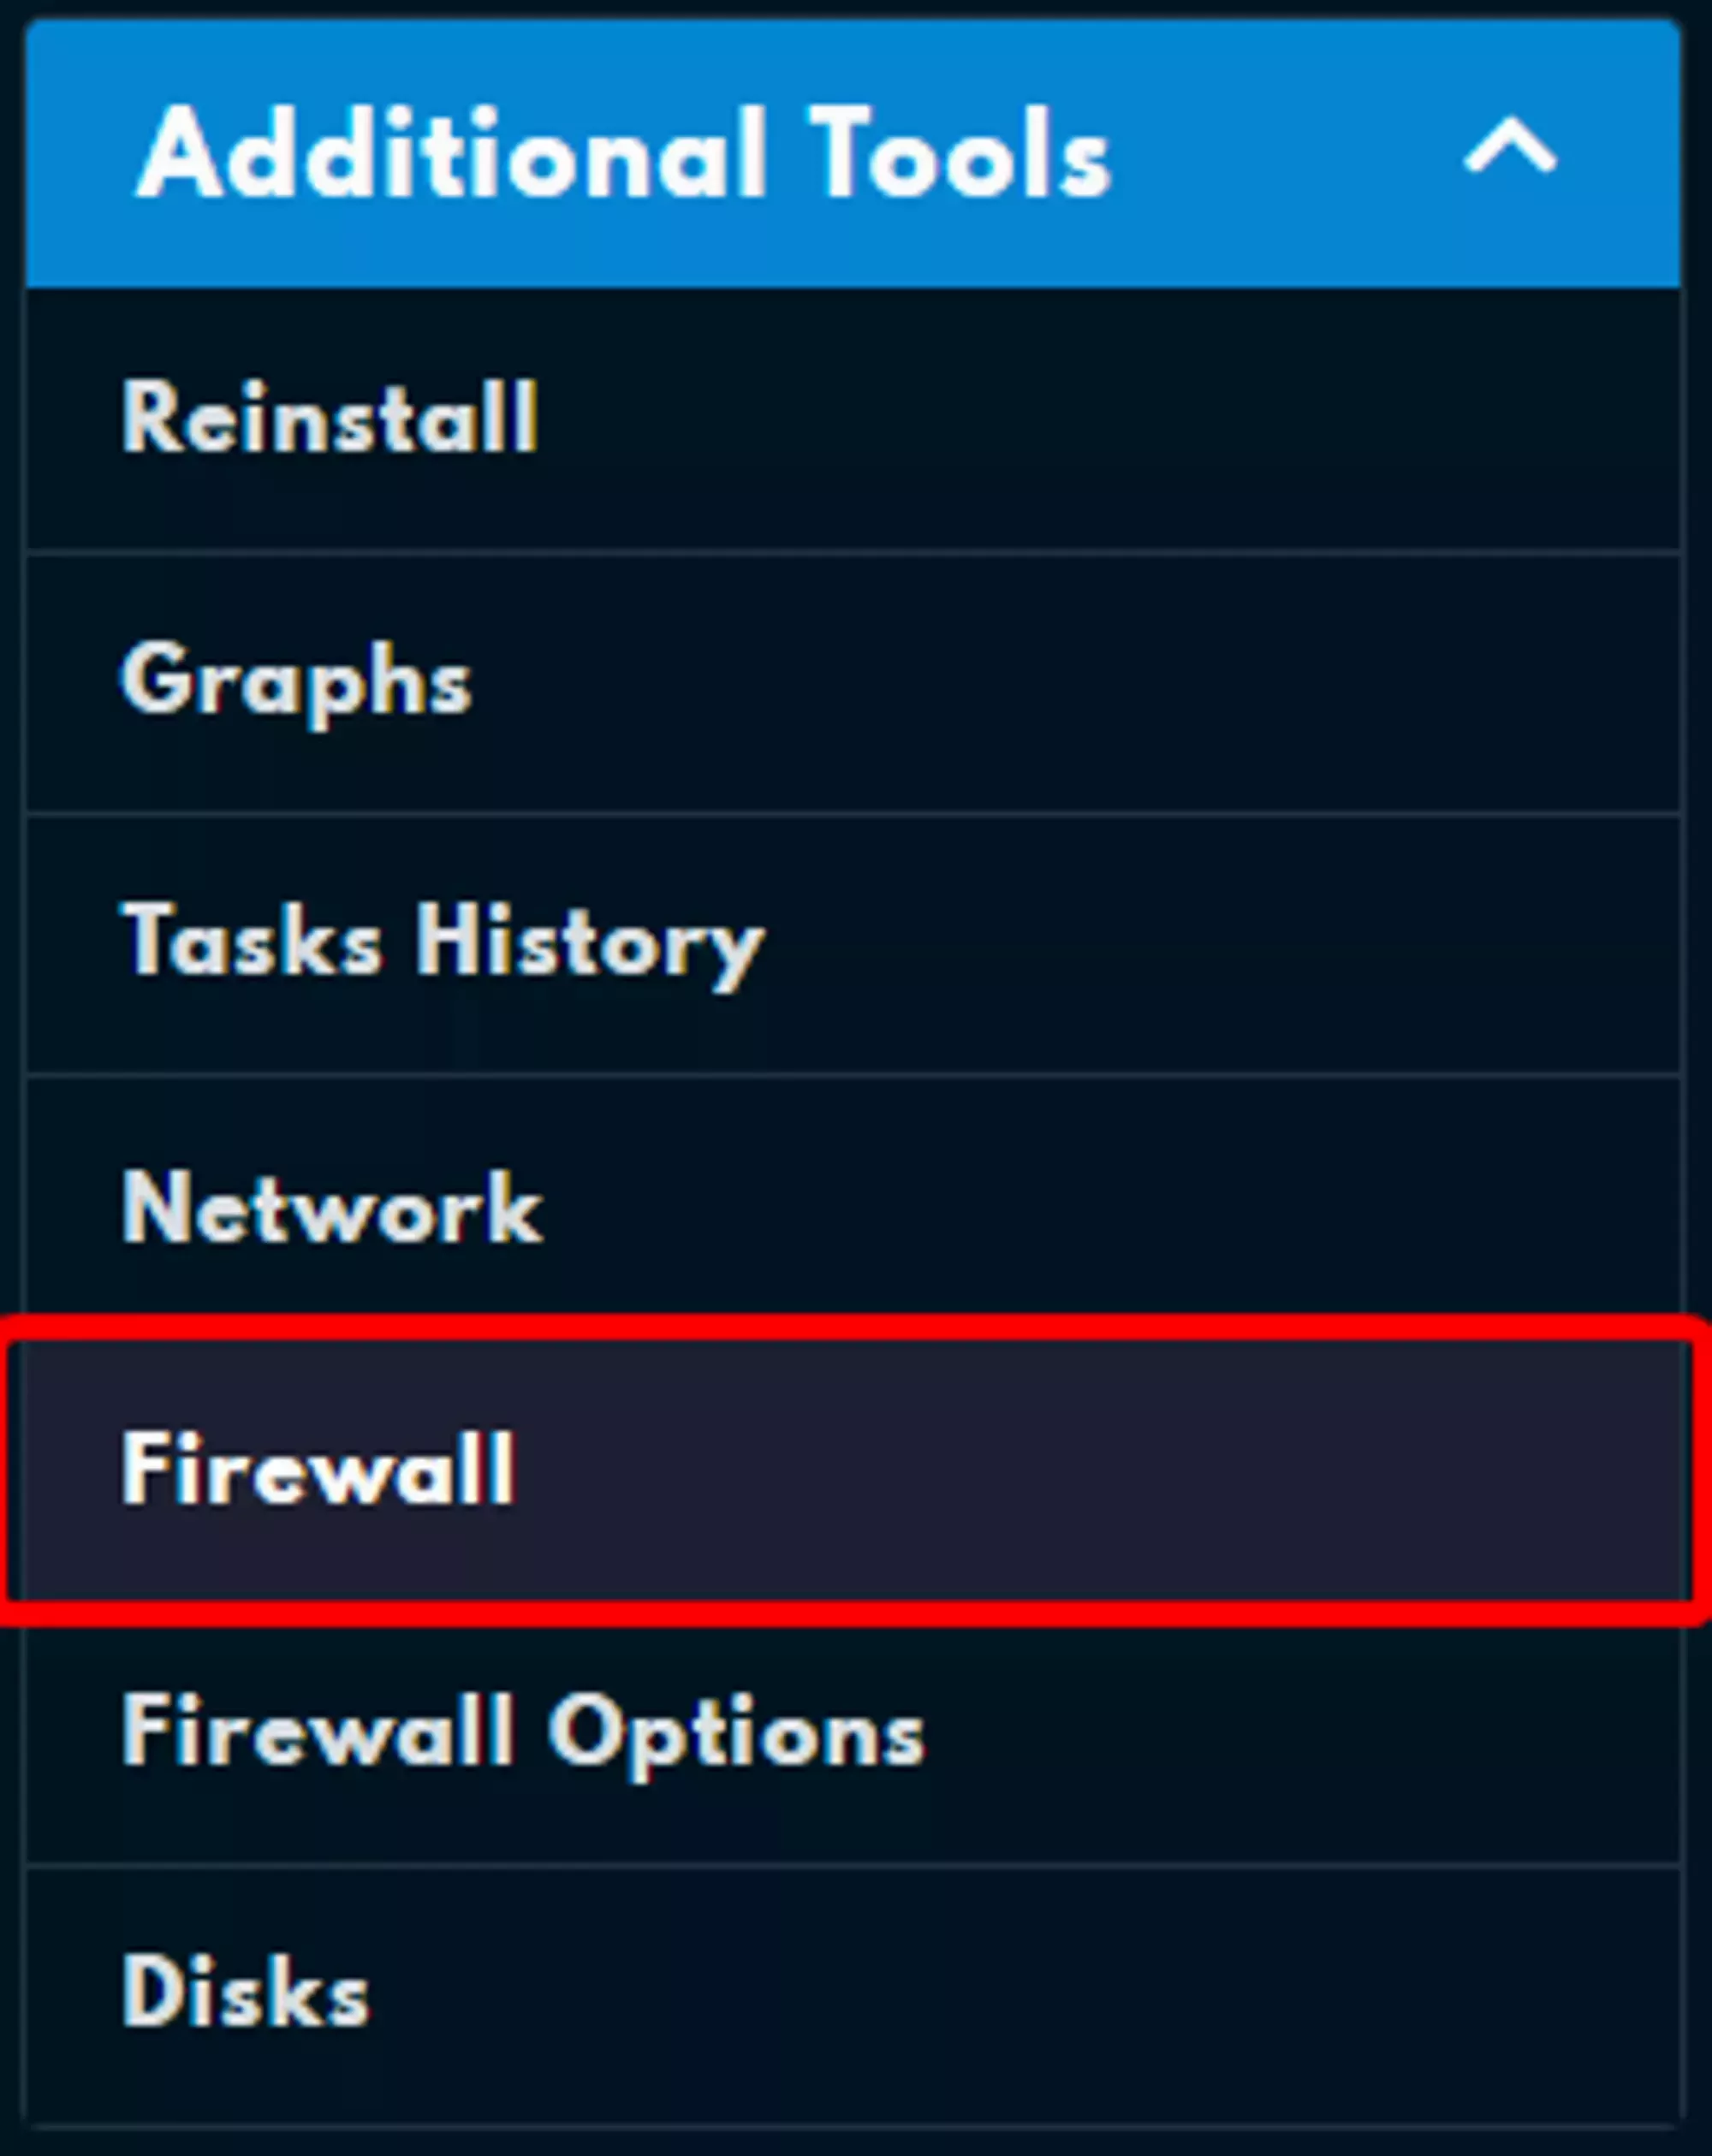
You can find the two sections for controlling your Firewall in the Additional Tools section of the VPS Panel or on the Additional Tools section of your sidebar when viewing your VPS Service. There is a Firewall and Firewall Options section where the Firewall section contains the Firewall Rules that you’ve set and allows you to set more and the Firewall Options section allows you to change how Firewall Actions are logged. We’ll be going over the details of how each of these sections functions and how you can use them below.
Firewall Usage
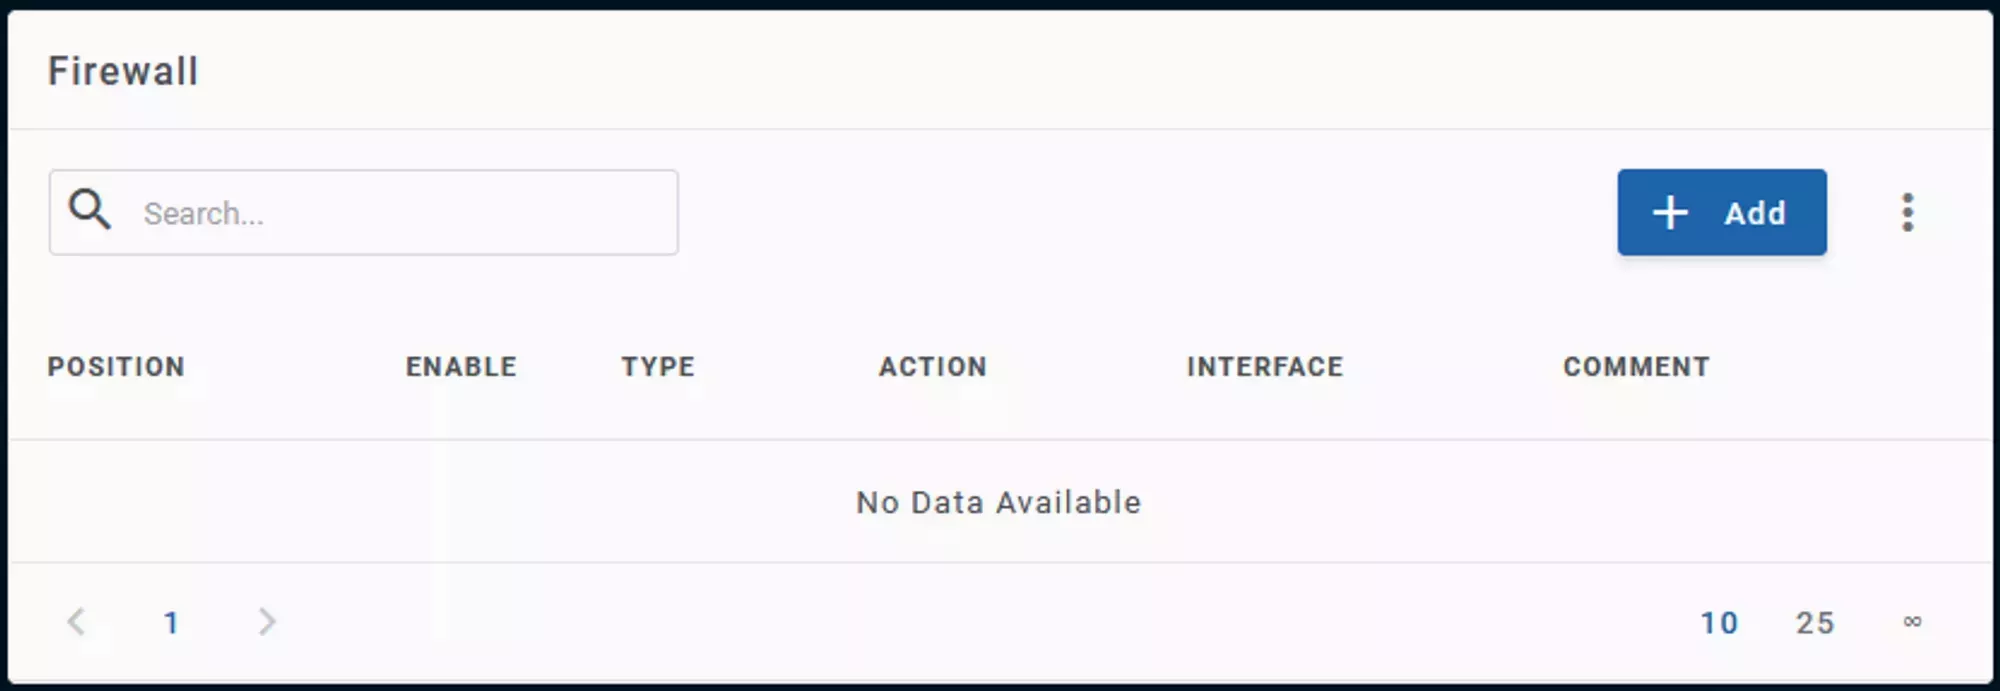
This is the area where you can view, add new, or edit/remove existing Firewall rules. These rules will take effect immediately after enabling and are prioritized by their position on the list.
 Loading...
Adding a new Firewall Rule
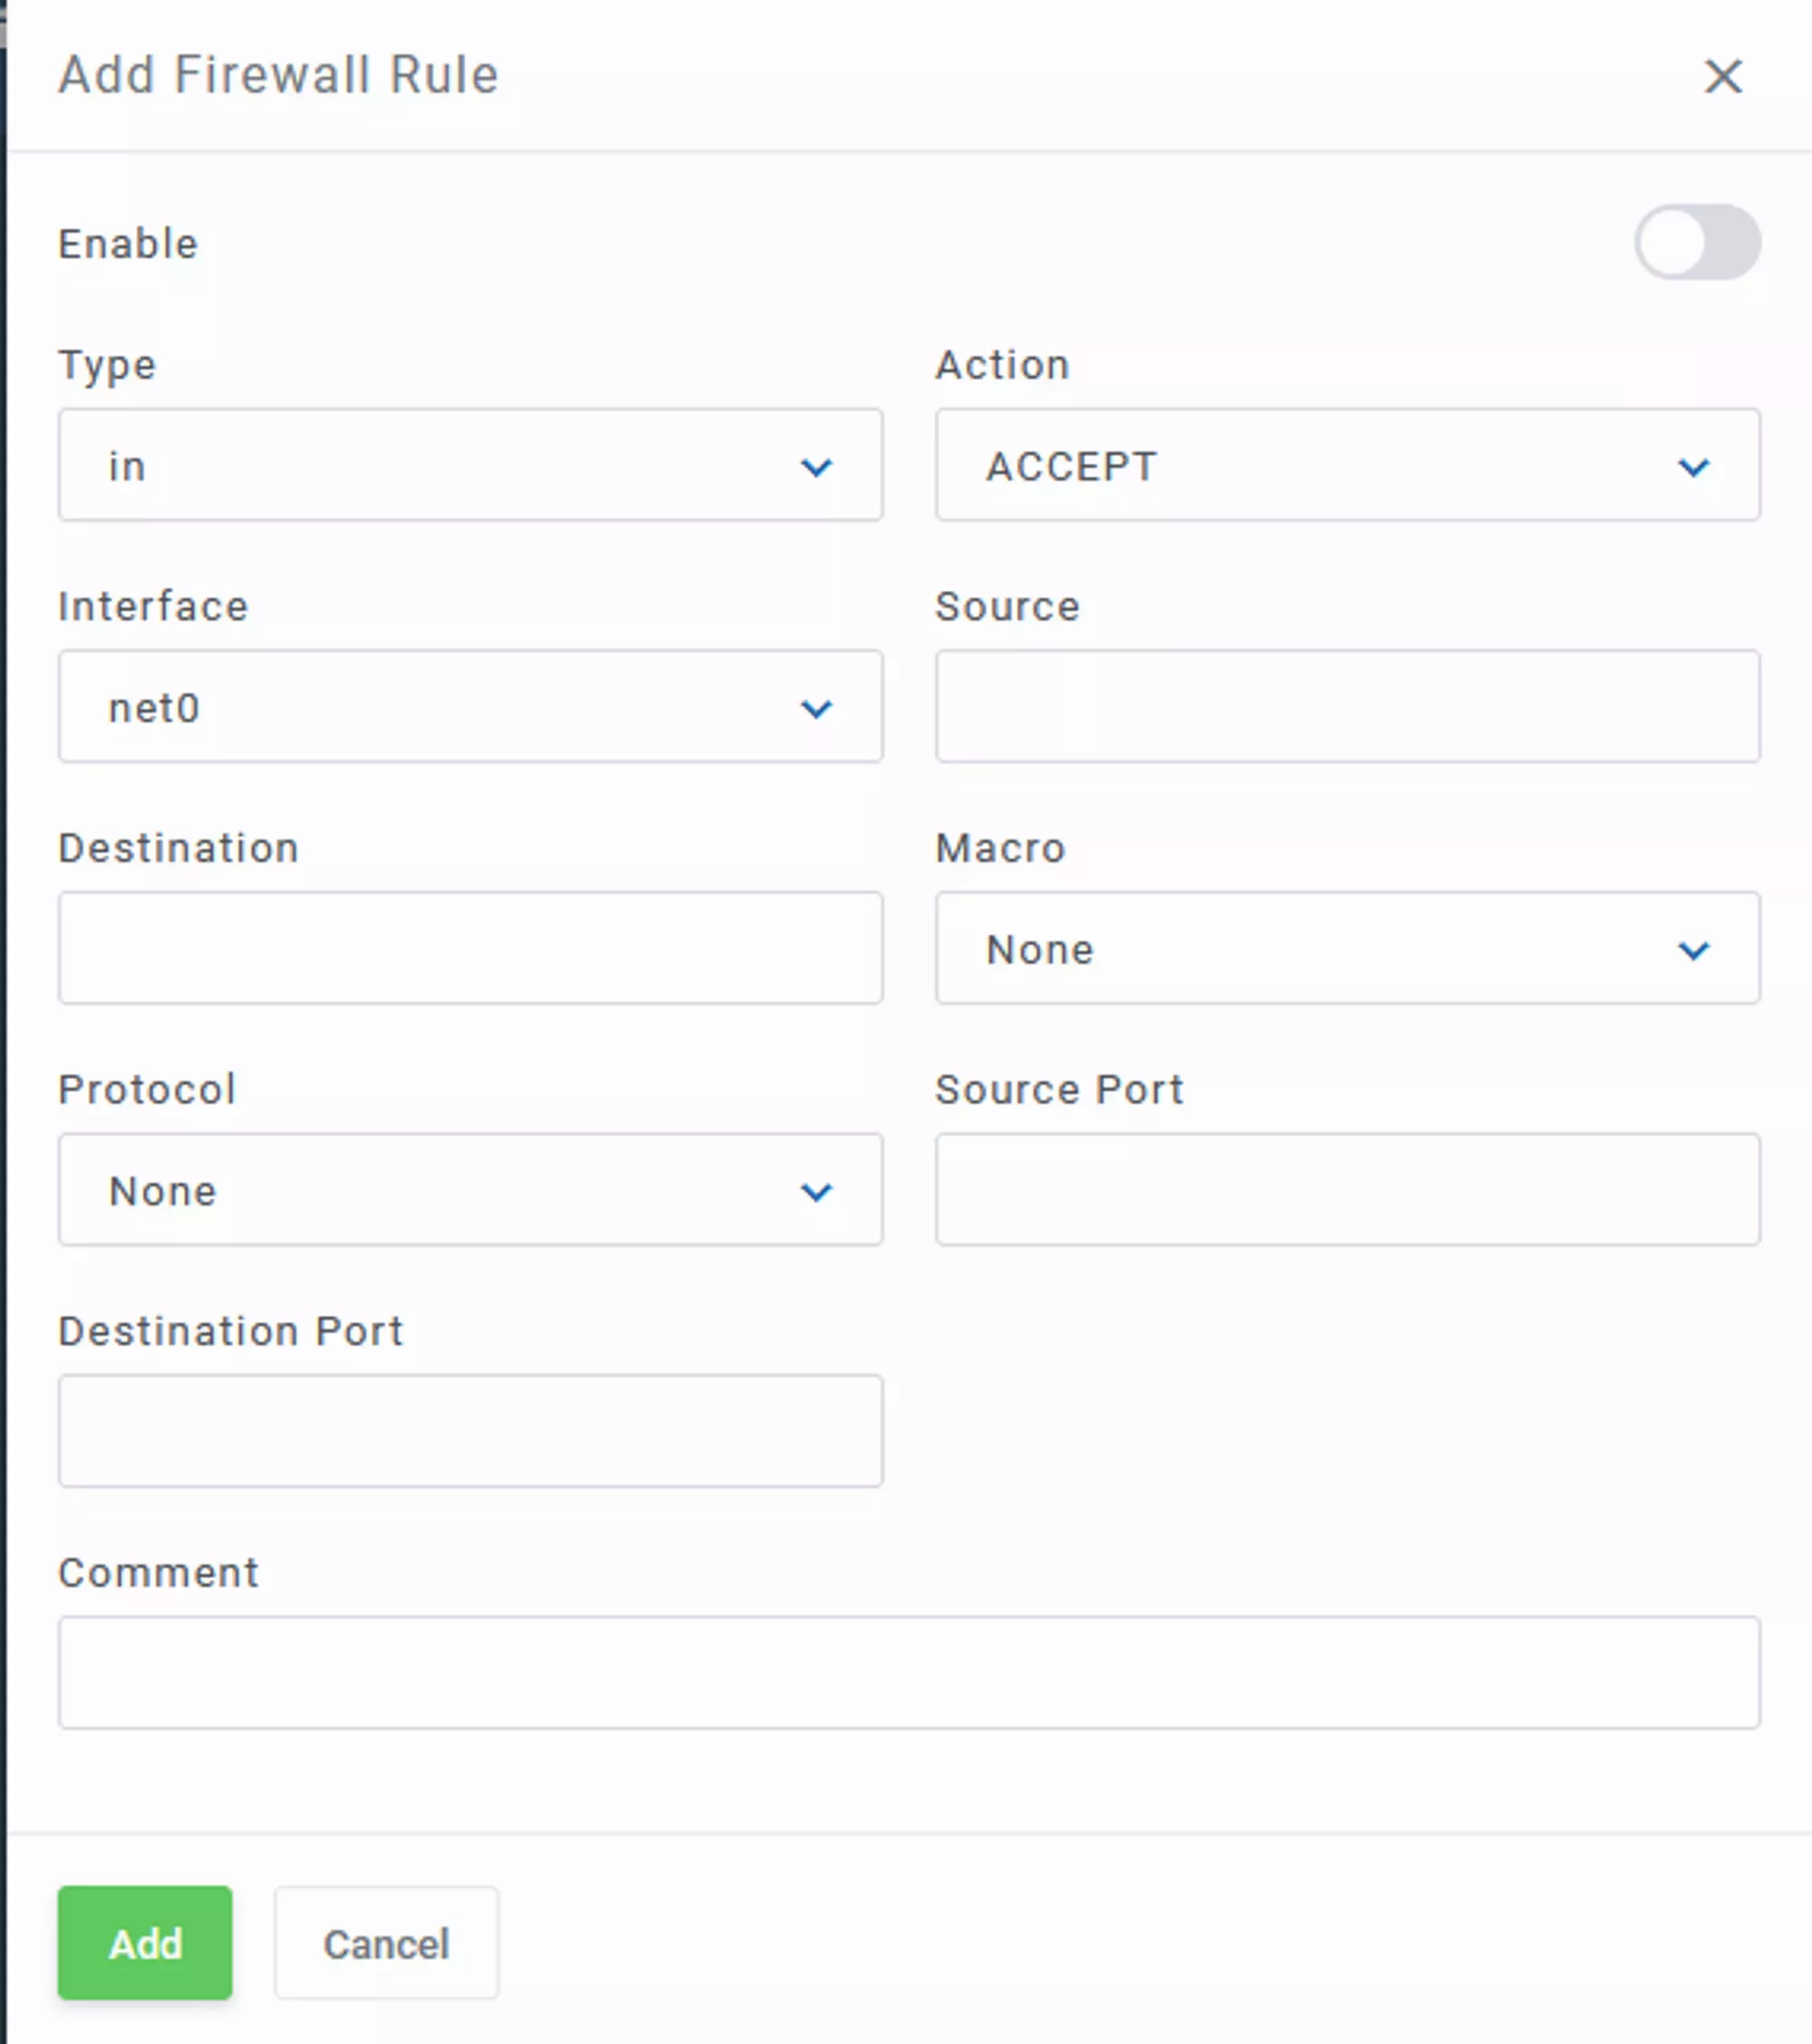
You can add a new rule to your Firewall by clicking the New Button on the top right of the Firewall window. That should display a prompt titled Add Firewall Rule that looks similar to the one shown on the right.
There’s a lot of nuance to how Firewalls can function, so we’re just going to cover the overview of how to interact with our VPS Panel in order to get your desired Firewall rules implemented. If you need a jumping off point for Firewalls, check out this tutorial.
 Loading...
With the Add Firewall Rule window open, you can select the details of your rule. You will need to select the protocol you’re filtering in order to create your rule, but every other field can be left either default or selected from any of the drop-downs. Most of the protocols are shown spelled out instead of being abbreviated, so UDP is User Datagram Protocol, so that may require some adjustment when looking for the protocol you need.
There is also a Macro field, that supplies a selection of “default” options for some common firewall sources. Using this will grey out your Protocol, Source Port, and Destination Port fields and won’t use any data you entered into them before selecting a Macro.
A new Rule will be disabled by default, you will need to enable it after creating it for it to take effect.
 Loading...
Removing an Existing Firewall Rule
You can remove an existing Firewall Rule by clicking the trash can icon on the far right of the Rule Entry. This will open a confirmation prompt and then cascade the position of any rule that exists after it.
 Loading...
If you would like to test your Firewall without the rule or might need the rule again, you can toggle the rule for the same effect. Use the enable switch on the left side of the Rule Entry to enable or disable the Entry.
Loading...
Editing an Existing Firewall Rule
You can change the values of existing Firewall Rules with the same control you had when creating it by using the pencil icon on the right side of the Rule Entry. Clicking the icon will open a prompt titled Update Firewall Rule and will have the same requirements as creating a rule but with your previous values saved.
 Loading...
You can also reposition existing rules in the list. This will change which rules take priority if there are any conflicts. The first rule that matches a request will be the one that handles it, any rules after that will never trigger. The arrows on the left side of the Rule Entry, just before the edit icon we mentioned above, can be used to move it up and down.
Loading...
You can also reposition existing rules in the list. This will change which rules take priority if there are any conflicts. The first rule that matches a request will be the one that handles it, any rules after that will never trigger. The arrows on the left side of the Rule Entry, just before the edit icon we mentioned above, can be used to move it up and down.
 Loading...
Re-install
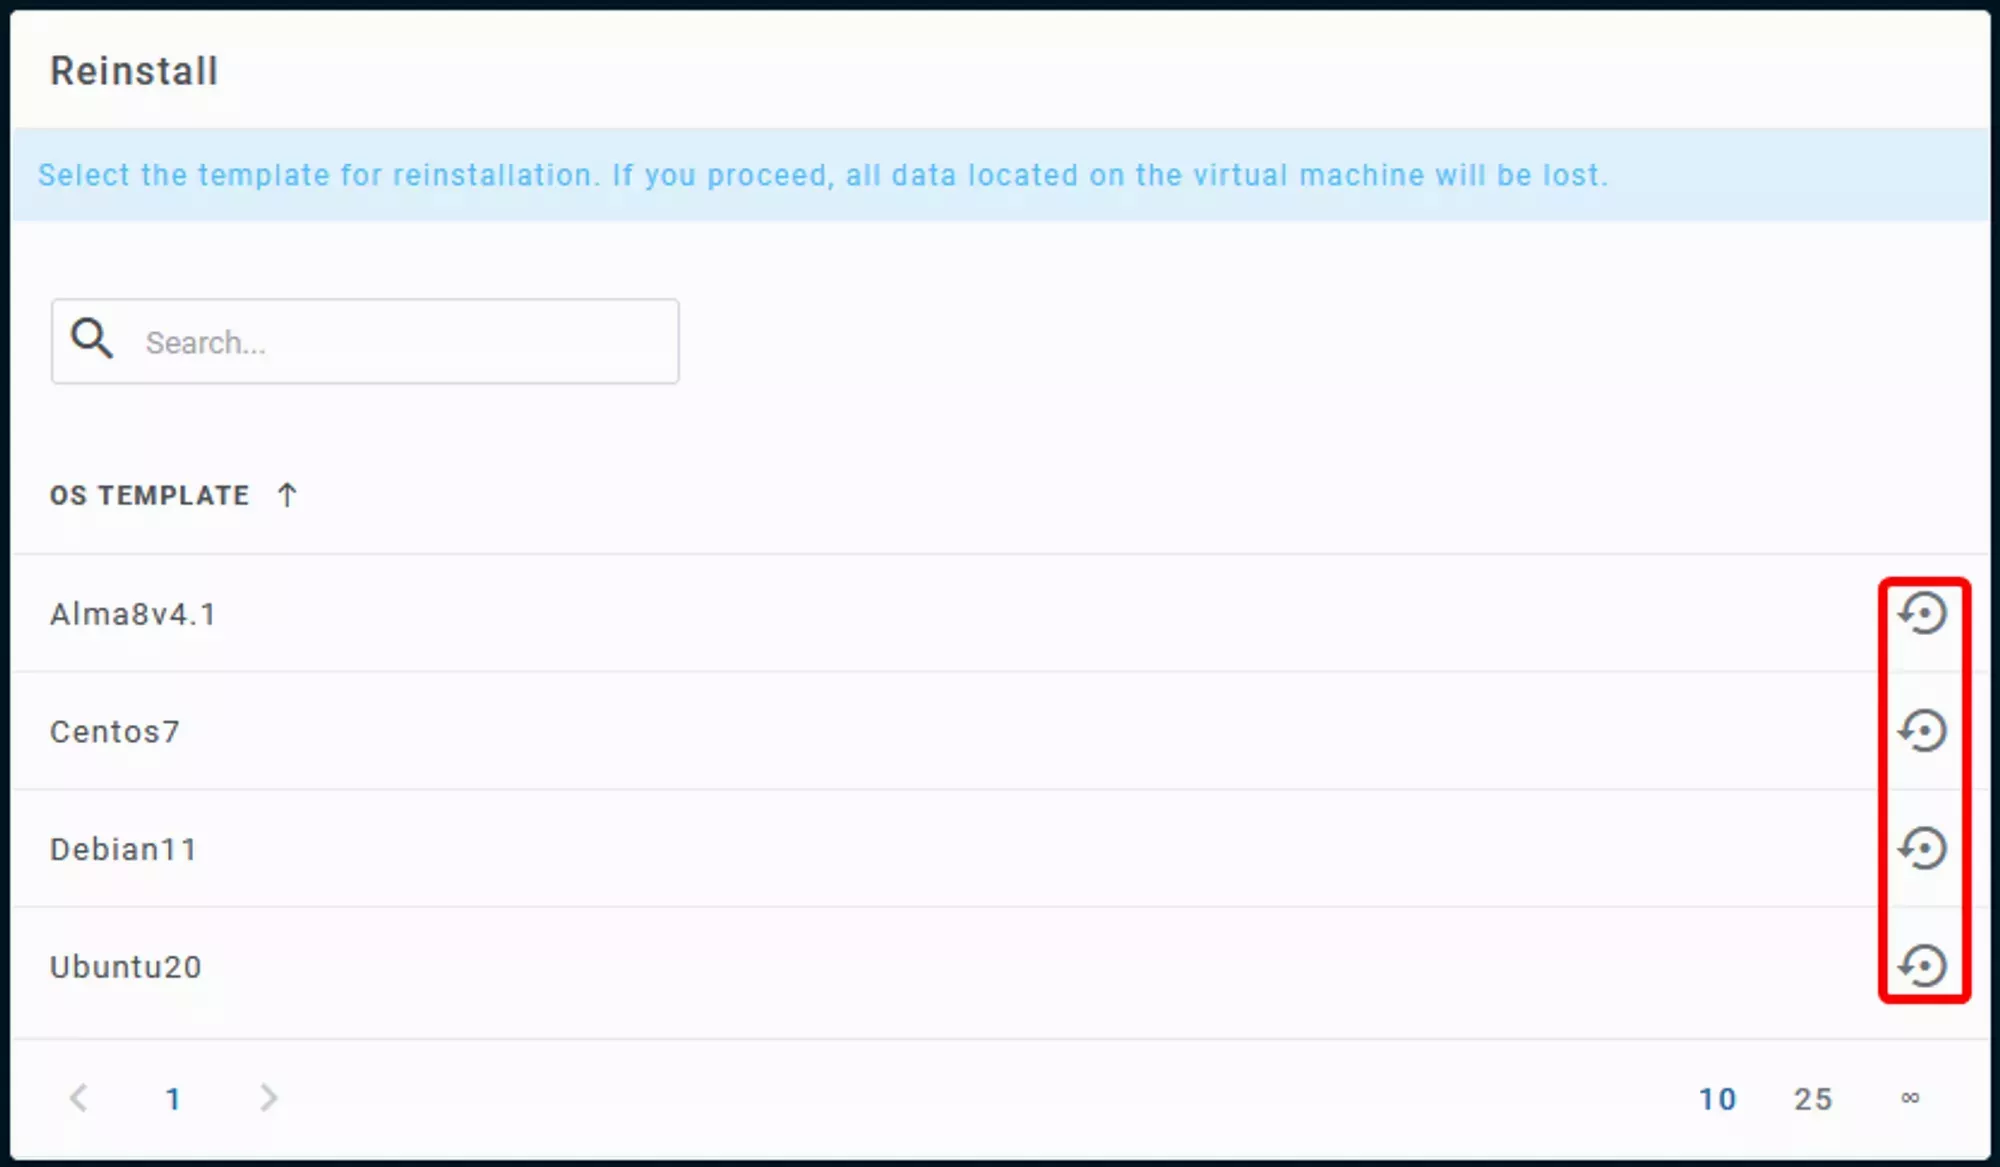
You can reinstall your server with one of our provided OS templates. This is helpful when you need a fresh start on your VPS or when you need a different Operating system than what is currently installed.
This is a destructive process! You will loose all of the data on your VPS and there will be no way to get it back.
 Loading...
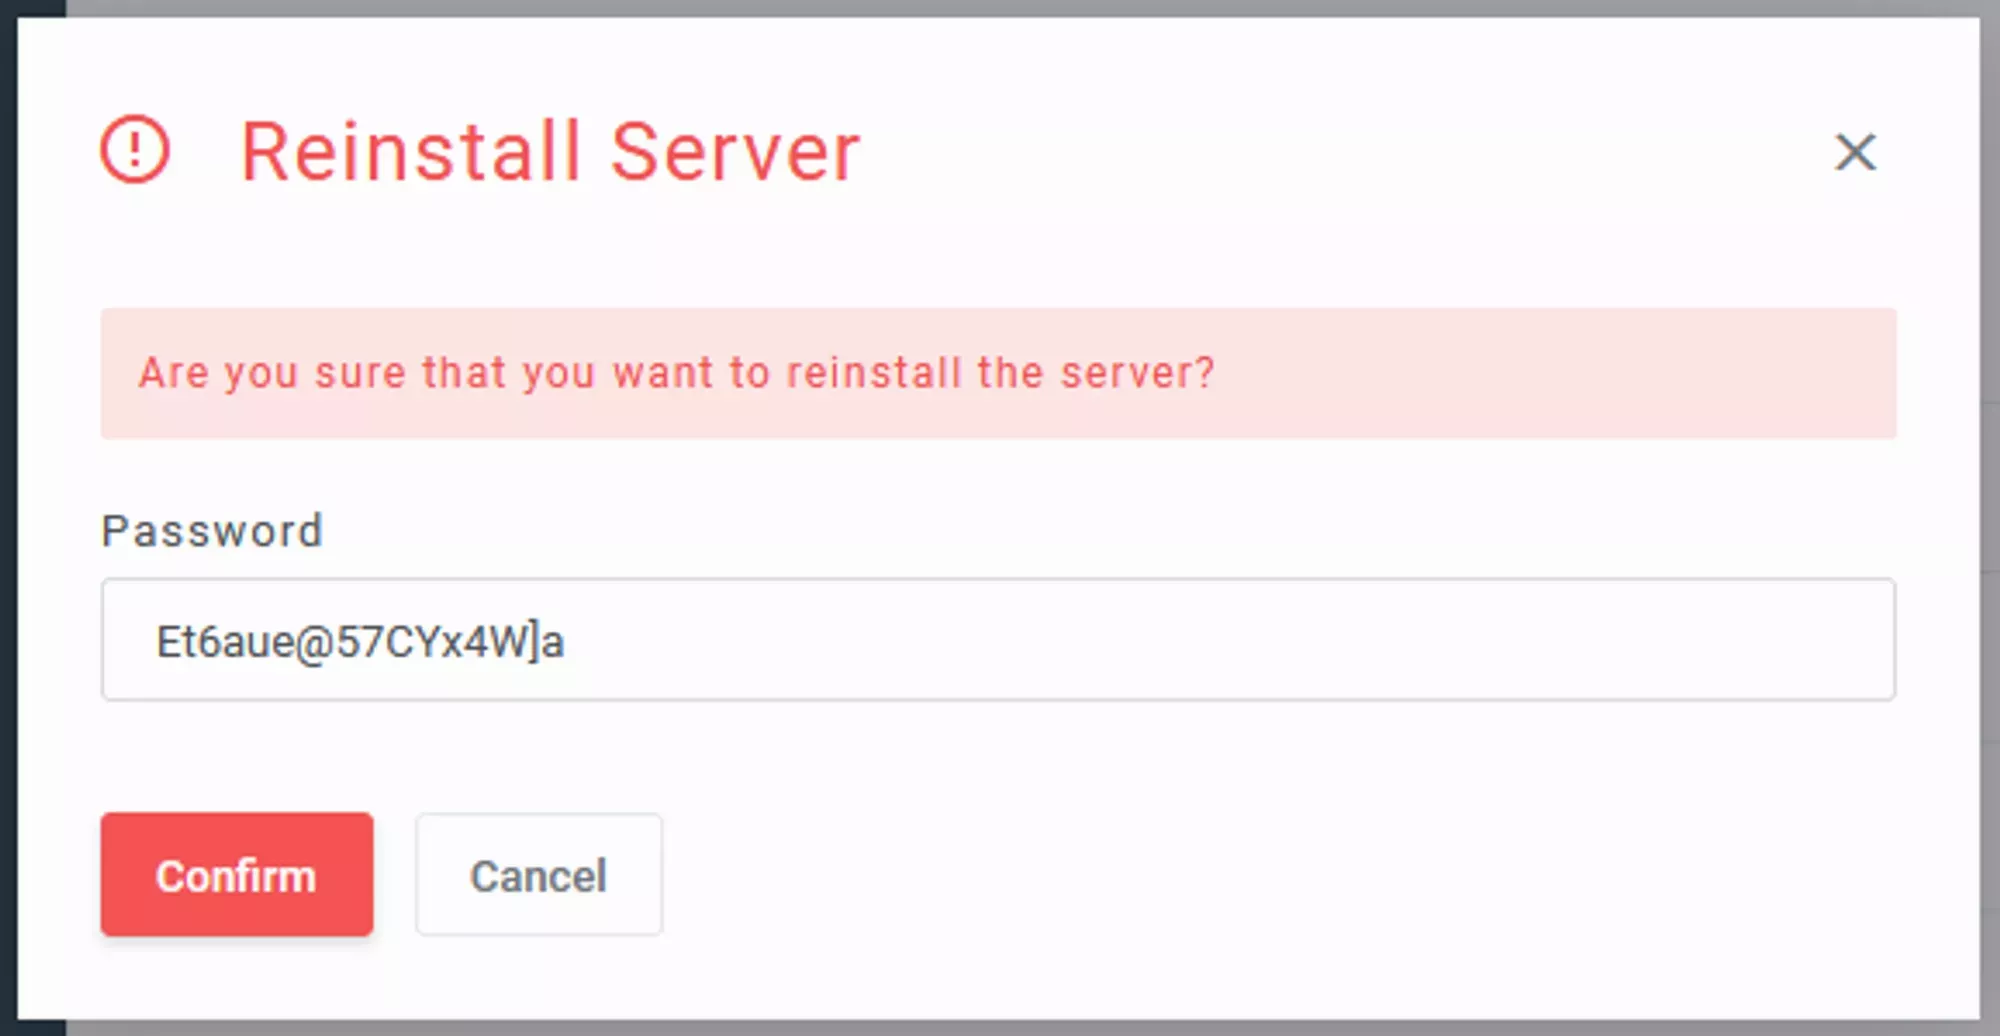
Selecting the template will bring up a confirmation page similar to the one shown to the right with a randomly generated password for your root login. After confirming that you want to reinstall your server, your VPS service page will look like the one depicted below until your VPS has been rebuilt.
 Loading...
If your VPS hasn't been rebuilt within 5 minutes, reach out to us via ![]() Discord or a
Discord or a ![]() Client Area Ticket and we’ll do everything we can to assist you!
Client Area Ticket and we’ll do everything we can to assist you!
 Loading...
Graphs
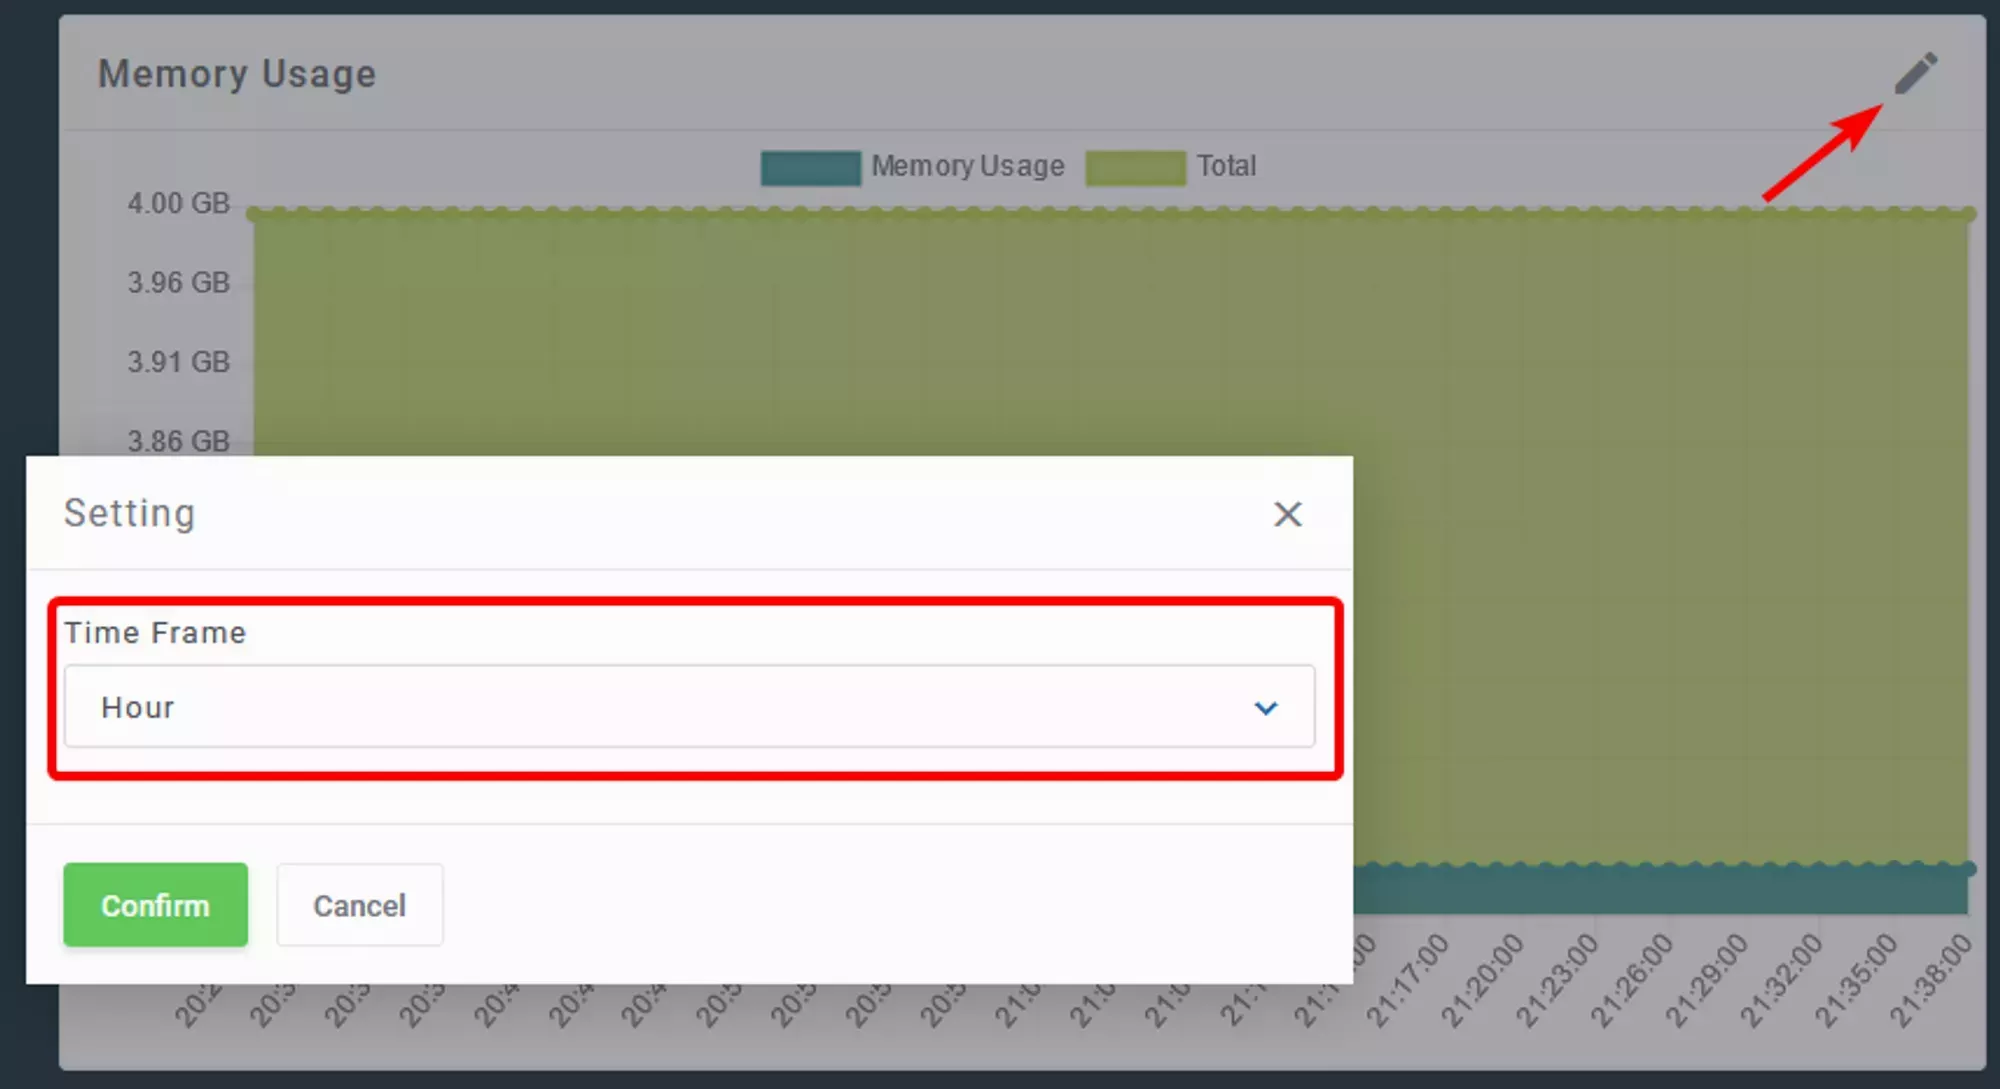
The Graphs page shows the historical usage of your VPS’s CPU, Memory, Network, and Disk IO over up to the last month. By default when you open the Graph Page, each graph should display the the usage over the last hour, but you can change the time frame by clicking on the Pencil Icon on the top right of the graph you’d like to adjust as shown below.
 Loading...
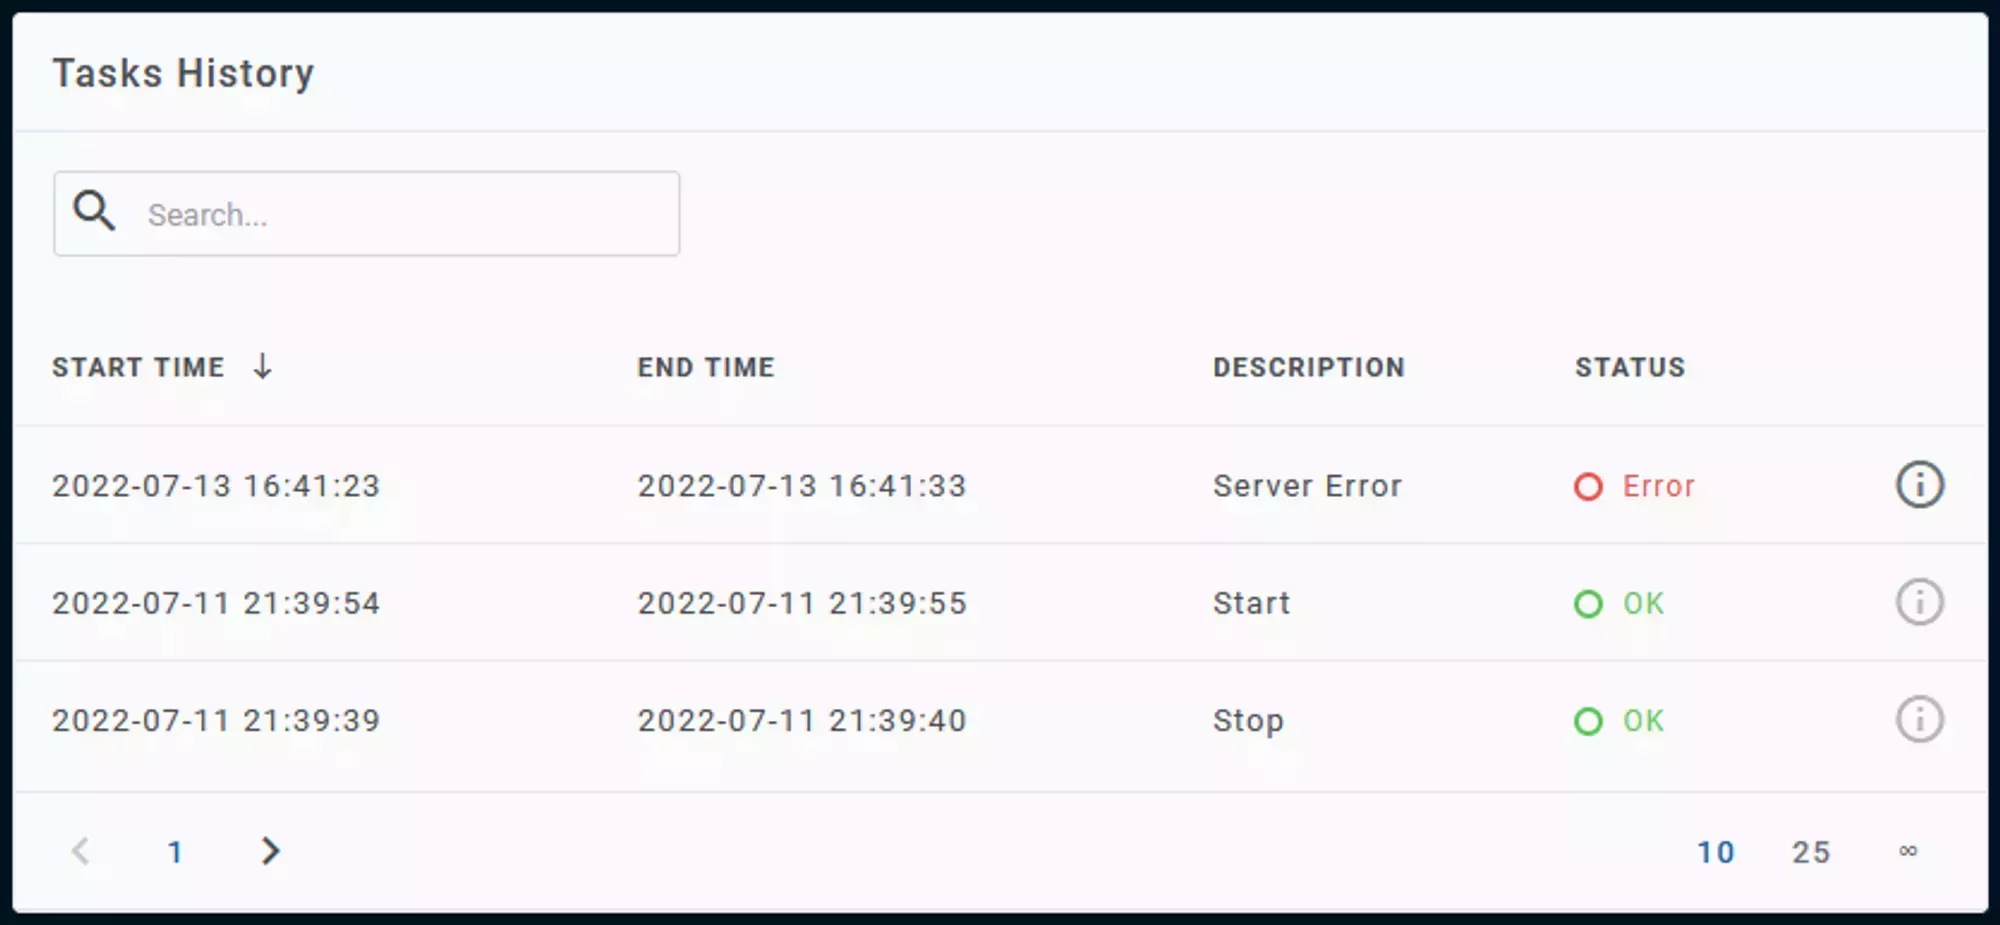
Task History
The Tasks History page shows a log of error and status changes regarding your VPS from the panels perspective. This includes starts, reboots, stops, and VNC errors, but will not include any errors regarding software installed on your VPS.
 Loading...