Folder Compression/Decompression
File compression is incredibly helpful when uploading a lot of small files over SFTP, even if all together they don't amount to much. SFTP takes time to upload each file regardless of its size, this is called overhead. When you're transferring a single large file, that initial transfer time is essentially the same as if it were a much smaller file.
The result of there being overhead is that it's better to compress, or zip, a folder before uploading it over SFTP. This includes folders that contain Game Saves, Player Data, Configuration Data, or just generally a large amount of individual files.
Where to start


File compression is a very widespread utility, and for good reason. So it's extremely likely that your operating system already has at least a basic compression method installed. We'll go over how to compress files using Windows 10 here, but if you're using MacOS check out Apple's support article here. If you're using Linux, the most common way is to use the unzip, which should be available regardless of distro.
Selecting the files to compress

When you compress a group of files they will decompress with the exact same structure as when you compressed them. For example, if you have folders 1 and 2 inside of a folder named A. When you compress folders 1 and 2 on their own they'll decompress onto whatever folder the compressed file is as their separate folders. But if you compress folder A then you'll get folder A containing folders 1 and 2 as an output into that same folder.
So when you select the files you want to decompress, consider where you're going to place the file when you upload it. The decompression task can overwrite files that already exist without confirmation and will make a mess if you decompress it in the wrong location.
Compressing with Windows 10
Windows 10 has a fairly simple integrated tool for compressing files and folders. It only takes a few clicks to compress what you want but it doesn't offer any control over how it's compressed. However, for a simple SFTP transfer that's enough.
 Loading...
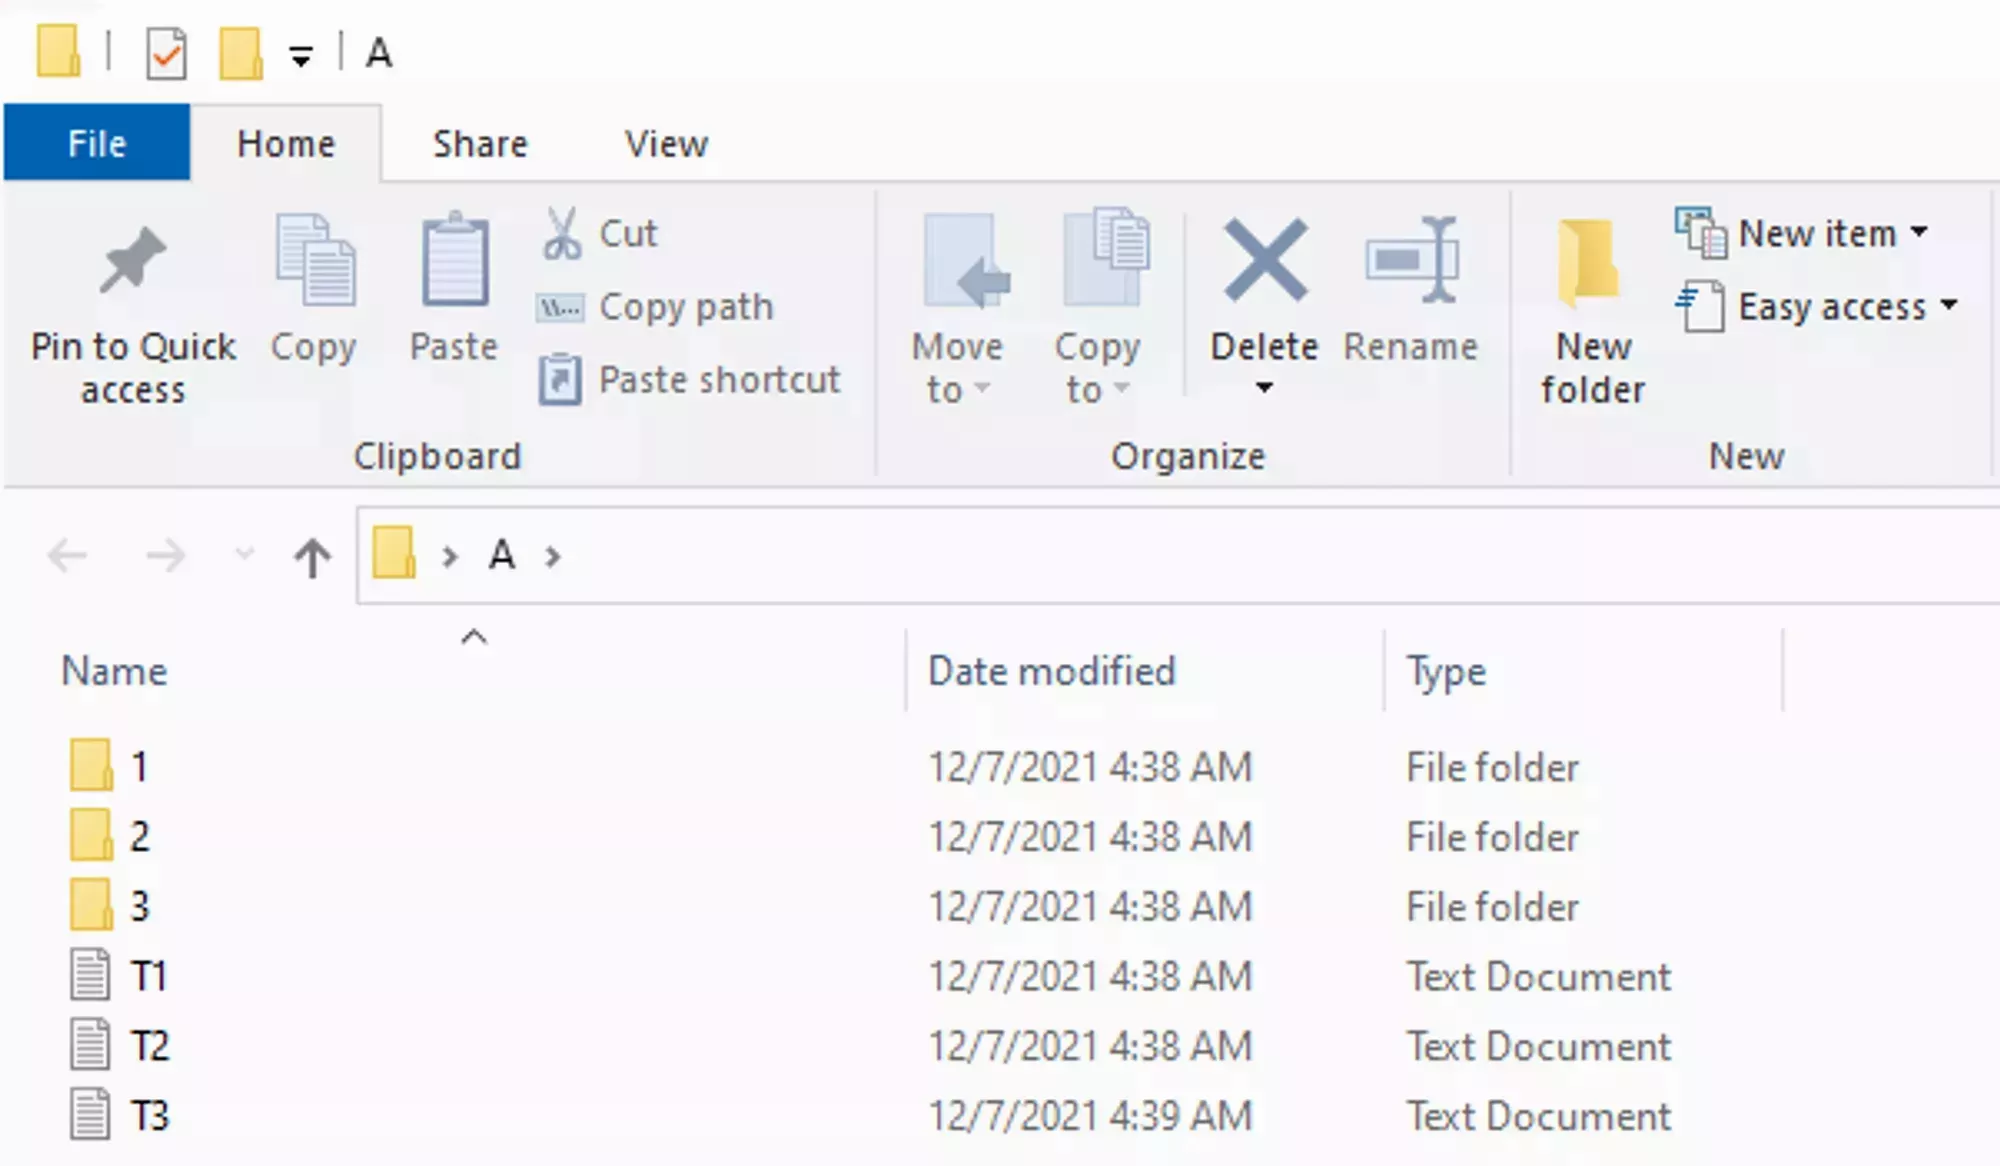
The first thing you'll need to do is navigate to the files/folders you want to compress. In the image to the right you'll see that I've navigated to Folders 1, 2, 3 and files T1, T2, and T3 and that they are all contained in a folder named A.
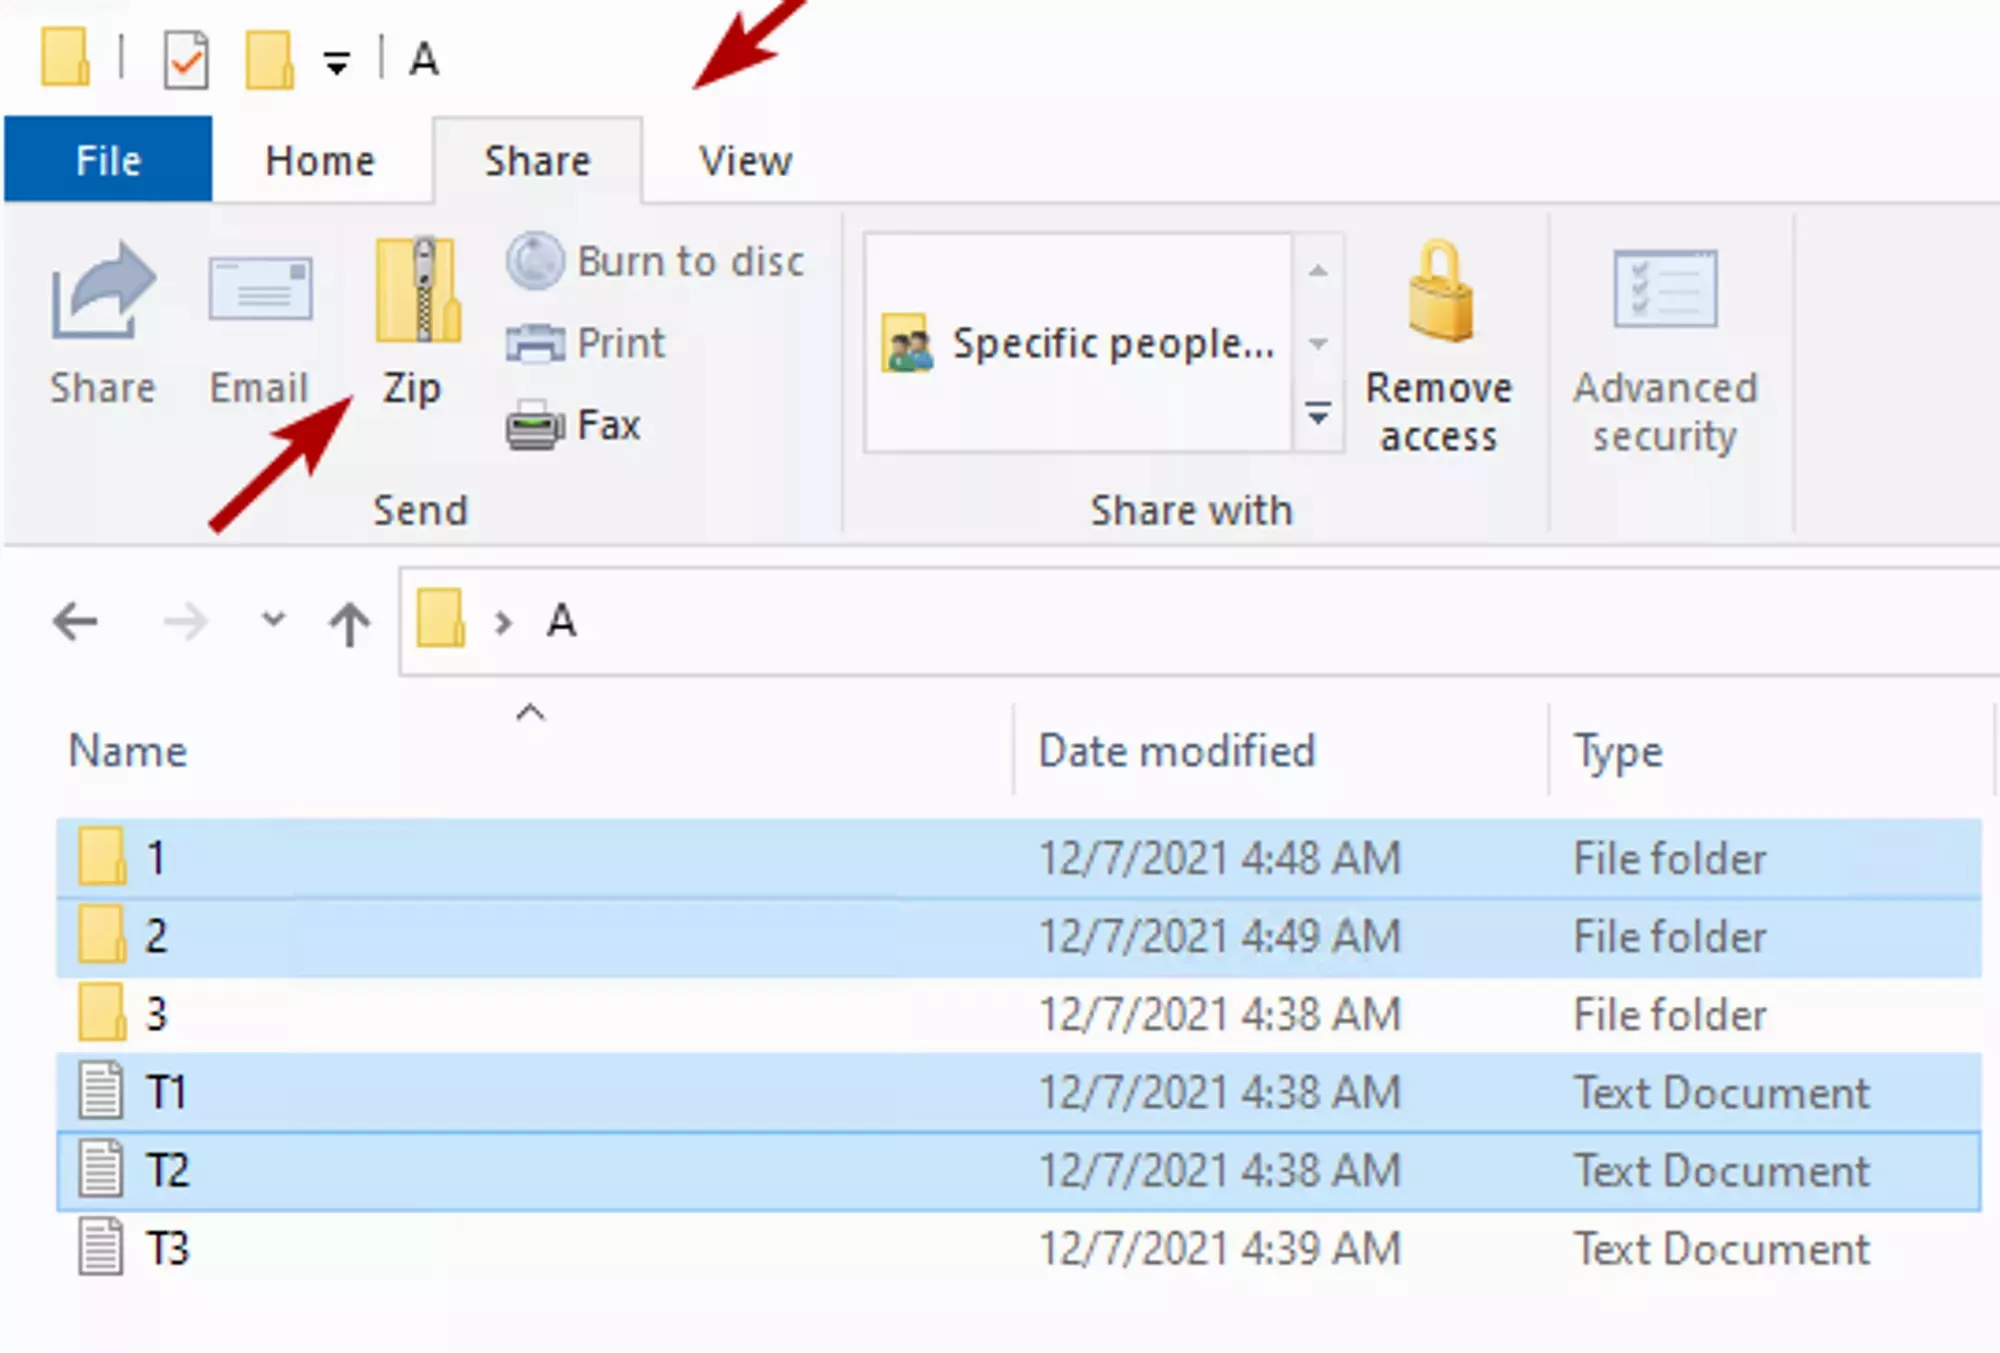
Now you need to select what you want to compress. In the example folder on the left I want to compress folders 1 and 2 with Files T2 and T3, so I can use CTRL+Left Click to select them
Once you have the files/folders selected, navigate to the share tab on the top of the screen and click the Zip button as shown on the image to the right.
 Loading...
Once the Zip process starts you'll be able to name your file and then it'll compress the files/folders you selected. Depending on the total size of what you're compressing it may take some time to finish, but once it's done you're all set to upload the file to your server ![]() Using SFTP!
Using SFTP!
Decompressing with Windows 10
Decompressing with windows 10 is a similarly simple task. We'll use the Archive we created above as an example.
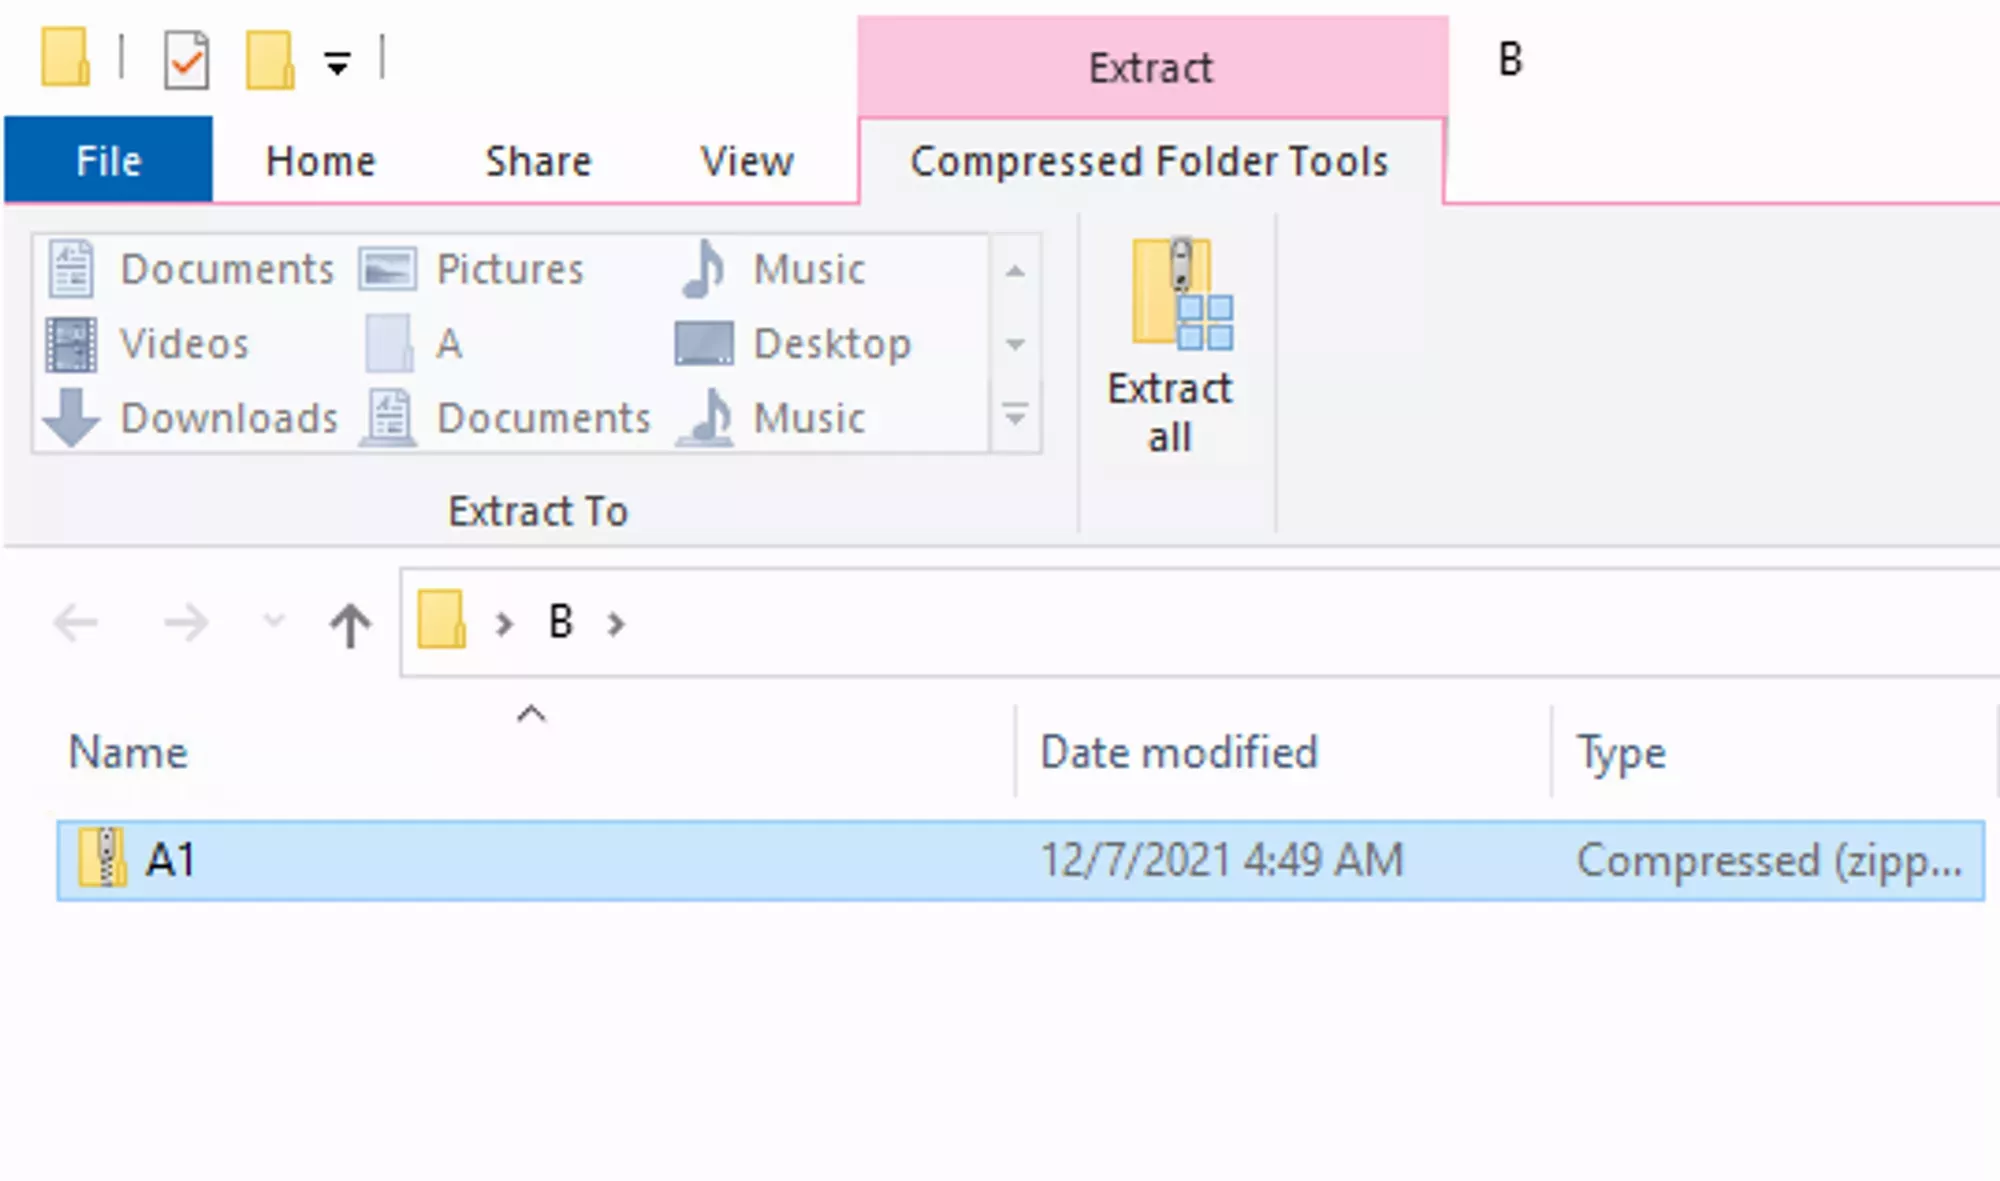
Locate and select the archive you want to decompress and you'll get a new tab on the top of the file explorer window called Compressed Folder Tools. Inside of that tab, you'll see a button labeled Extract.
 Loading...
 Loading...
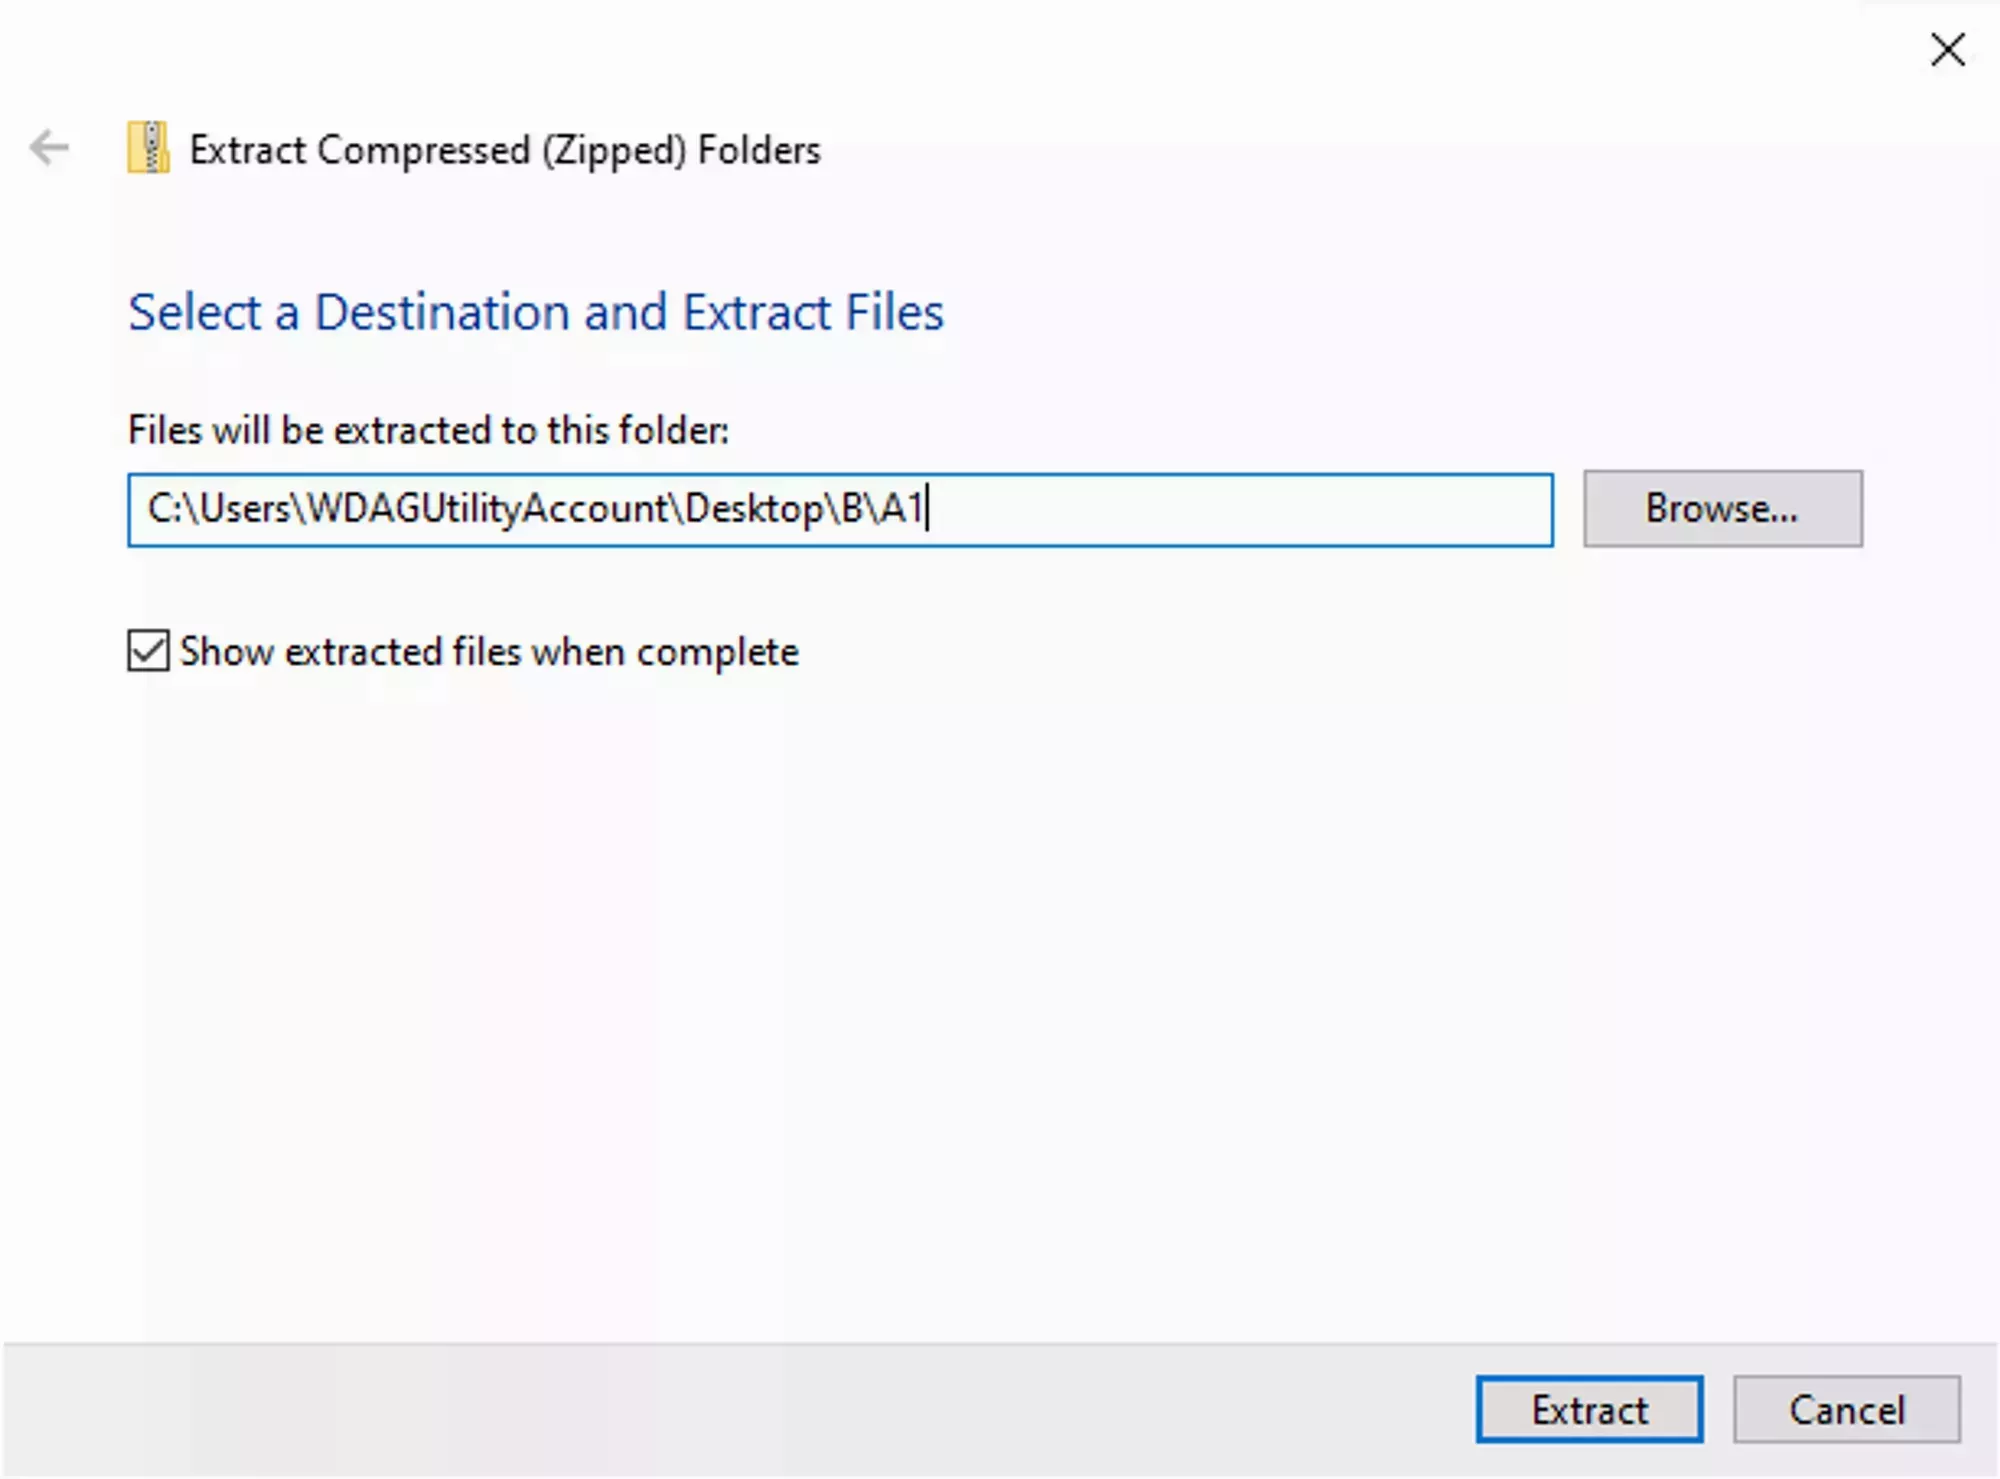
Extracting your archive is as simple as clicking that button and the selecting the location you want to extract the files to.
The default location will be a folder with the name of the archive in the same folder as your Archive. For example, my archive is named A1 and is in folder B, so the path would be \B\A1.
Decompressing on the Game Panel

Now that the compressed file is uploaded to your server you need to use the Game Panels File Manager to decompress it. For information on how to use the File Manager, check out the ![]() File Manager Section on the Game Panel page!
File Manager Section on the Game Panel page!