Import Valheim World to your Valheim Server
You can import your Valheim world, from either another server or your client, by changing the contents of the /.config/unity3d/IronGate/Valheim/worlds_local directory on your server. You may want to import your world to transfer settings that can only be set on the client, or to save your progress from another server, but in either case the process can be simple if you know what steps to take.
Locating the save files
Importing from your Client
Windows Clients, using Steam or Xbox, will store the world files at %AppData%\..\LocalLow\IronGate\Valheim\worlds_local or on the Cloud, where you'll have to ![]() Move it to Local in order to import it to your server. That directory, assuming you're storing the worlds locally as mentioned before, should contain
Move it to Local in order to import it to your server. That directory, assuming you're storing the worlds locally as mentioned before, should contain .fwl and .db files bearing the names of your worlds. It will also contain any backups that were ![]() automatically made by Valheim while you were playing.
automatically made by Valheim while you were playing.
After locating the folder and the world files you want to upload, you can select the .fwl and .db files bearing the name of your world, excluding any that contain the word backup or old, and ![]() compress them for upload. You'll want to upload the compressed file to your server's
compress them for upload. You'll want to upload the compressed file to your server's .config/unity3d/IronGate/Valheim/worlds_local directory and then decompress it using the ![]() File Manager. Finally, you'll need to
File Manager. Finally, you'll need to ![]() configure your server to use the imported world files.
configure your server to use the imported world files.
Downloading a Cloud World
Both Steam and Xbox Clients on Windows have the option to store your saves on the Cloud and you'll need to move your save to local storage in order to import it to your server.
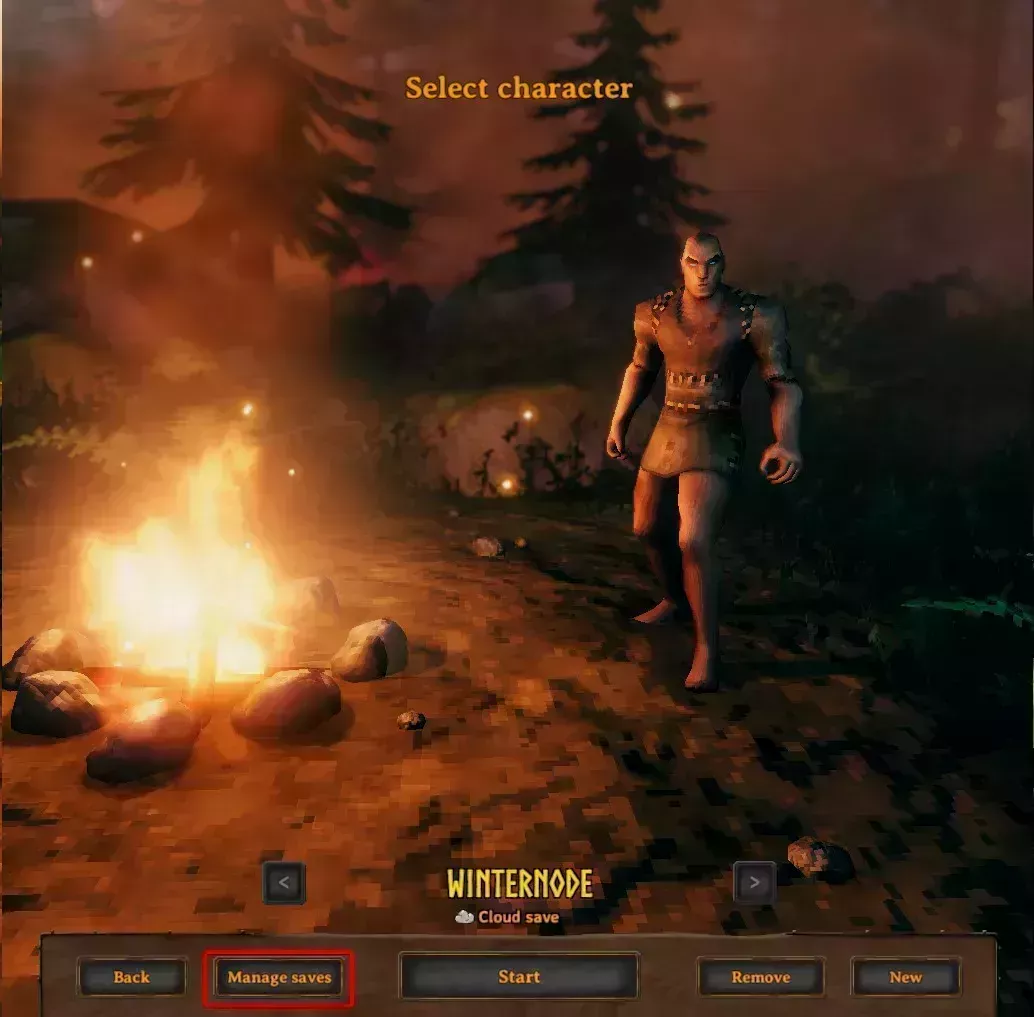
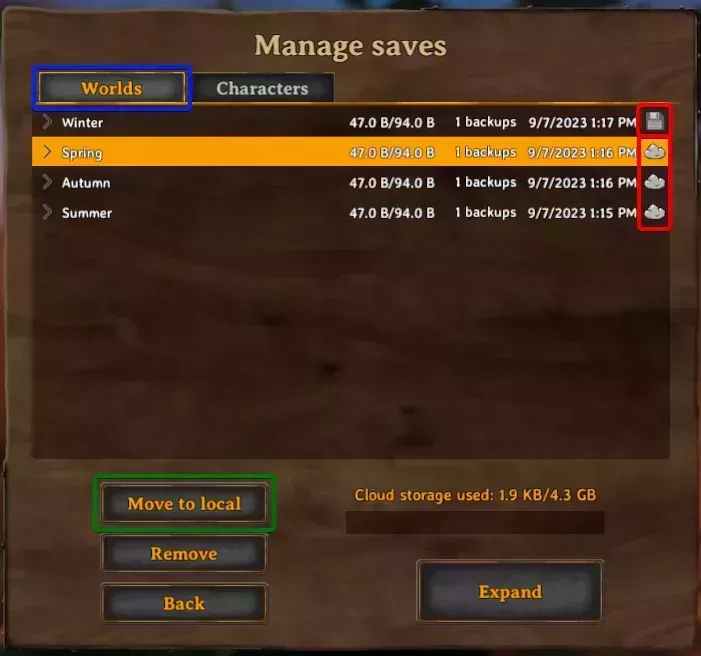
You can view your current saves list by clicking on Manage saves on the Select character screen, as shown to the right. Once there You'll want to navigate to the Worlds tab, as shown below selected in blue.
 Loading...
 Loading...
Cloud saves show a cloud icon on the far right, and local saves will show a floppy disk, or save icon, on the far right. Any local saves can be found in the %AppData%\..\LocalLow\IronGate\Valheim\worlds_local folder, but cloud saves will have to be moved to local storage. You can do this by selecting the save, and then clicking on the Move to local button, which will be a Move to cloud button when looking at a local save.
After confirming that the save you want is located in the %AppData%\..\LocalLow\IronGate\Valheim\worlds_local folder, you can follow the steps outlined in the ![]() Importing from your Client section.
Importing from your Client section.
Importing from another Server
Valheim Linux servers store their worlds in the /.config/unity3d/IronGate/Valheim/worlds_local folder, and Windows servers store worlds in the %AppData%\..\LocalLow\IronGate\Valheim\worlds_local like the client does. Both Windows and Linux use a default world name of Dedicated, but that can be changed with the command line argument -world "<worldName>", so if you're unsure of the world name you can check the host's panel or startup command for that command line argument.
After you've located the world directory your server uses, you'll need to find the save files you want to transfer. Valheim saves are stored in two parts, a .fwl file and a .db file, both using the name of the world. You'll also find all of the backups that have been ![]() automatically generated by Valheim in the same folder, they will contain the words
automatically generated by Valheim in the same folder, they will contain the words backup or old in their file name, and you can leave those behind when importing your world.
With the .fwl and .db files located, you'll want to compress the two files and download them to your computer. You can then upload them to your server ![]() using SFTP to the
using SFTP to the /.config/unity3d/IronGate/Valheim/worlds_local folder and then ![]() decompress them using the Game Panel. Finally, you'll need to
decompress them using the Game Panel. Finally, you'll need to ![]() configure your server to use the imported world files.
configure your server to use the imported world files.
Configuring your Server
You should now see the .fwl and .db files you compressed before, bearing the name you gave the world on your old server or the client. If there are any other .fwl and .db files in the .config/unity3d/IronGate/Valheim/worlds_local for worlds that you don't want to keep, for example the server's default Dedicated world, you can delete those.
With the new world uploaded, you'll need to make sure that the ![]() World Name startup parameter matches the name you gave your world when you created it, this is also the name of the
World Name startup parameter matches the name you gave your world when you created it, this is also the name of the .fwl and .db files. You can change the ![]() World Name startup parameter by navigating to your server's
World Name startup parameter by navigating to your server's Management → Startup Parameters tab or adding the -world "<worldName>" command line argument to your startup command if you're not using our Game Panel.