Find and Join your Valheim Server
This guide details three ways for players to connect to your Valheim server.
It's recommended that you create a new character for online play!
 Loading...
Join within the Client
After making sure to ![]() Name your Server you'll have two options to join your server from within the game. Both options require that you load a character by selecting
Name your Server you'll have two options to join your server from within the game. Both options require that you load a character by selecting Start Game and selecting the character you want to use, as said above it's recommended that you use a separate character for online play. After selecting the character you want to use, close the New World dialog box if it pops up and move to the Join Game tab.
Join by IP
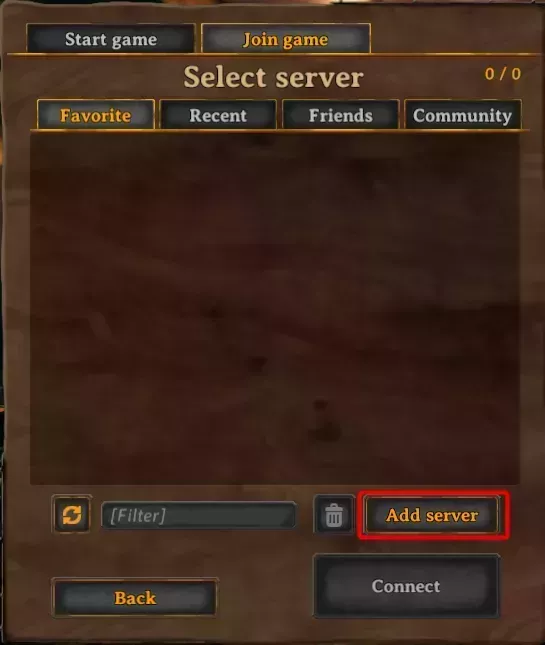
From the Join Game tab of the character select screen, click on Add server in the bottom right. Enter the IP and Port of your server, which you can find ![]() here, into the pop-up box that appears and then click the new
here, into the pop-up box that appears and then click the new Add server button. This will add the server to your Favorites tab and you'll be able to use the Connect button to connect to it after selecting it in the list.
 Loading...
 Loading...
Filter Community Server List
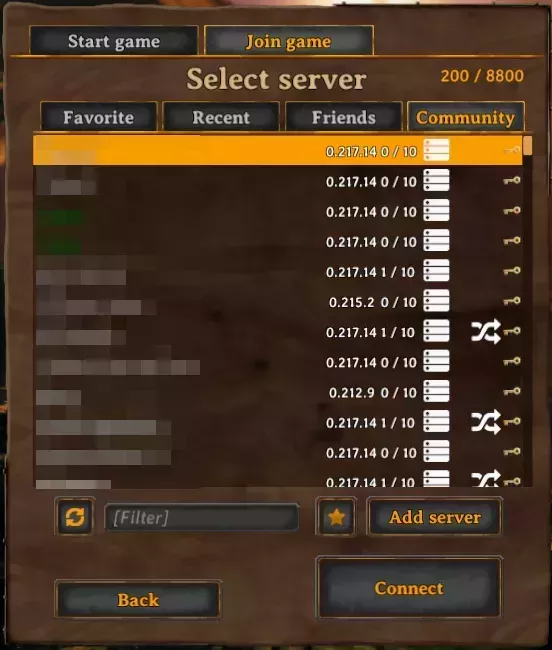
From the Join Game menu, select the Community tab and filter for your server based on your ![]() Server Name. Select your server and click
Server Name. Select your server and click Connect, making sure to also click the star icon to add it to your favorites.
 Loading...
Steam Launch Parameter - Direct Connection
The fastest way to repeatedly connect directly to your server, is by adjusting the ![]() Steam Launch Parameters for the game. Changing this option forces you to join a specific server when you launch the game and select your character.
Steam Launch Parameters for the game. Changing this option forces you to join a specific server when you launch the game and select your character.
The parameter you'll want to use is +connect IP:PORT where IP represents your server's IP and Port represents your server's Port. You can find your server's IP and port in the locations outlined ![]() here.
here.