Game Control Panel
This guide will help you get started with using our panel regardless of what service you're managing. It will also be a good place to come back to if you don't remember how to something specific or just need a refresher on the features available.
How to log in
You can access your server on WinterNode using the ![]() Game Control Panel.
Once you have created your server, you will receive an email to create an account (check your Spam folder, if it’s not in your inbox).
It will generate a username and will use your email from the Client Area account.
Game Control Panel.
Once you have created your server, you will receive an email to create an account (check your Spam folder, if it’s not in your inbox).
It will generate a username and will use your email from the Client Area account.
In the email, you will have a button that will give you a form to set up your password for Game Control Panel account.
In the Game Control Panel sign in page, fill in your credentials and press Sign In.
Alternatively, you can use your Client Area account to login into Game Control Panel by providing Client Area account credentials and pressing Sign In with SSO.
If you're being asked for a 2FA code, this is because your account has 2FA (Two-factor authentication) enabled, this requires a second step where you need to import the 6-digit code given by the Authentication app you set up on your account.
If you lost the app or don't have the code, you can insert the backup 2FA code, otherwise, open a Client Area Ticket to try to resolve your problem.
Getting to know the Game Control Panel
 Loading...
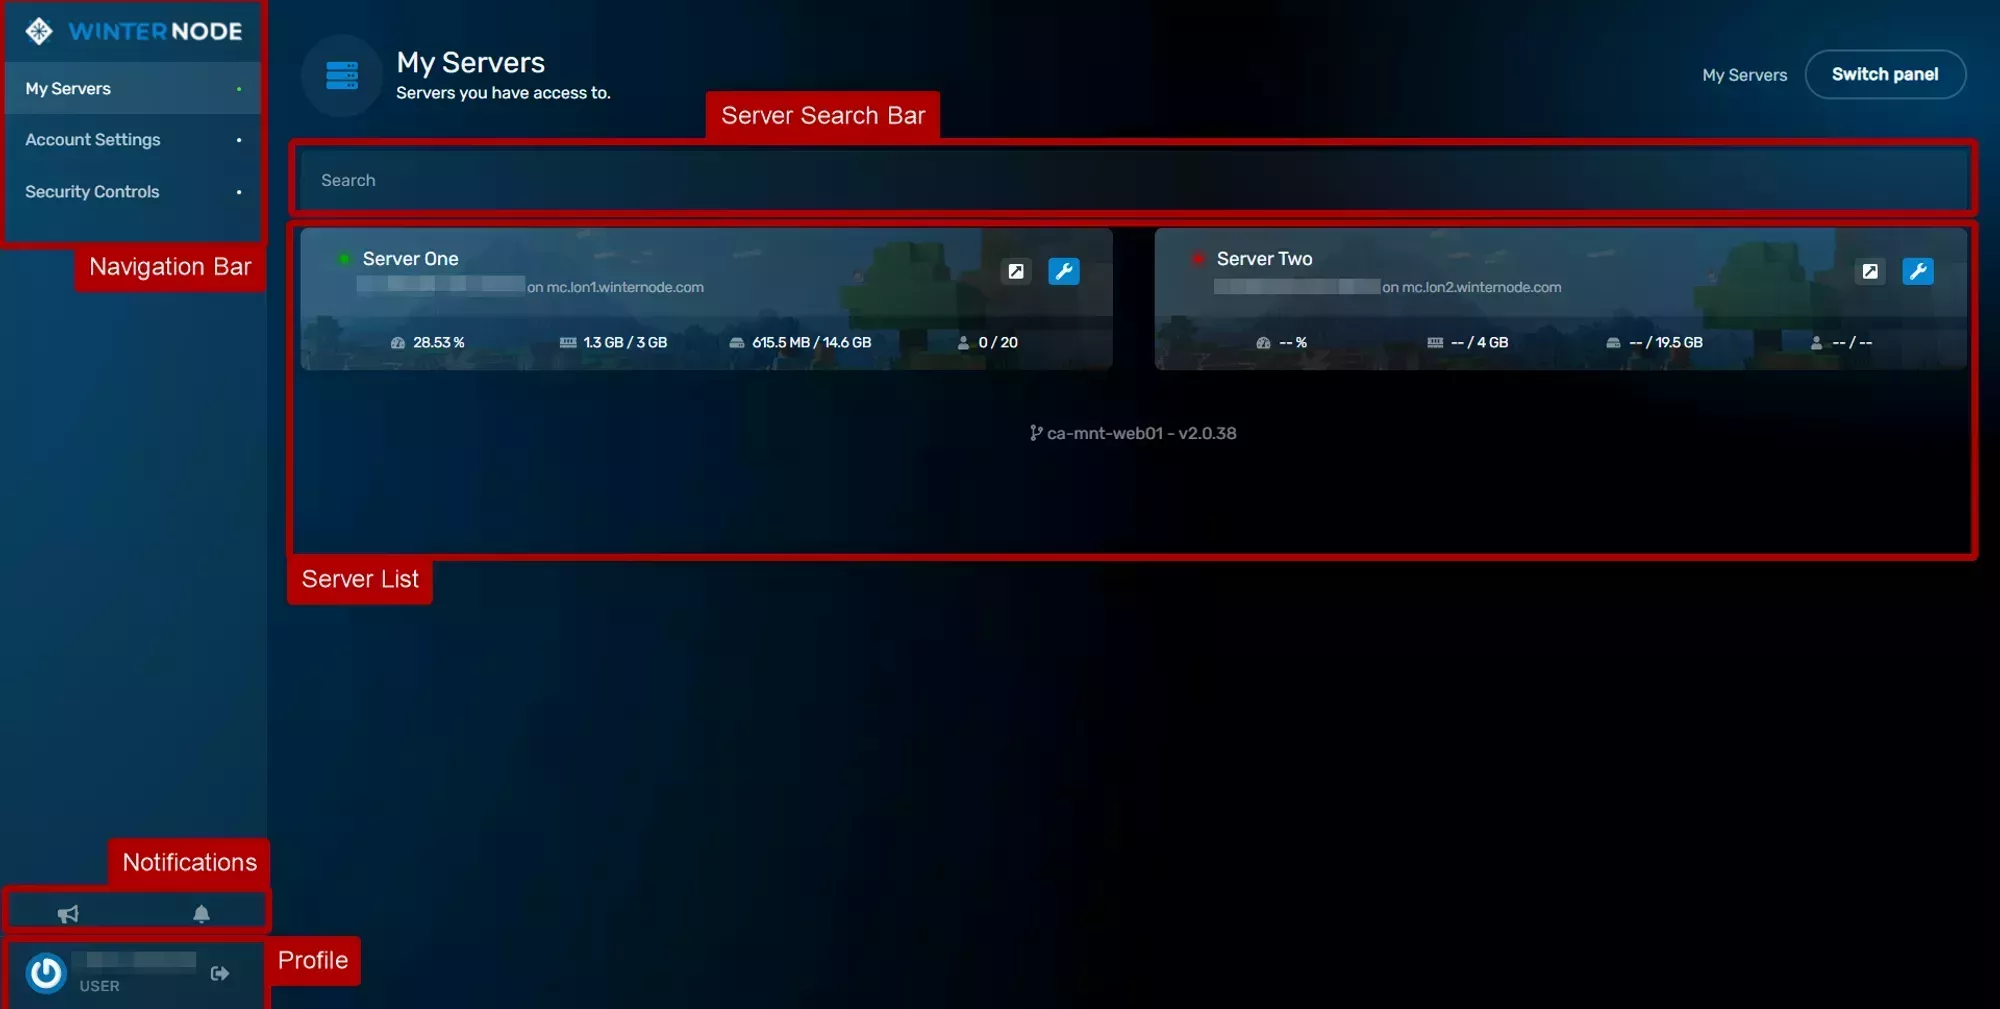
Once you log in, you will be prompted to the server list.
On top is the header. In the right top corner, you have:
Loading...
Once you log in, you will be prompted to the server list.
On top is the header. In the right top corner, you have:
- Announcements - Here you can view announcements from WinterNode.
- Notifications - Here you can view notifications about your servers.
- Logout - This will log you out from Game Control Panel.
- Account - Here you can manage your account details.
On the bar below, there is a navigation bar, allowing you to navigate to different areas of the panel. Some tabs have sub-tabs that show when you click and expand them.
Server List
The server list is located underneath the header and holds the list of servers accessed by your account.
Each server in that list will give you a preview of it:


The Go to Console button, with an arrow pointing to the upper right, will open a new pop-out window with only the server's console, while the Manage button, that looks like a wrench or spanner, will access the server to manage it.
Server Management
When you open a server, it will greet you with the server's console, server actions, and graph underneath.
The actions that are below the console have 4 self-explanatory options:
Start- Starts the serverRestart- Restarts the serverStop- Stops the serverKill- Kills the server, this will end the process, and you will lose unsaved data!
The graph on the bottom shows live CPU and memory usage.
On the navigation bar in the header, there will be new tabs for setting up the server which we will guide through.
File Manager
The file manager is best used for quickly editing text based files or uploading small files. It's also the main location where you'll interact with your files to Compress or Decompress them. To make the most out of your server it's important to understand what the File Manager can do for you, and what it can't. You'll find some walk throughs of the main features of the File Manager below.
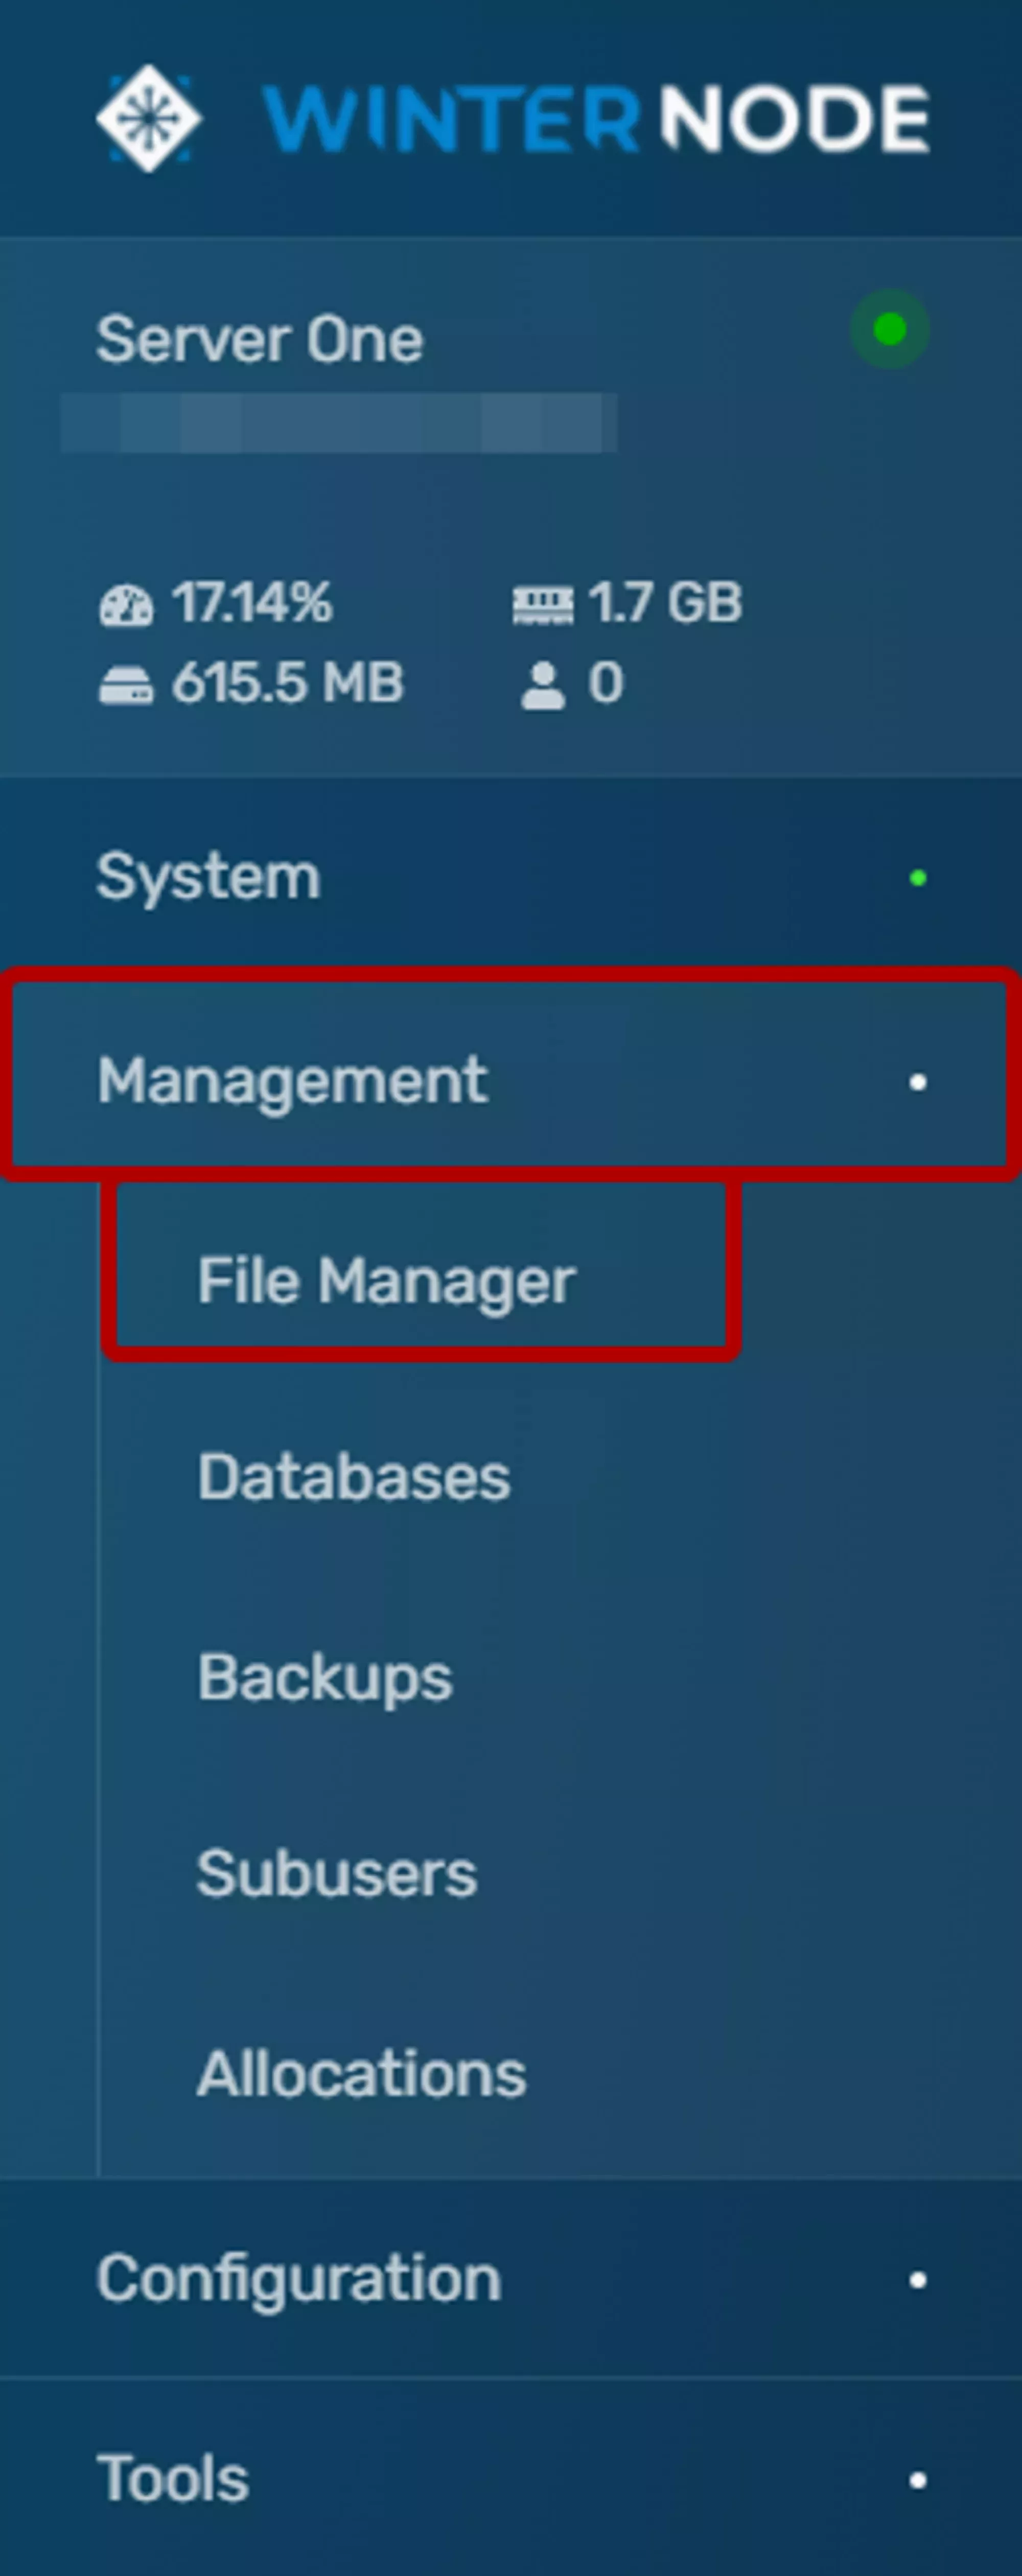
Locating the File Manager
The File Manager can be found under the Management tab as seen in the image to the right. Once there you'll be taken to your server root and should see the all of the files currently located on your server.
 Loading...
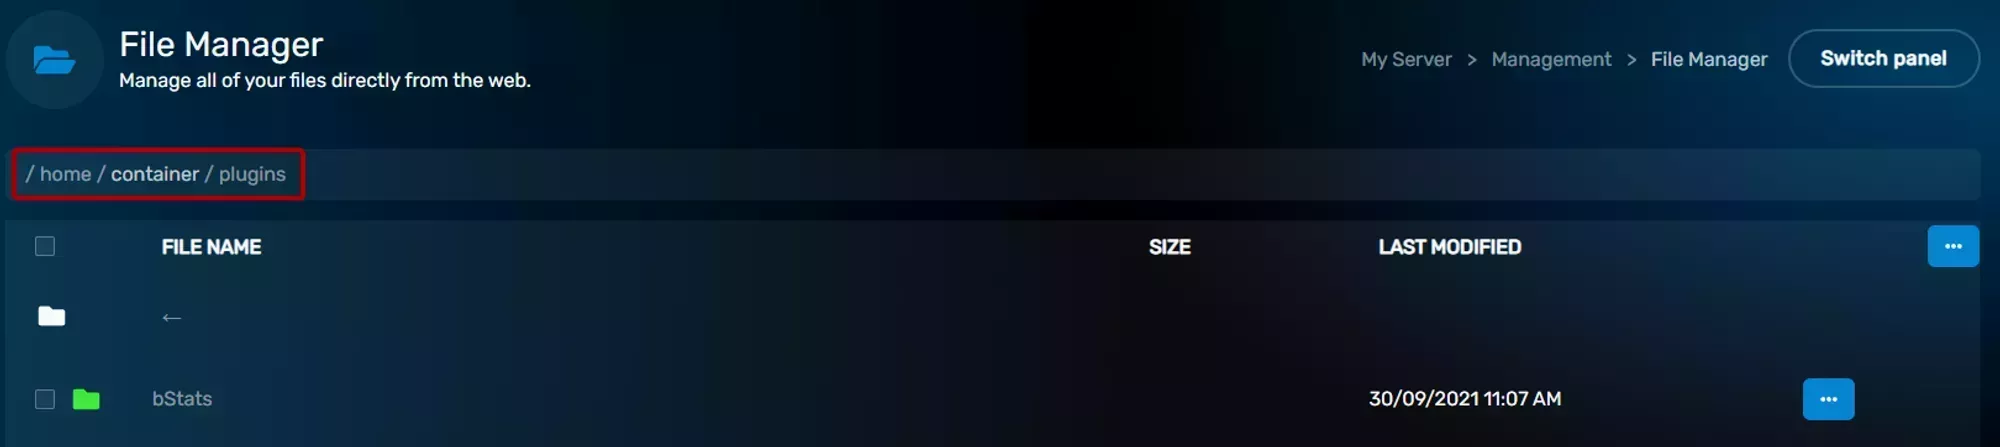
Navigation
The File Manager displays the current file content of your server and allows you to navigate through the directories it contains. You can enter a Directory by clicking on it's name in the File Table located in the center of your screen. When you enter a Directory it will be added to the File Path at the top of the page as seen in the image to the right.
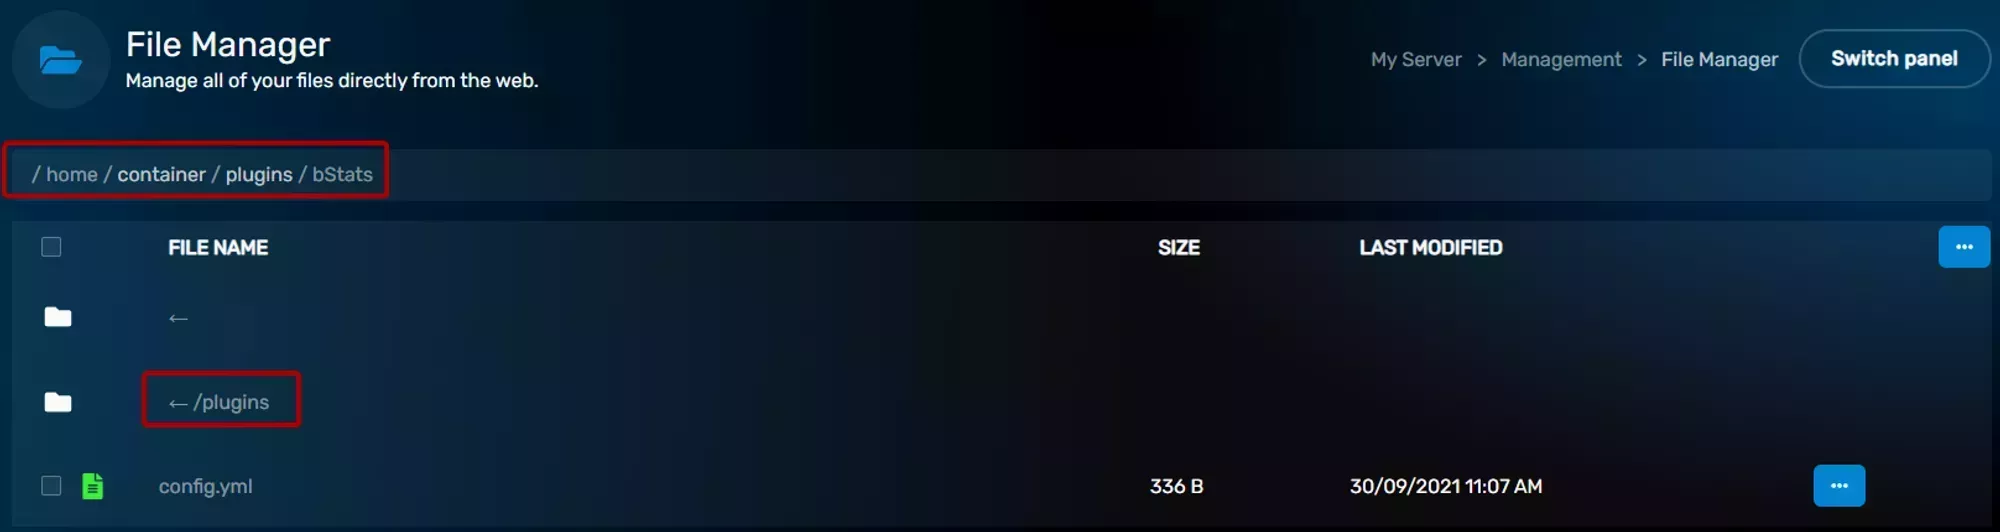
If you need to navigate back to the Directory above your current one, for example in the image to the right, the plugins Directory, you can select the ← <DIRECTORY>/ button at the top of the File Table.
 Loading...
 Loading...
If you need to navigate back to the Server Root at any time then you can select the ← button at the far top of the File Table. Your Server Root will always be /home/container so you can double check your location using the file path at the top of the screen.
Editing a File
If you need to navigate back to the Server Root at any time then you can select the ← button at the far top of the File Table. Your Server Root will always be /home/container so you can double check your location using the file path at the top of the screen.
To edit a file navigate to it in the File Table and the click on it's name. If it's a file that can be edited as text then you'll be sent to a basic text editor. You can easily edit your file from here and use the save button on the bottom right of the window to save your file. Once you're done editing you can use the Return to File Manager button to return to the directory that contained the file.
There are some QoL keyboard shortcuts that might make editing your files a little bit easier. You'll find a list of them below.
Shortcuts
| Shortcut | Action |
|---|---|
| CTRL+SHIFT+D | Duplicates the current line to the line below. |
| CTRL+D | Deletes the current line. |
| CTRL+A | Selects the entire file. |
| CTRL+S | Saves the current contents of the file. |
| CTRL+X | Removes the selected content from the file and places into your paste buffer. |
| CTRL+V | Places the contents of your paste buffer at the text cursor position. |
| CTRL+Z | Undoes the last action. Includes parts of typed text. |
| CTRL+SHIFT+Z | Redoes the last action that was undone. |
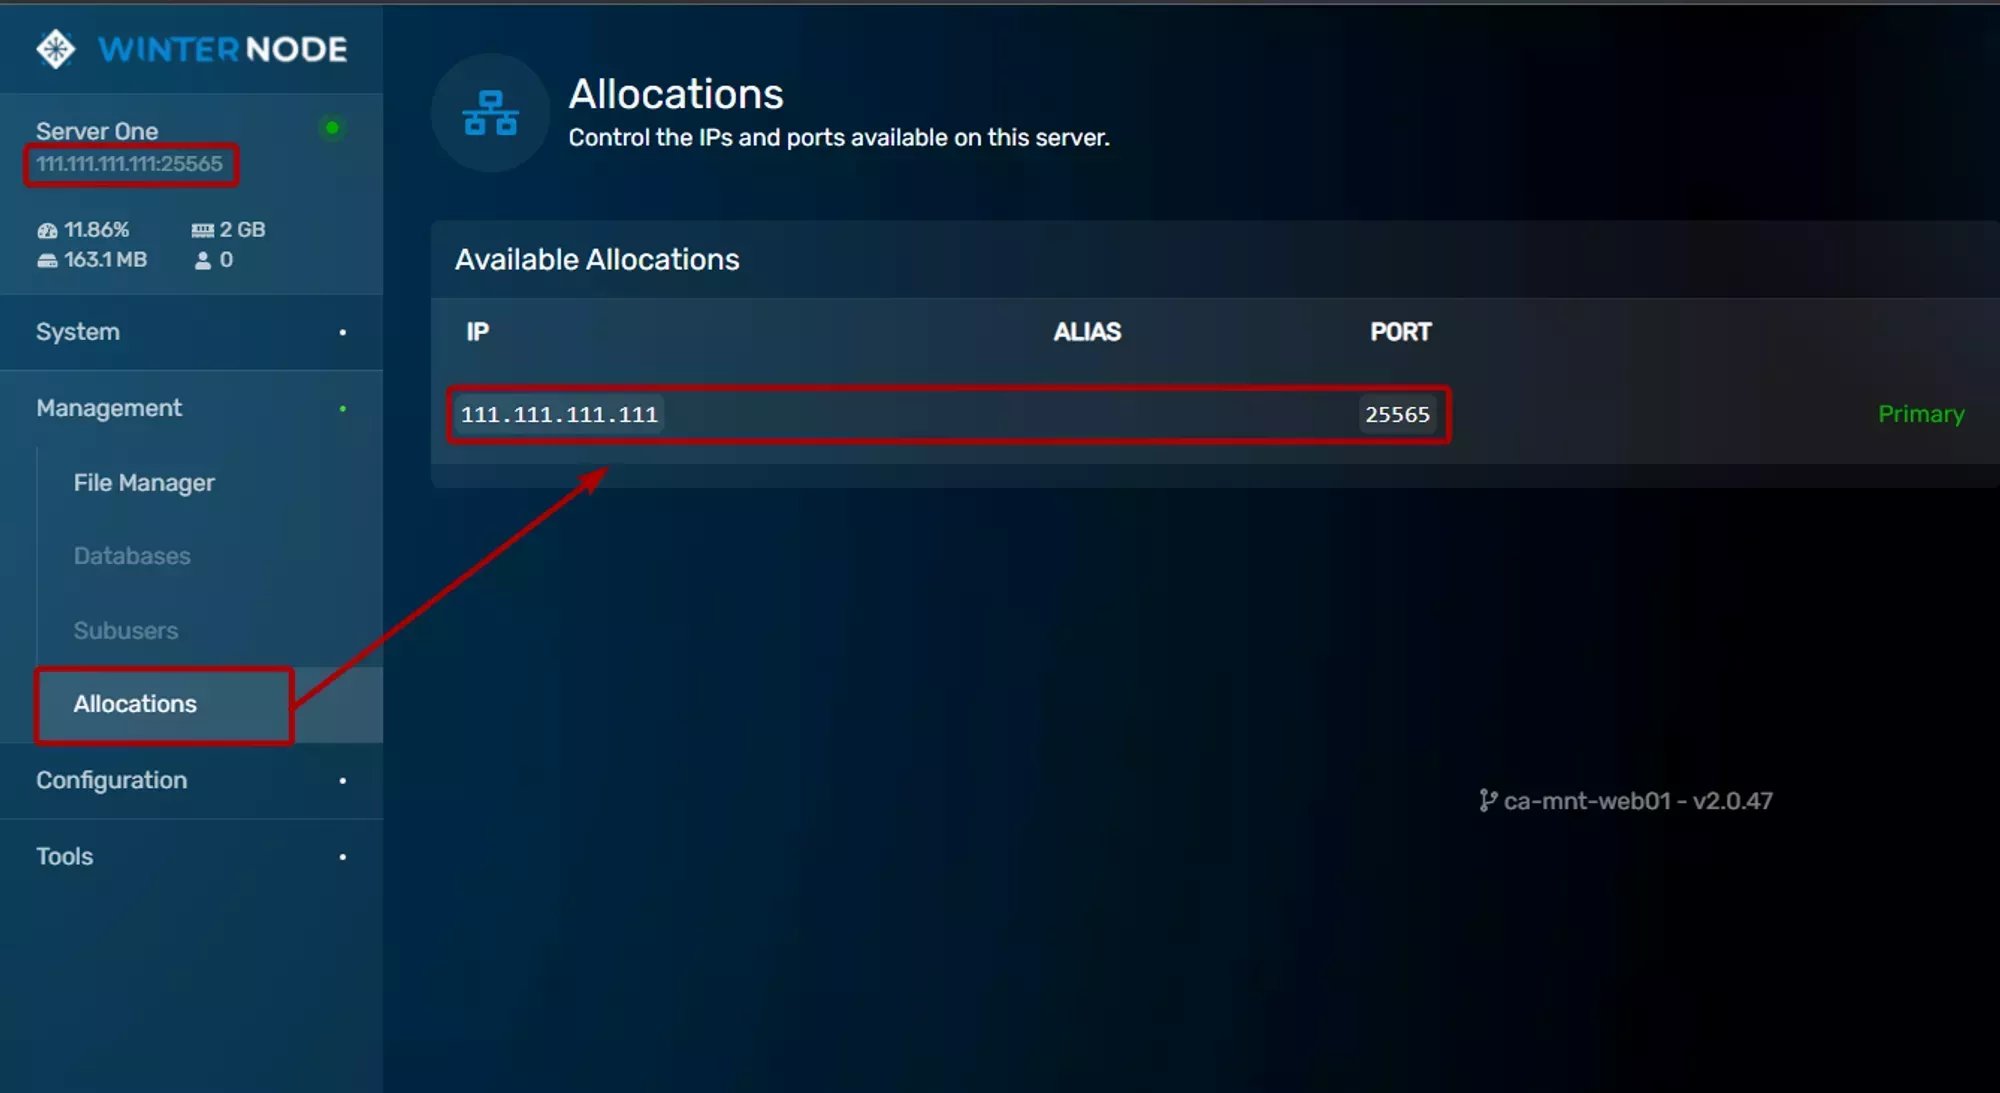
Allocations Tab
You can find all of the IP addresses and ports currently allocated to your server under the Management → Allocations tab when viewing your server. If the list has been recently updated, the ports/IP will become available to your server after a restart.
The allocation marked Primary is generally used for the port that you would connect to as a player of the game and shouldn't be changed under normal circumstances.
Where's the Server IP Address?
Server IP Address can be found in Management → Allocations, or under the server’s name on your server list.
To connect to that IP address, use the IP Address for the IP and Port for the port.
To see other ports available on the server, go to the Management → Allocations tab.
 Loading...
 Loading...
 Loading...
Decompressing a compressed file
After uploading your compressed file to your server ![]() Using SFTP you need to decompress it by following the steps below.
Using SFTP you need to decompress it by following the steps below.
- Locate the file you uploaded on the File Manager
- Click the 3 dots on the right side of your file
- Select Decompress
- Ensure that the files you wanted are now in the correct location!
 Loading...
Compressing Folders and Files
Compressing a folder allows the folder to act as a single file and decreases it's size at the same time, while compressing an individual file will only decrease it size. In both cases, programs such as game servers, plugins, mods, or software won't be able to interact with the files or folders as they normally would, so being able to compress items is primarily useful to you as a user rather than the server.
You can use the web file manager to compress files/folders individually or in bulk.
You may find that the File Manager freezes or disconnects from the Daemon when creating large archives. This is normal and will not cause harm to a running server.
Compressing an individual file or folder
You can compress a single file or a folder containing multiple files by following the steps below.
- Locate the file or folder you want to compress
- Click on the ellipsis menu on the right side of the item
- Click the compress option
 Loading...
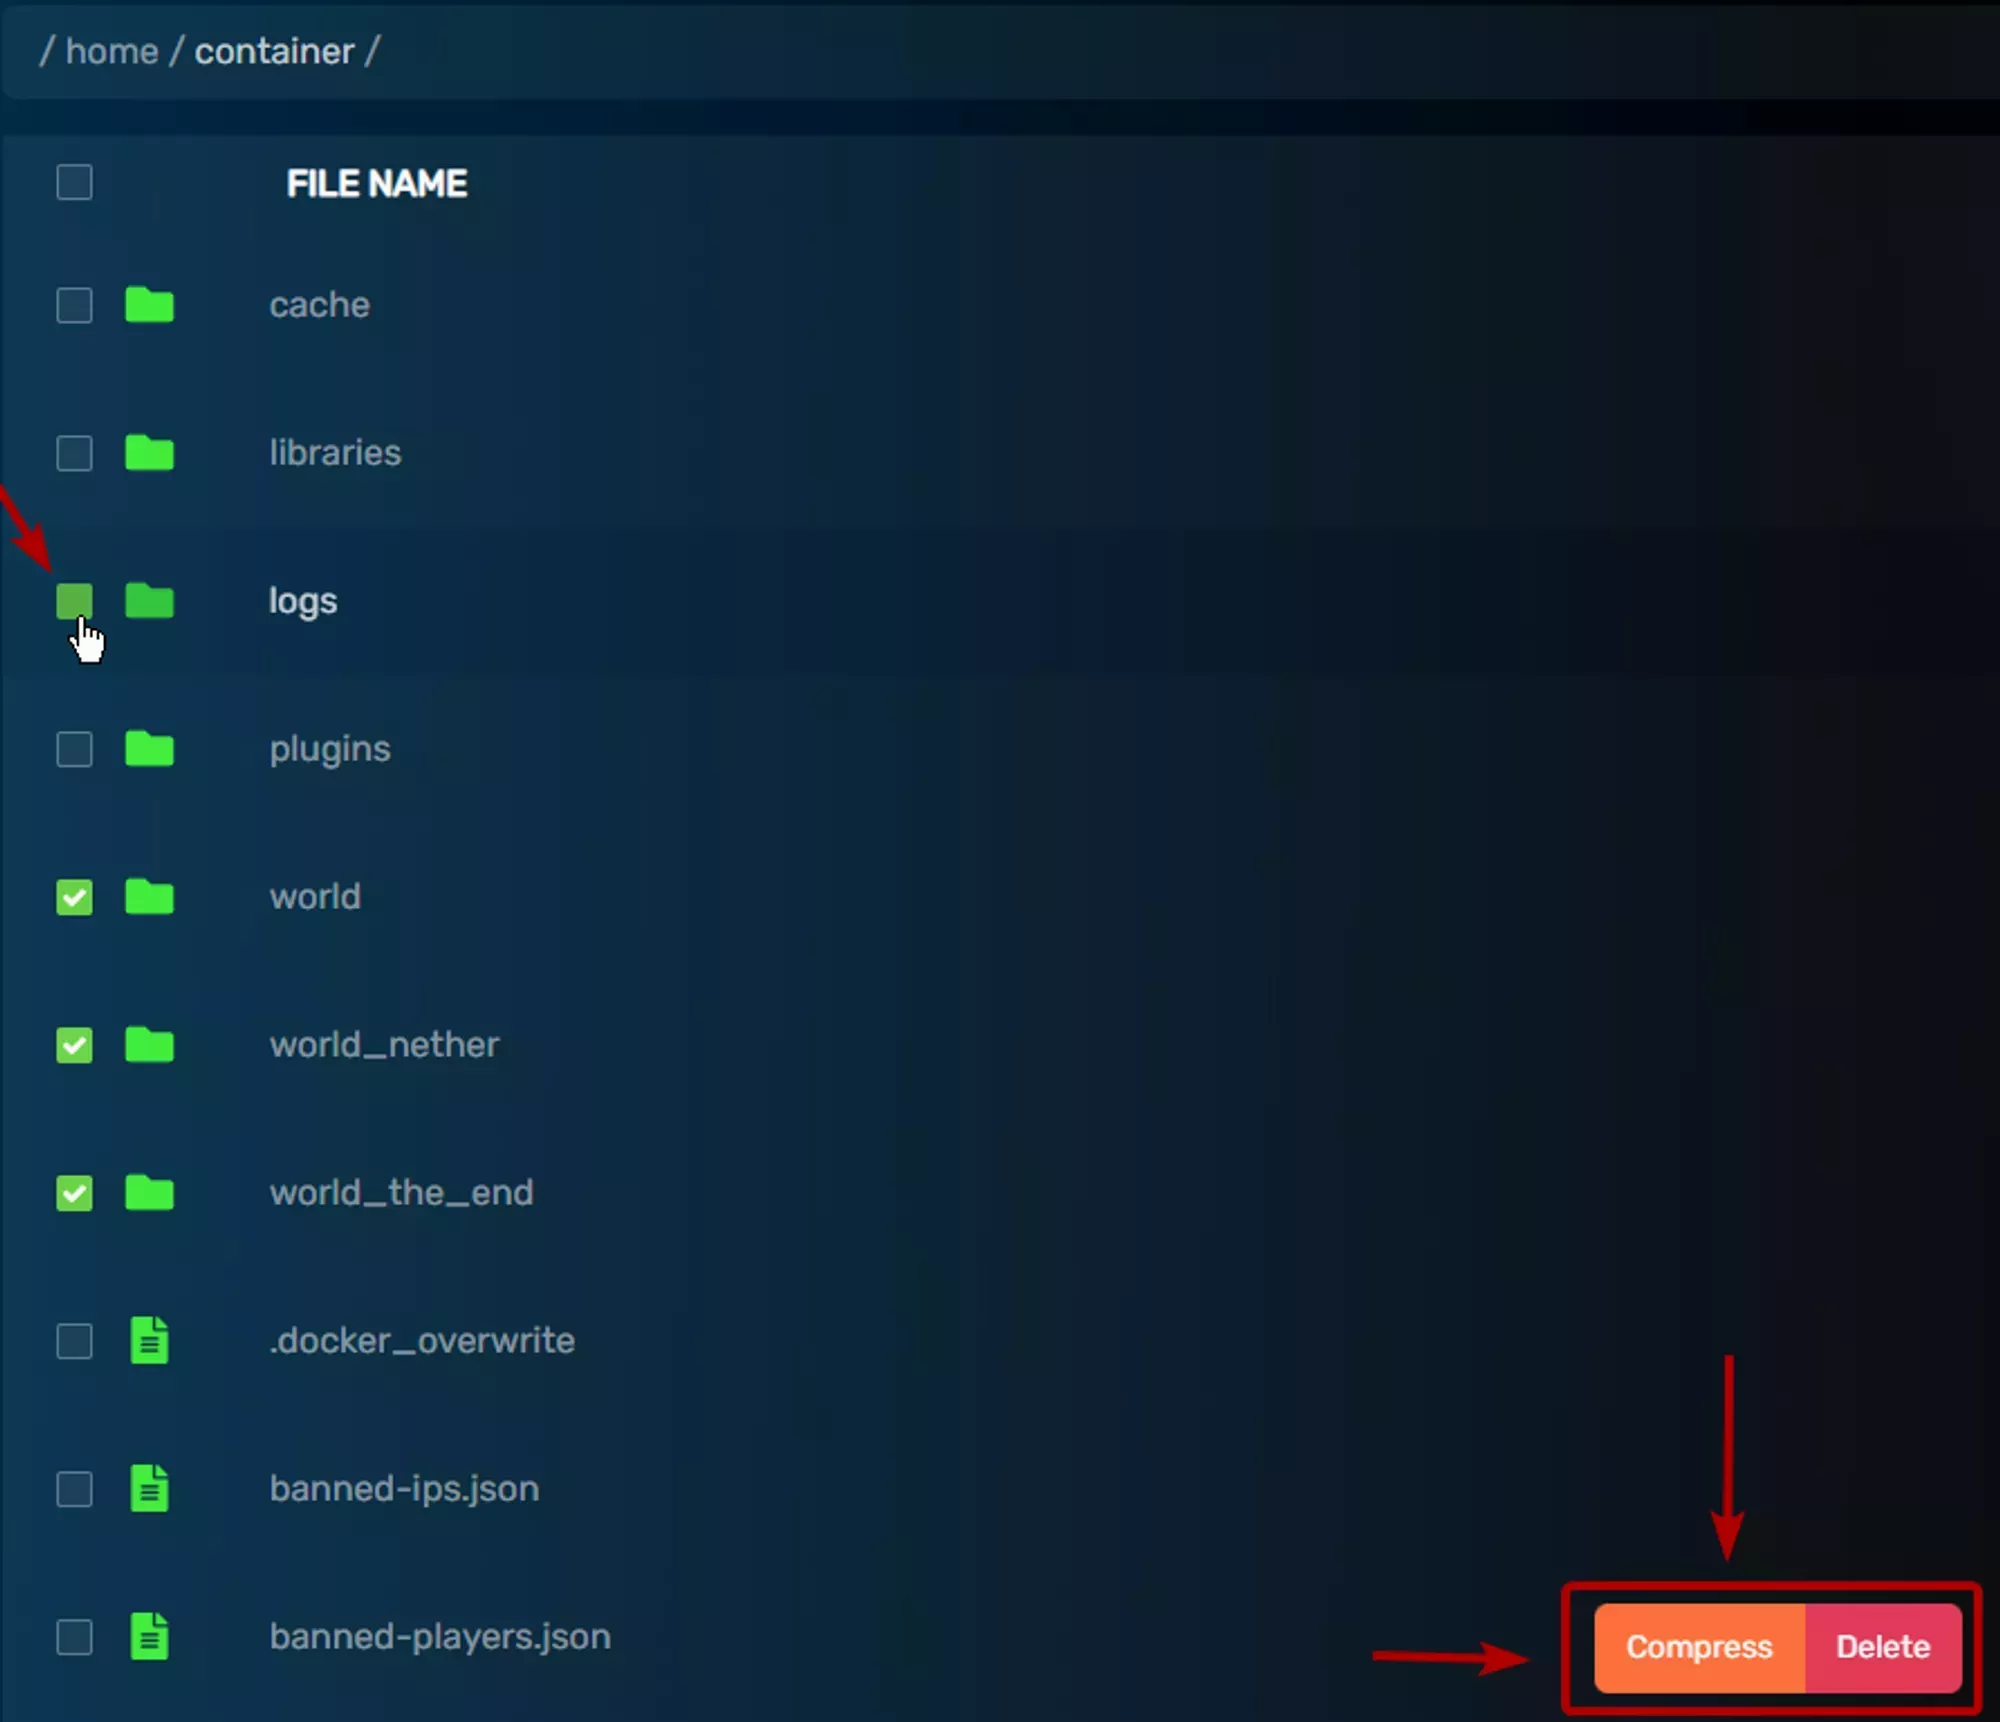
Compressing multiple files or folders
You can compress multiple files/folders into one archive by following the steps below
- Locate the files/folders you want to compress.
- Select each file/folder using the check boxes on the left side of the items.
- Click the Orange
Compressthat appeared at the bottom of the webpage.
 Loading...
After compression finishes you'll find a new file named archive with a suffix for 4 randomly generated characters. For example, archive.15Ji.tar
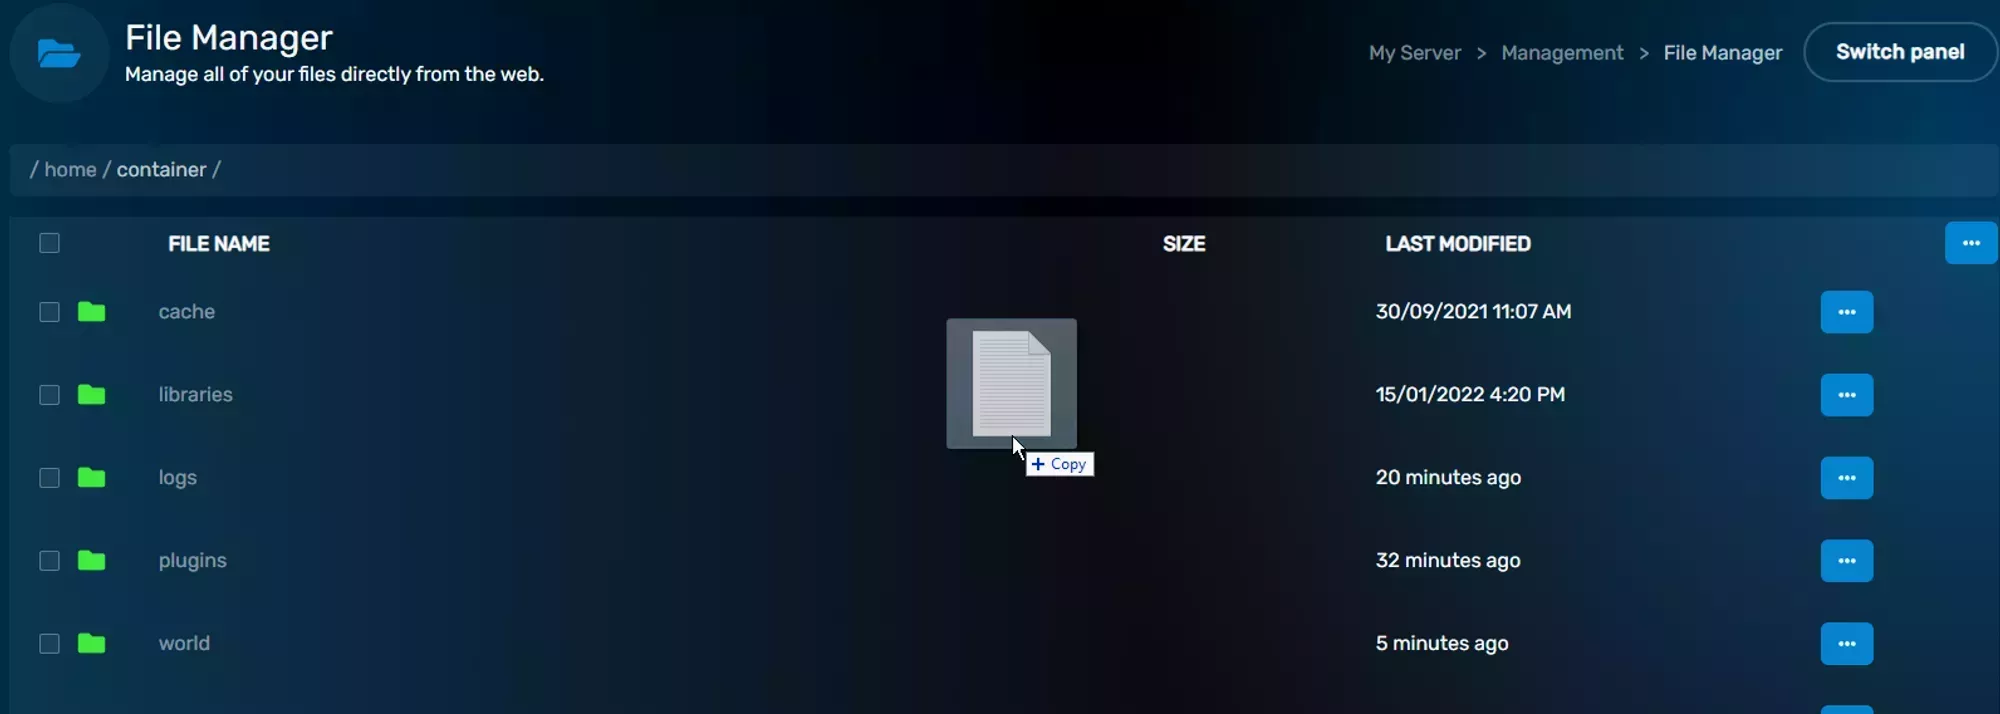
Uploading a file
You can upload files directly from the File Manager by either dragging the file into the File List as you can see in the image to the right. The Web Based File Manager has an upload limit of 100mb, so if you need to upload a file that's larger than 100mb you need to use SFTP. If you're not sure how to use SFTP, then check out our ![]() Using SFTP page.
Using SFTP page.
 Loading...
Related Articles
📄️ Creating a MySQL Database
How to create a MySQL Database using the WinterNode Game Panel.
📄️ Game Panel 2FA
What is 2FA and how can you enable it for your WinterNode Game Panel Account?
📄️ Game Panel Sub-Users
What is a Sub-User and what can it do for your interactions with the WinterNode Game Panel?
📄️ Getting an API Key
Getting and using an API Token with the WinterNode Game Panel.
📄️ Manual Backup
How to take a manual backup of any Game Server with the WinterNode Game Panel.
📄️ Renaming your Server
How to rename your server within the WinterNode Game Panel.
📄️ Startup Parameters
How the WinterNode GCP Startup Parameters work!
📄️ Using SFTP
How to use SFTP with the WinterNode Game Panel.
📄️ Using the File Manager
How to use the WinterNode GamePanel's File Manager.
📄️ Using the Schedule Manager
How to use the WinterNode Game Panel's Schedule Manager.
📄️ Using the Sub-Domain Manager
What is a sub-domain and how to get one for your GameServer using the WinterNode Game Panel.