BungeeGuard
Bungee Guard is a plugin that secures your Waterfall or Bungeecord networks from backend accses. This is an essential plugin to use if you're running a Minecraft network.
Why should you secure a network?
The Danger
Networking your server using Bungee or it's subsequent forks can be a great way to diversify your server and reduce the impact of the features your server offers. But there's a major danger that comes with running your server behind a proxy. If you don't protect yourself from this then your server can be easily attacked by just about anyone with almost no effort.
Your backend servers (the servers that have are connected to the proxy) all have to be running in offline mode and rely on the proxy to authenticate users when they log in. That means that anyone can log into them with any Minecraft Account that they want, and subsequently get any permissions that any other user has.
A Solution
While you can do some things to hide the IP of your backend servers to help prevent this, none of the methods to do so are foolproof and come with numerous downsides and simply act as a deterrent to those without the knowledge to bypass them. The best way to prevent anyone from bypassing the proxies authentication check is to add a second authentication method that is shared specifically between the proxy and the backend server.
Proxies like Velocity already have a built in method of doing so, but if you're using Bungee, you have to use a plugin that does this like BungeeGuard. Now that you know why you need it, we'll go over how to install BungeeGuard here.
How to Install
BungeeGuard can be downloaded from, Spigot, GitHub, or their Jenkins Build server. You'll want to get the latest version. While it rarely updates, the updates that are provided patch security issues and should be used as soon as possible. After you've downloaded the Jar file, you'll want to stop your proxy and all of your backend servers then upload the same jar file to all of their plugins folders.
Starting the Proxy
Start your proxy server and open the token.yml file in plugins/BungeeGuard. Your proxy will have generated a unique token that you'll need to place in the config file of each of your backend servers.
As an example I'll use this as my fake token. This is what you should find in your proxy after it starts with BungeeGuard for the first time.
token: Si3ExfjFaArGgCFY0iJB2lLnLnlyDKEk621nEzQRniM5gGwV5Rrdzvpk6CqguhfQ
Make sure you keep your token a secret! A knowledgeable player can use the token to log directly into the backend server!
Do the same process, but you'll end up with multiple tokens. we'll walk through how to handle more than one token in the next step.
Starting the Backend Servers
Start your backend servers one by one and place your token into the allowed-tokens list in the plugins/BungeeGuard/config.yml file. After saving the configuration file, run the command /bungeeguard reload and your server should now be secured!
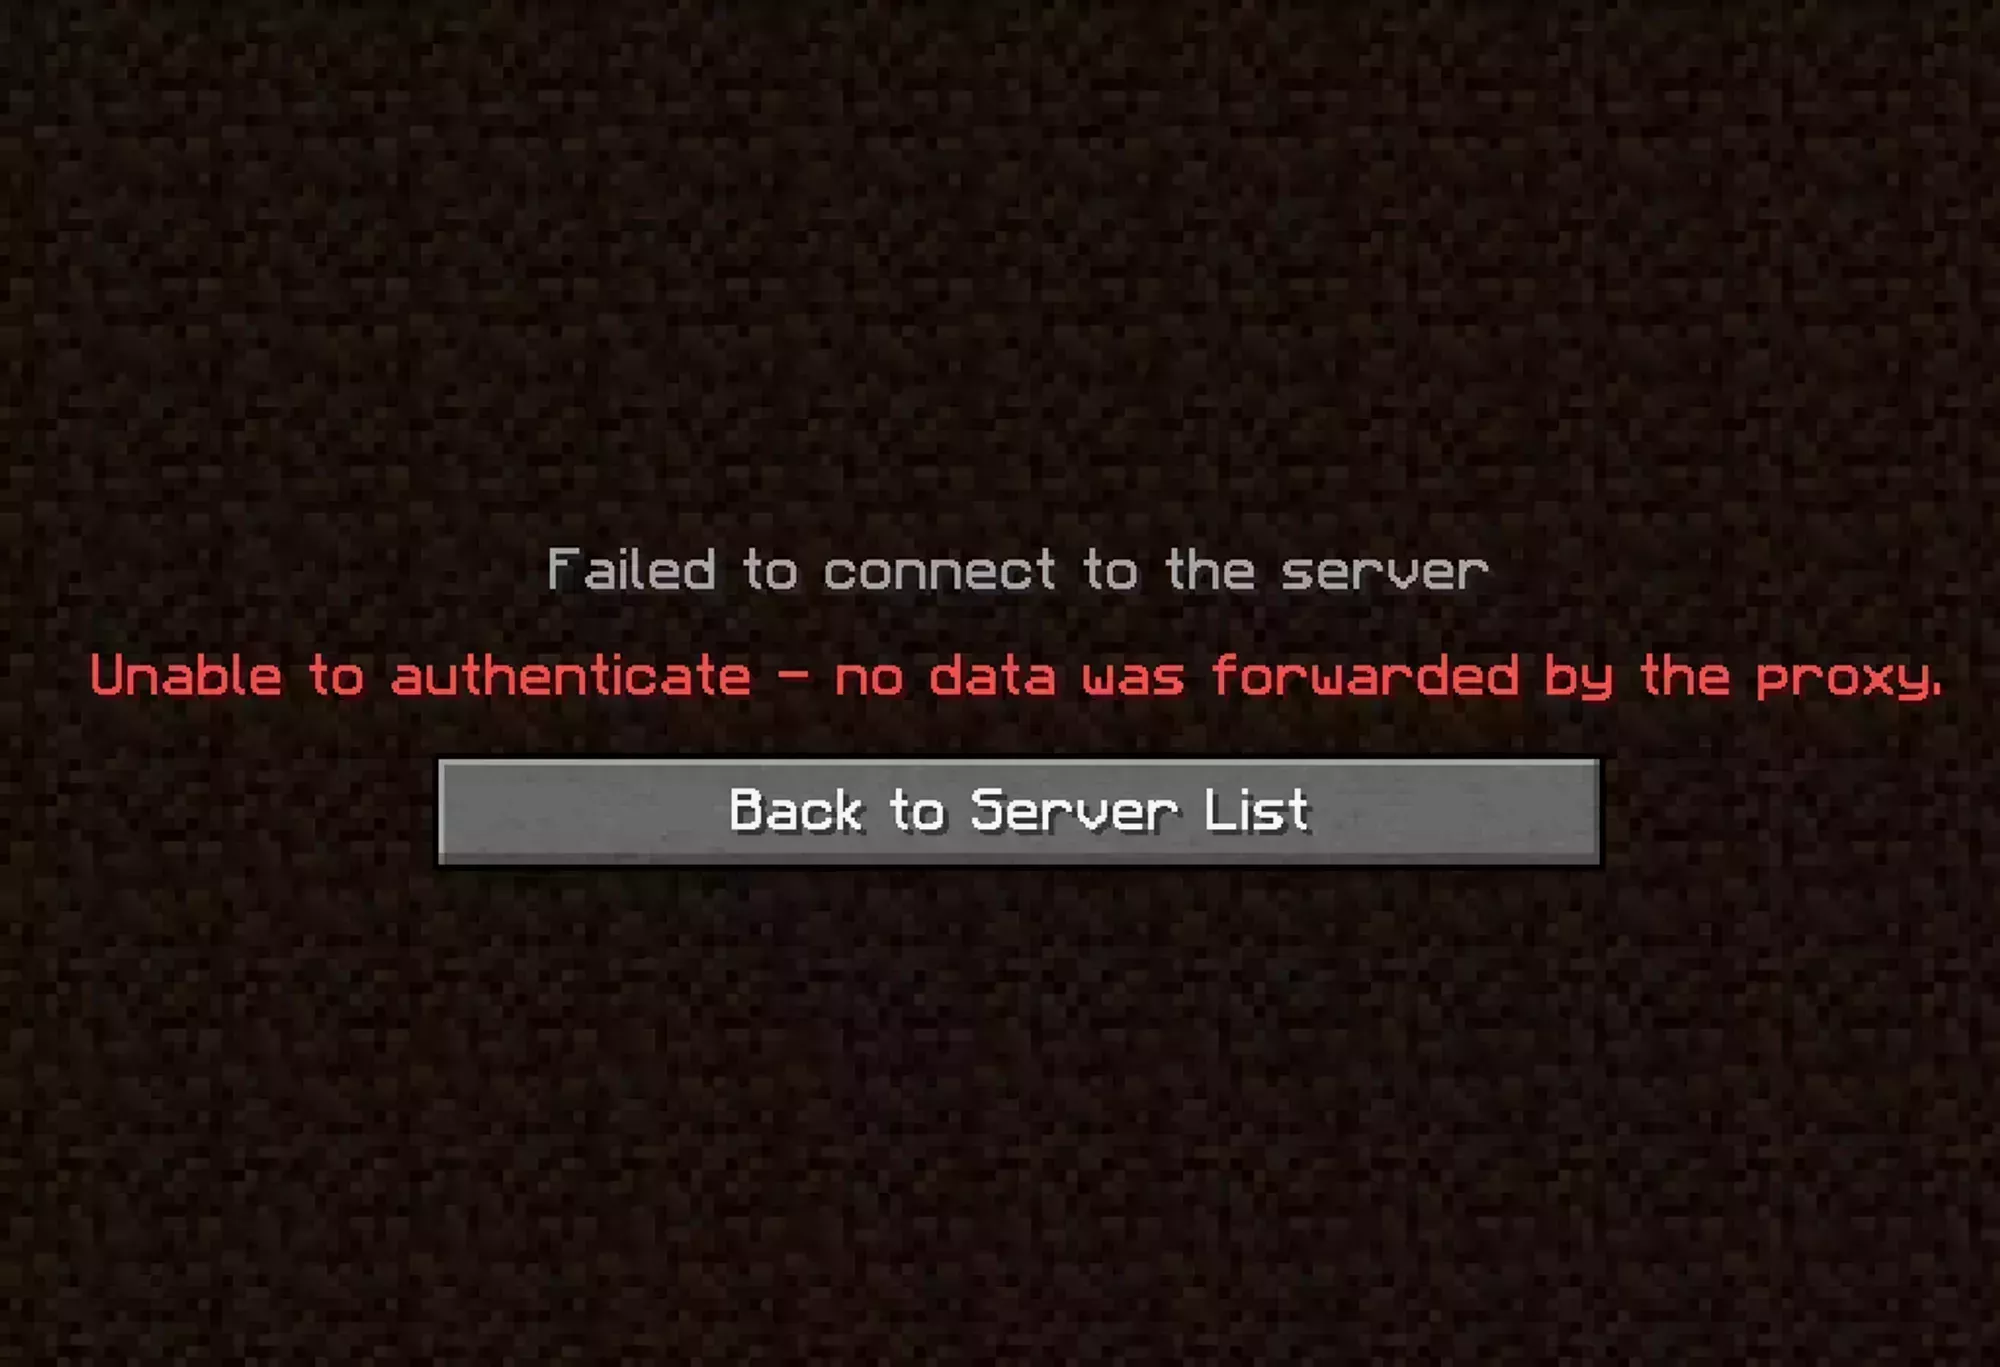
You can test this by trying to connect to the IP of your backend server and making sure you get disconnected. By default you should see the message shown to the right.
 Loading...
If you have multiple Proxies
You can add the token from each proxy by using the format below
# Allowed authentication tokens.
allowed-tokens:
  - "token-1"
  - "token-2"